DocMinder® Reporting allows you to easily analyze your business data and create insightful reports for informed decision-making.
Its powerful filtering tools allow you to generate user-defined reports, ensuring that no task, be it pending or completed, can be overlooked. You can also export the report into an Excel or CSV file.
To access; click on Reports from the Top Navigation bar.
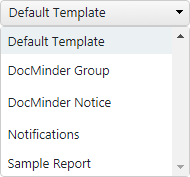
The View Name dropdown allows you to select different reporting templates to view within the data-table.
After making changes to a report you can save to an existing report or create a new report.
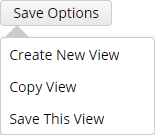
Save Options allows you to perform the following actions:
| Option | Description |
|---|---|
| Create New View | Select to create a new report view. |
| Copy View | Select to copy this report view. |
| Save This View | Select to save this report view. |
Easily edit report names, clear filters, share reports, unshare/remove, export a report to Excel or PDF, and delete report.
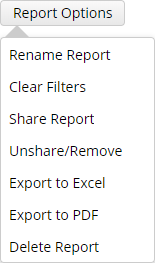
Report Options allows you to perform the following actions:
| Option | Description |
|---|---|
| Rename Report | Click to rename your report. |
| Clear Filters | Removes all filters. |
| Share Report | Share with others. |
| Unshare/Remove | Unshare the report. |
| Export to Excel | Export to MS-Excel. |
| Export to PDF | Export to PDF. |
| Delete Report | Removes the report from your Reports View. |
Quickly view any changes made to your report, see your report in a calendar view, etc.
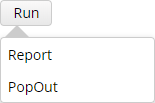
Run allows you to perform the following actions:
| Option | Description |
|---|---|
| Report | View changes made to your report. |
| PopOut | View report in a new browser tab. |
The data table displays by default, the following columns:

| Column | Description |
|---|---|
| ... | Display the type of task (e.g., Basic, Checklist, Workflow or Survey) by Icon |
| #### | The ID of the DocMinder (e.g., 1234) |
| To: | The name of the assigned Recipient(s) |
| Due Date: | The date the task is to be completed on and/or by |
| Subject: | Contains the subject-name of the task |
| Message/Body | Inststructions and/or bdetails about the DocMinder® |
| Completed By | The person's name who completed the DocMinder® |
| Completed Date | The date when the DocMinder®was completed |
Click on a column header to sort (e.g., Ascending A-Z ; Descending Z-A ).
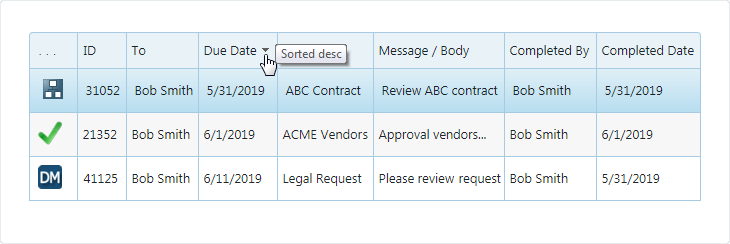
Click in-between two columns and drag (e.g., drag when you see )

The Edit Users Panel allows you to easily Add, Remove and Edit the current Owner, Recipient(s) and Escalation(s) of a single DocMinder® item within Reports.
To access the Edit Users Panel, click on the Edit Users tab on the Right.
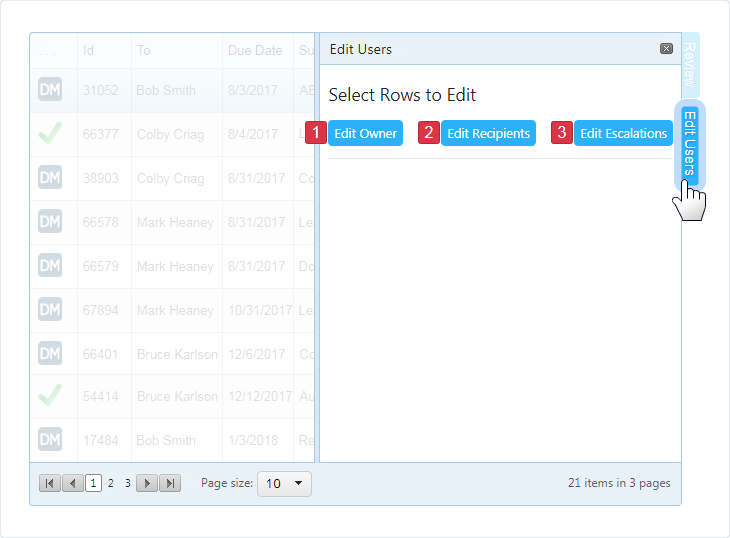
| 1 | Edit Owner: Reassign the Owner of the task. |
|---|---|
| 2 | Edit Recipients: Add/Remove/Swap Recipients (e.g., Assigned To, Cc). |
| 3 | Edit Escalations: Modify/Add Escalations (e.g., Escalated To). |
When you create a New DocMinder®, you are automatically assigned as the Owner; however, you can assign another Owner if necessary.
To change the Owner from the Users Panel, click the Edit Owner button.

Select the Current Owner from the dropdown on the left
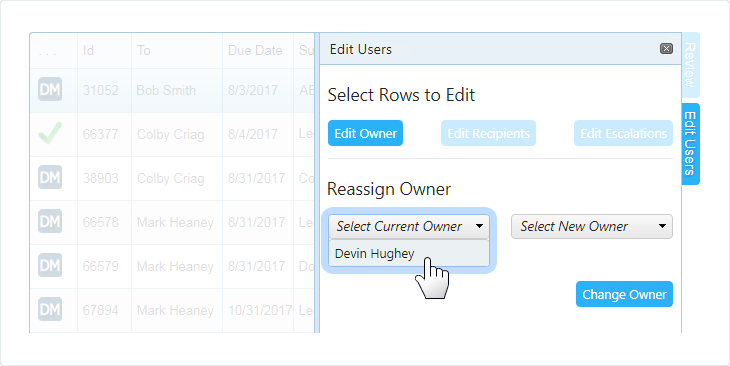
Select the New Owner from the dropdown on the right and click Change Owner.
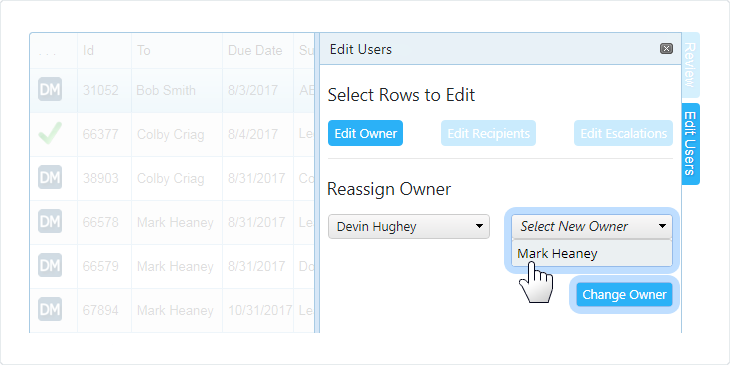
Each task can only have one Owner; but it can have multiple Recipient(s) assigned.
To Add, Remove or Swap Recipients click Edit Recipients.

Select To (e.g., recipient on the To line.) or Cc (e.g., recipient on the Cc line.) radio option.
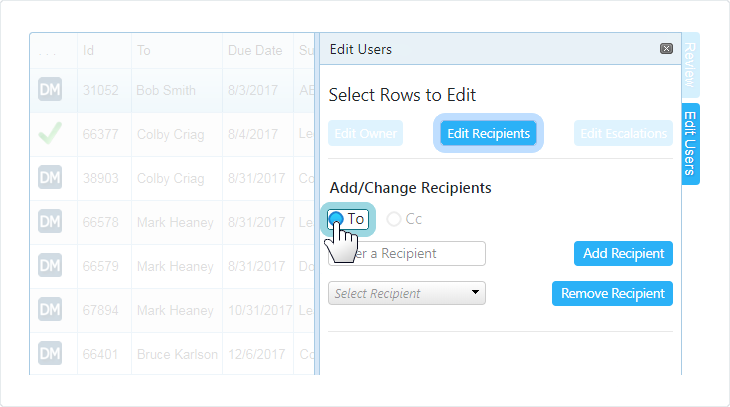
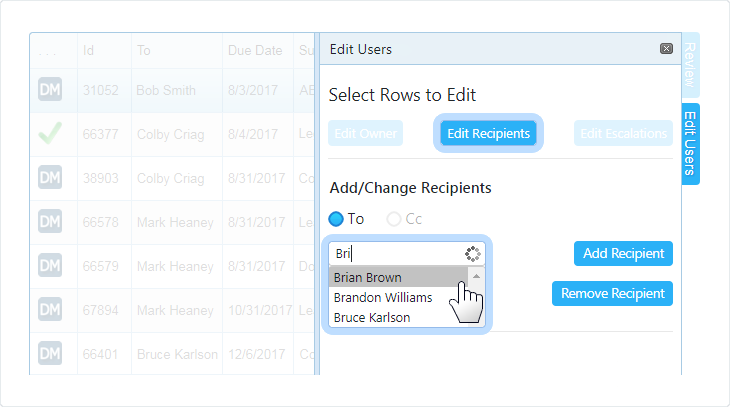
Type in the Recipient name into the textbox; then select it from the dropdown.
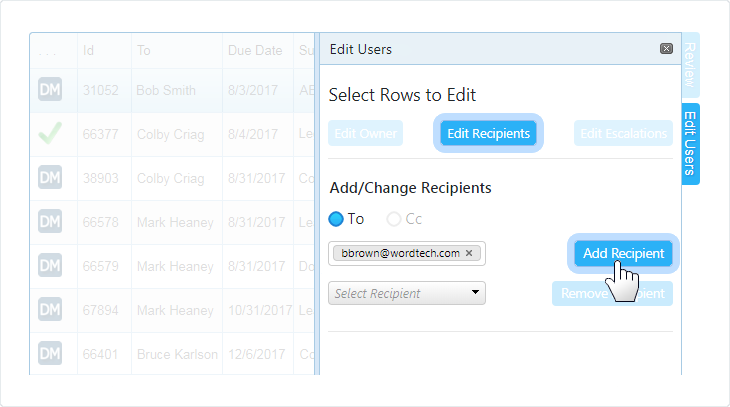
Click the Add Recipient button to complete the action.
Click the OK button from the browser confimration message box.
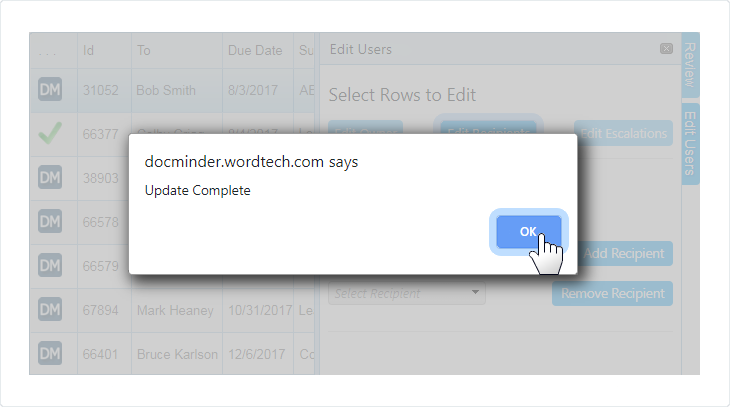
Select the To: or Cc: radio option.

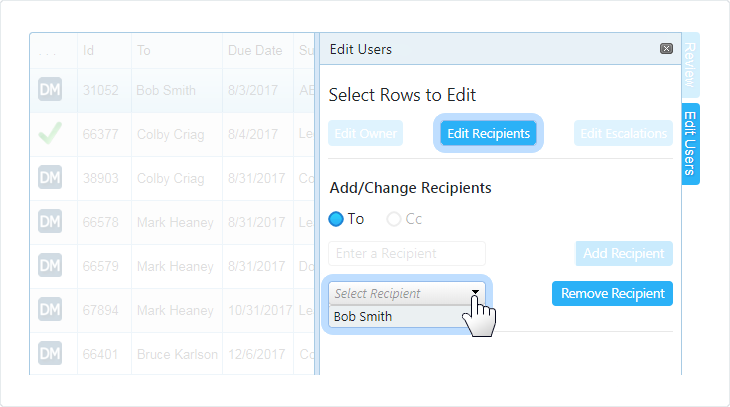
Select the Recipient name from the dropdown.
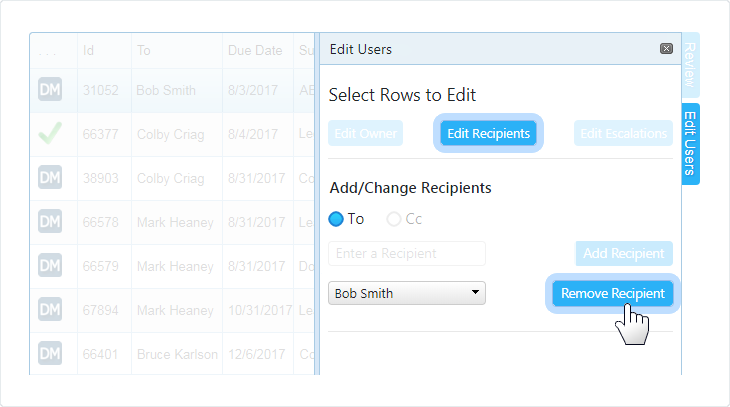
Click the Remove Recipient button to complete the action.
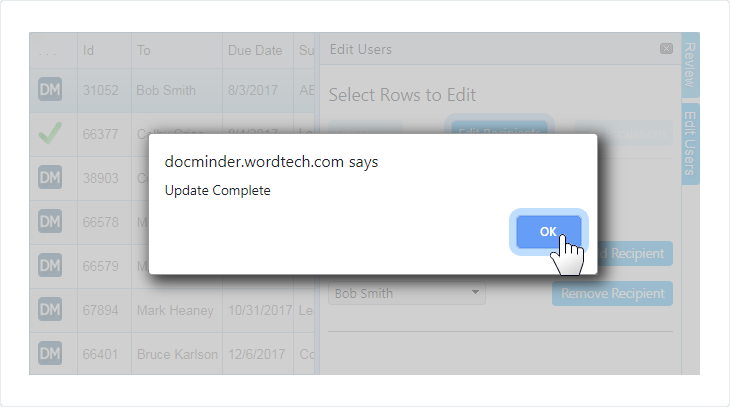
Click the OK button from the browser confimration message box.
The Swap Recipients feature is also known as Reassignment. This type of Reassignment allows you to reassign Recipient(s) for the selected DocMinder®task.
The WebAdmin Reassignment function reassigns all DocMinder® item(s) Owned by one user to another user.
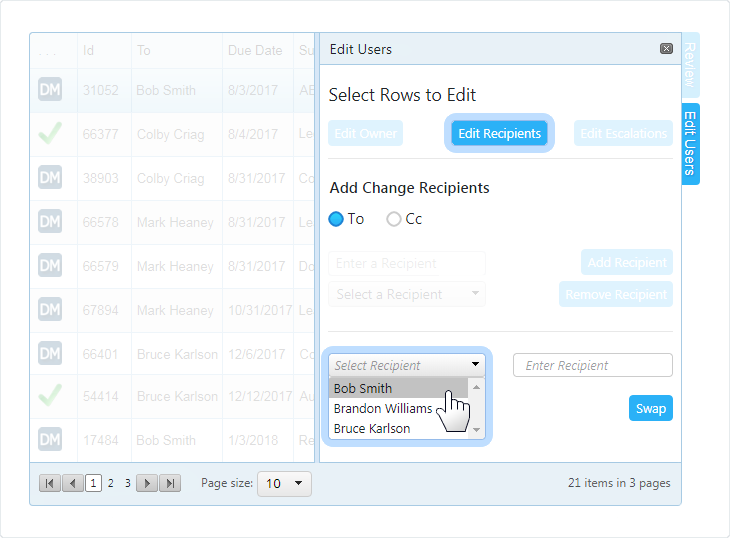
Select a Recipient from the Select Recipient dropdown;
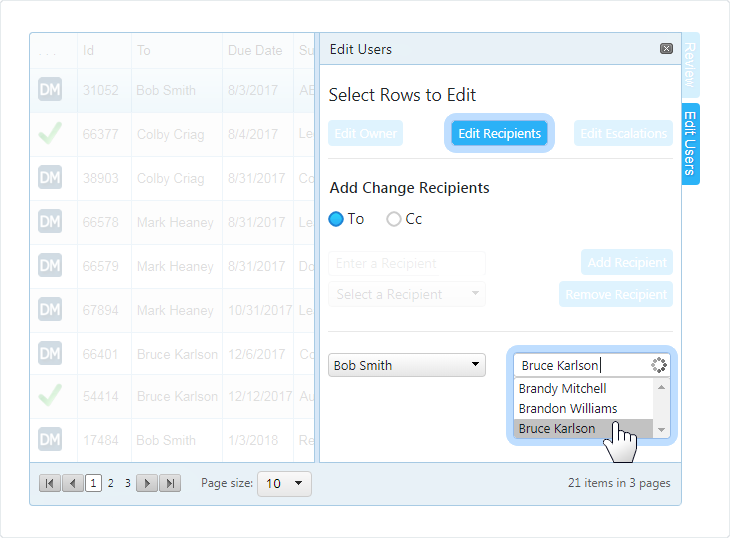
Enter the new Recipient into the textbox and select from the populated list;
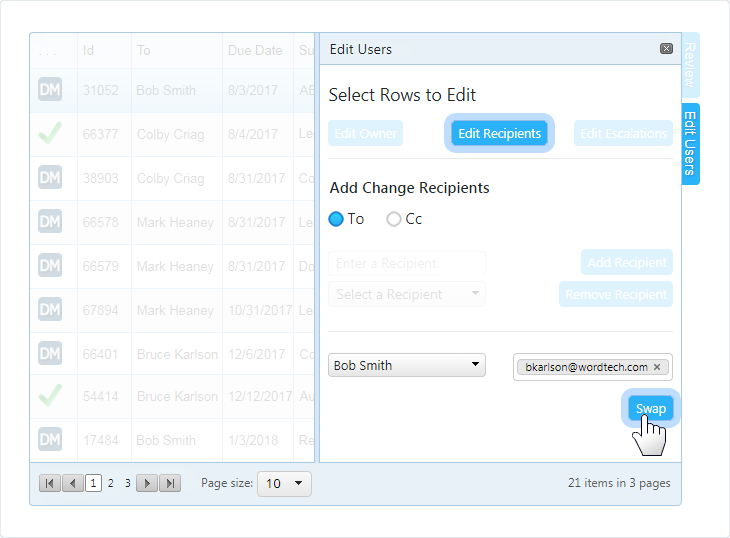
Click the Swap button to complete the action.
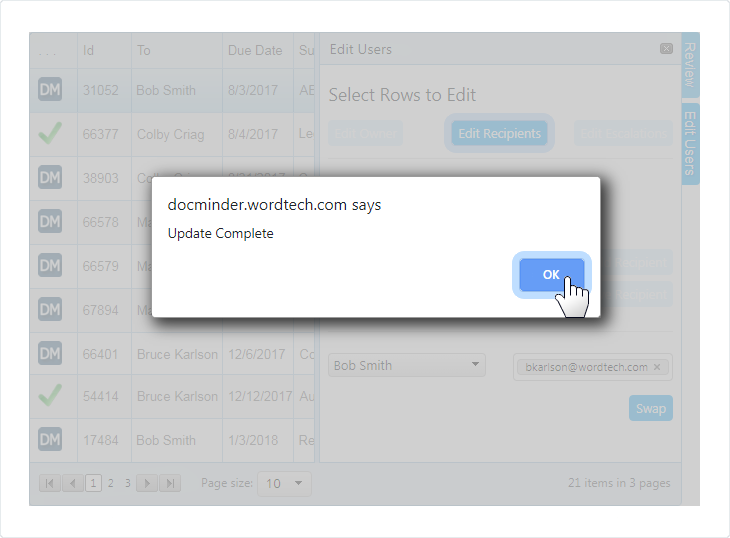
Click the OK button from the browser confimration message box.
An Escalation is a course of action that is implemented when an expected result from a task has not been achieved within a set period of time.
If a task or project is delayed for any reason, you can trigger Escalations manually within the Edit Users Panel or by editing the task.
To Add or Remove escalations, click on Edit Escalations.

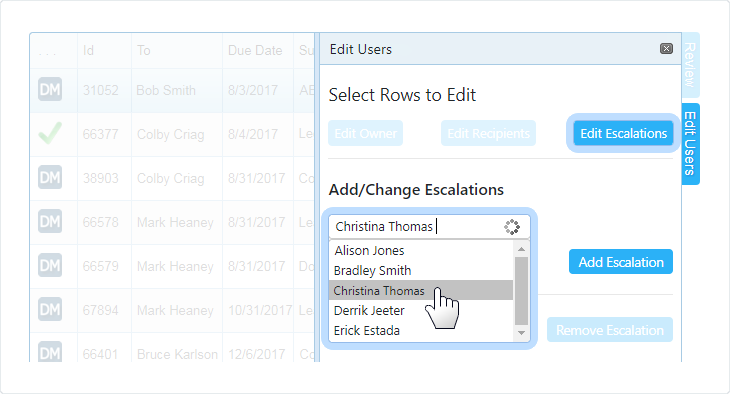
Type in the Escalation Recipient into the textbox; then select it from the dropdown.
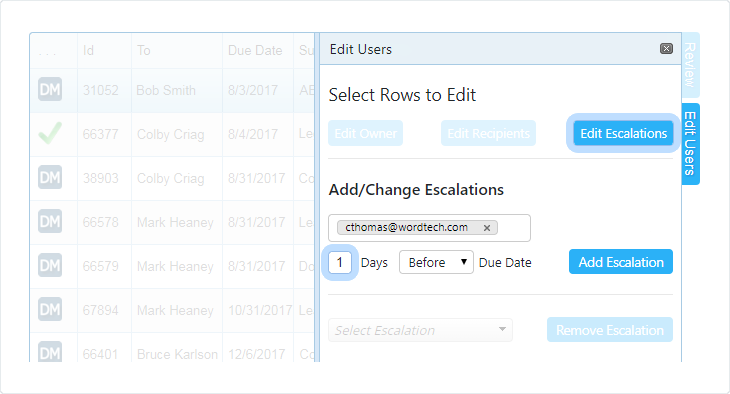
Enter the number of days to trigger the Escalation.
From the dropdown; select Before or After the due date to trigger the escalation.
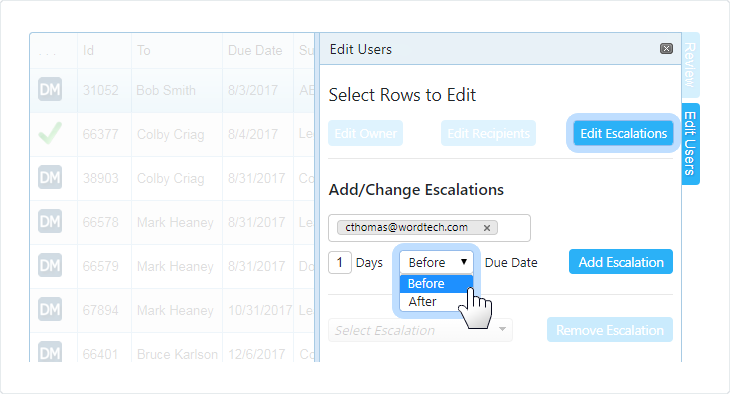
Escalations are based on the number of days Before or; After the due date which defines the date of the escalation event.
Click the Add Escalation button to complete the action.
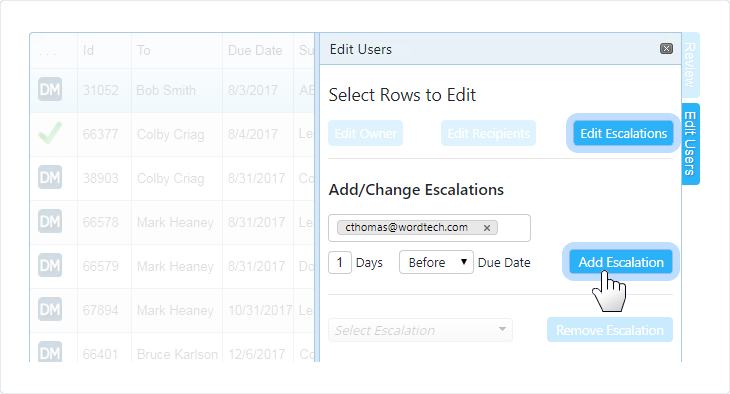
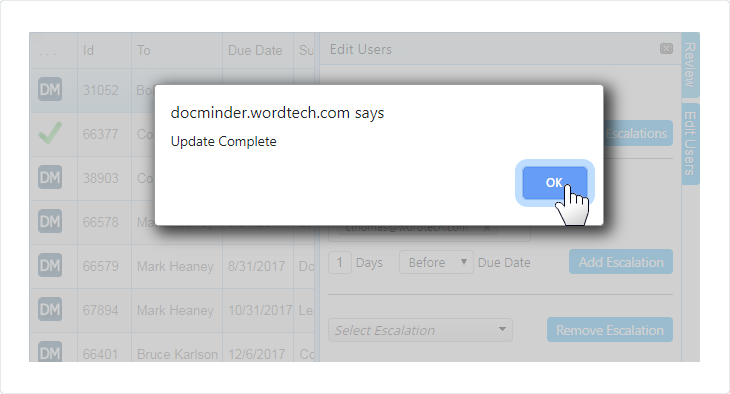
Click the OK button from the browser confimration message box.
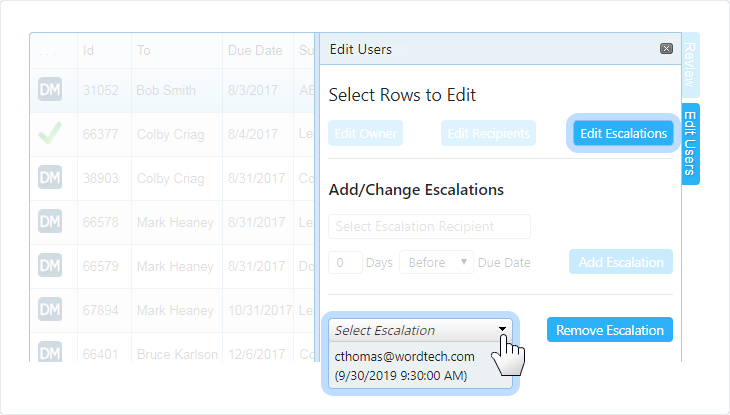
Select an Escalation Recipient from the dropdown;
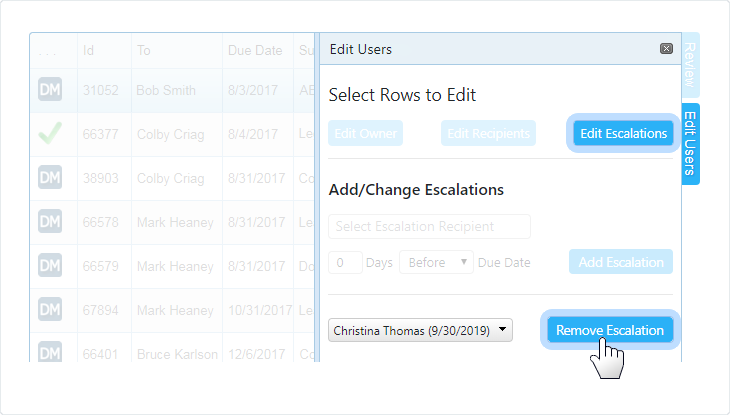
Click the Remove Escalation button to complete the action.
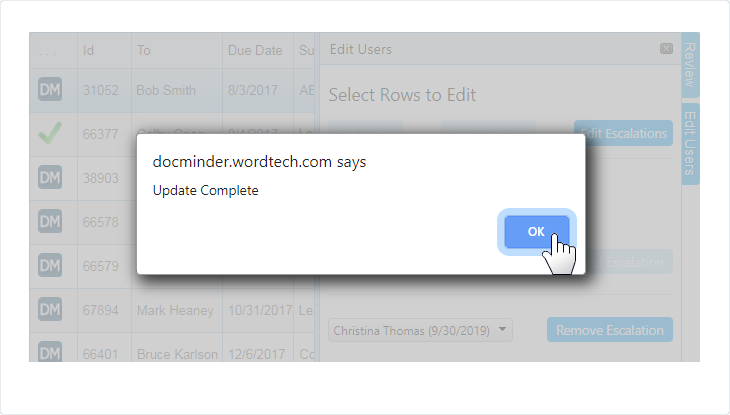
Then, click the OK button from the browser confimration message box.
DocMinder®Report Filters provide you with options to find your data based on a date range, assigned recipients, document number, and much more.
These filters allow you to access granular data about your tasks so you can see the most pertinent information. You can also save your filtered data as a Report View so you can easily find tasks that fit specific criteria at any time.
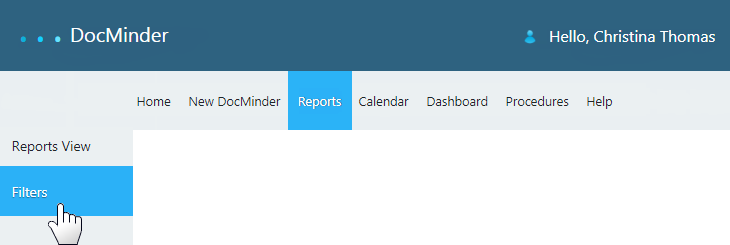
To access; click on Filters from the Left Navigation bar.
| Filter | Description |
|---|---|
| Select Columns | Add, remove or re-order the columns that display in your Report View. |
| Date Range | Search by: --- Date Range (e.g., Due Date, Notification Date). --- Fixed Date (e.g., Starting and Ending date). --- Relative Date (e.g., Time Span or Period). |
| User Type | Filter by User's Type (e.g., Completed By, Created By, Escalated To and Owned By). |
| Category | Type of DocMinder (e.g., Workflow, Checklist, Survey or Recurrence). |
| ID Search | DocMinder, Workflow, Series, Recurrence or, Document ID. |
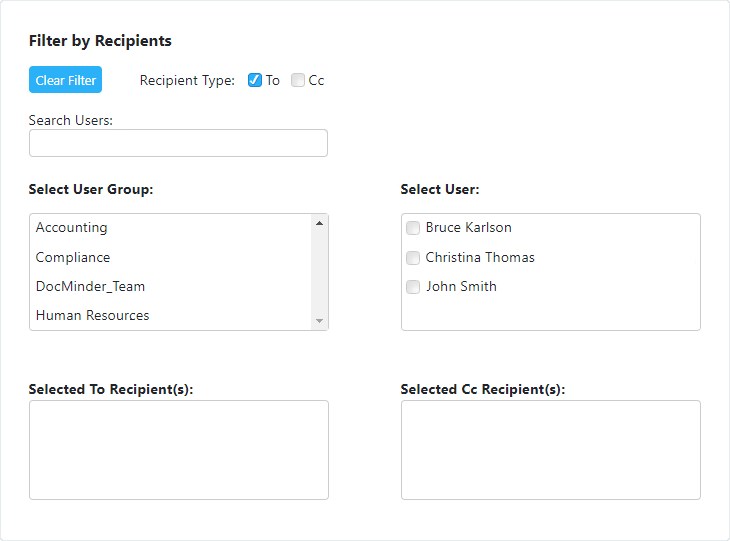
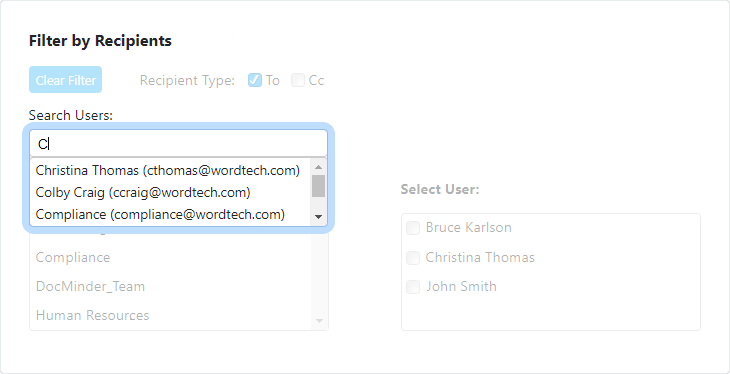
| Recipients | Search by Recipients assigned on the TO and CC line. |
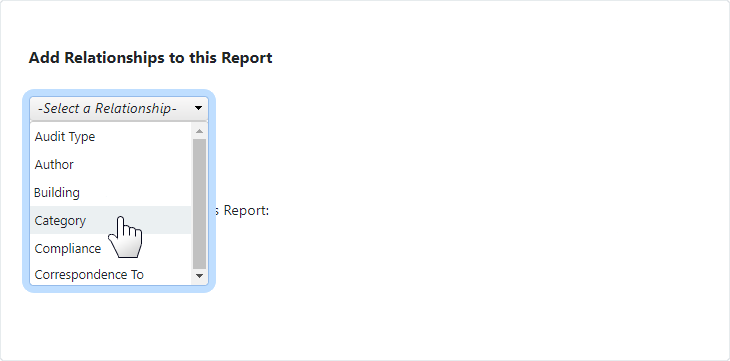
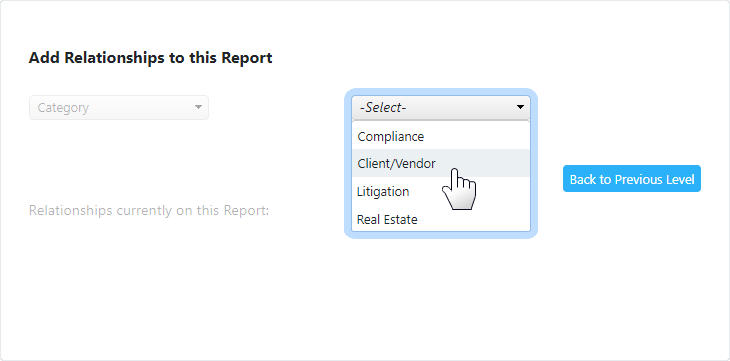
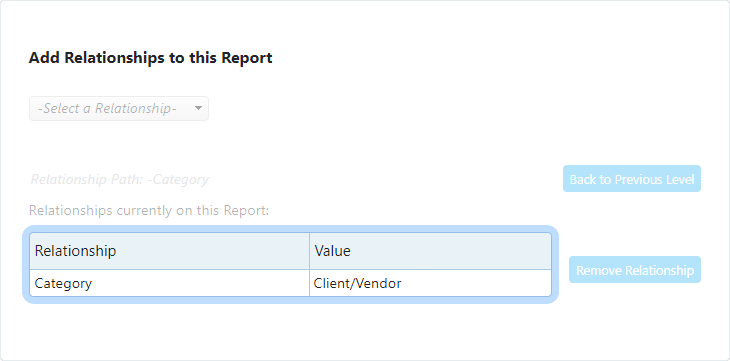
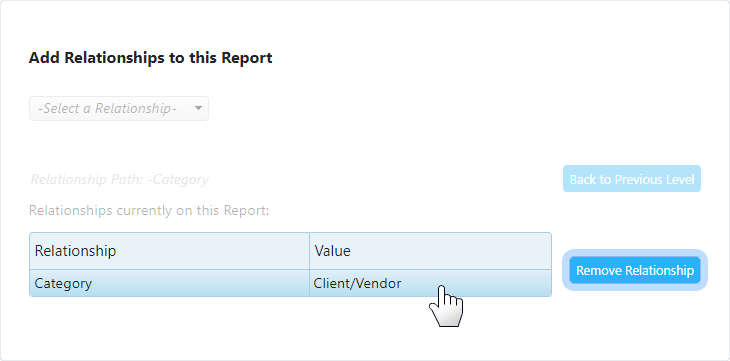
| Relationships | Search for tasks/projects that contain specific Relationships. |
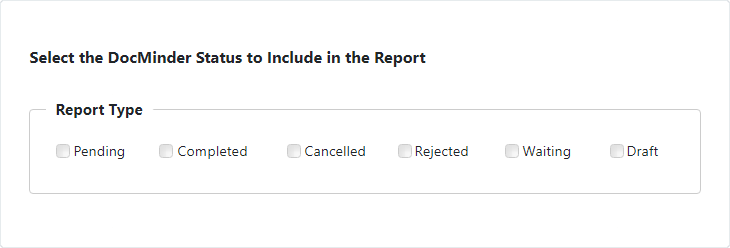
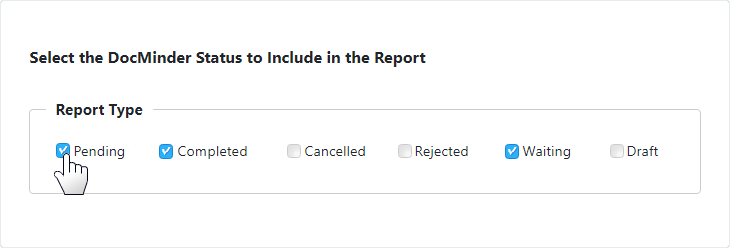
| Status | Pending, Complete, Cancelled, Rejected, Waiting and Draft |
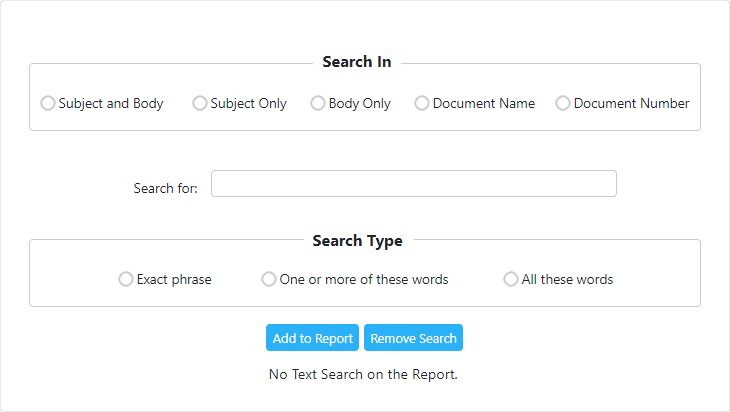
| Text Search | Subject/Body, Subject Only, Document Name/Number |
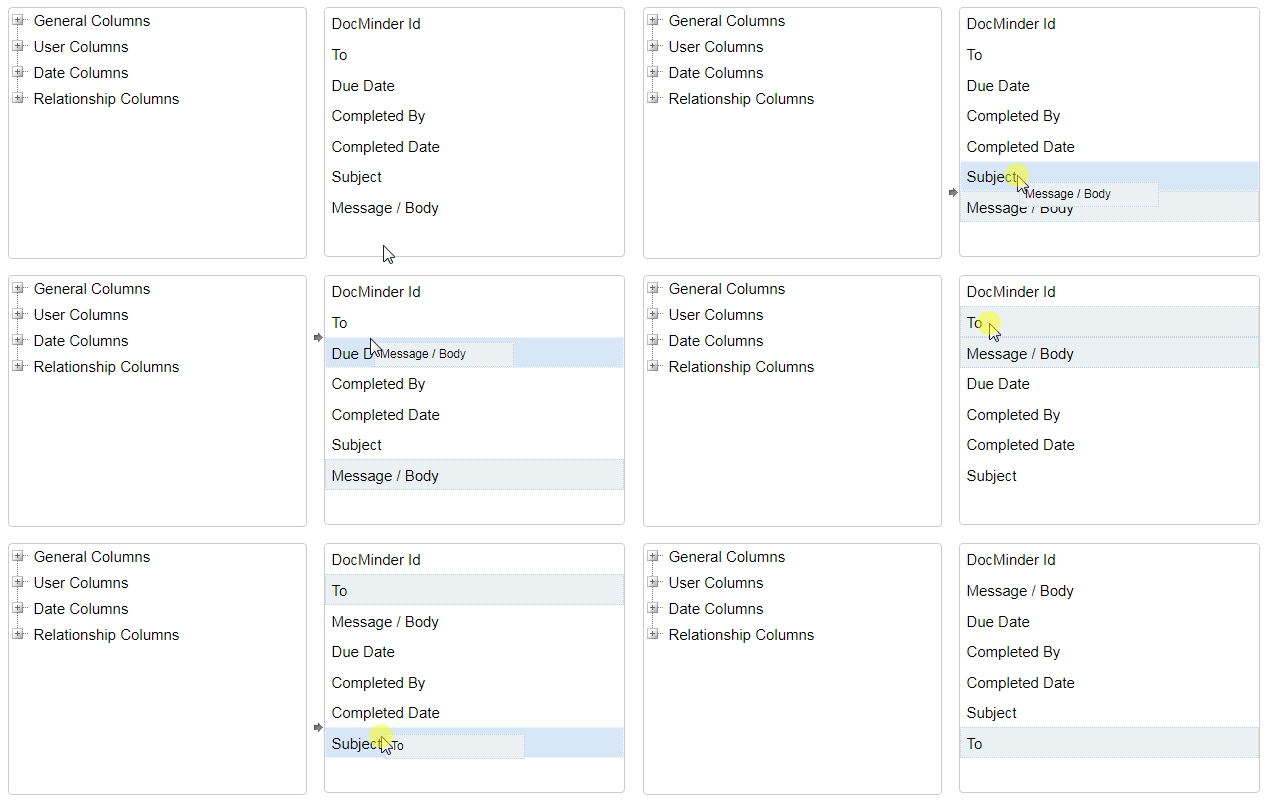
Control which data columns display in your report; add, modify (e.g., add, remove), and re-order (e.g., move-up, move-down) columns.
To access; click Select Columns from the Left Navigation bar.
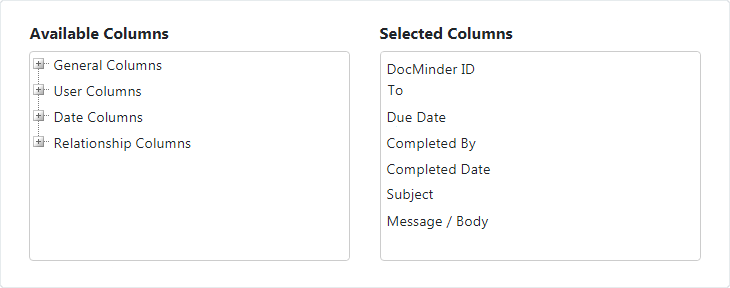
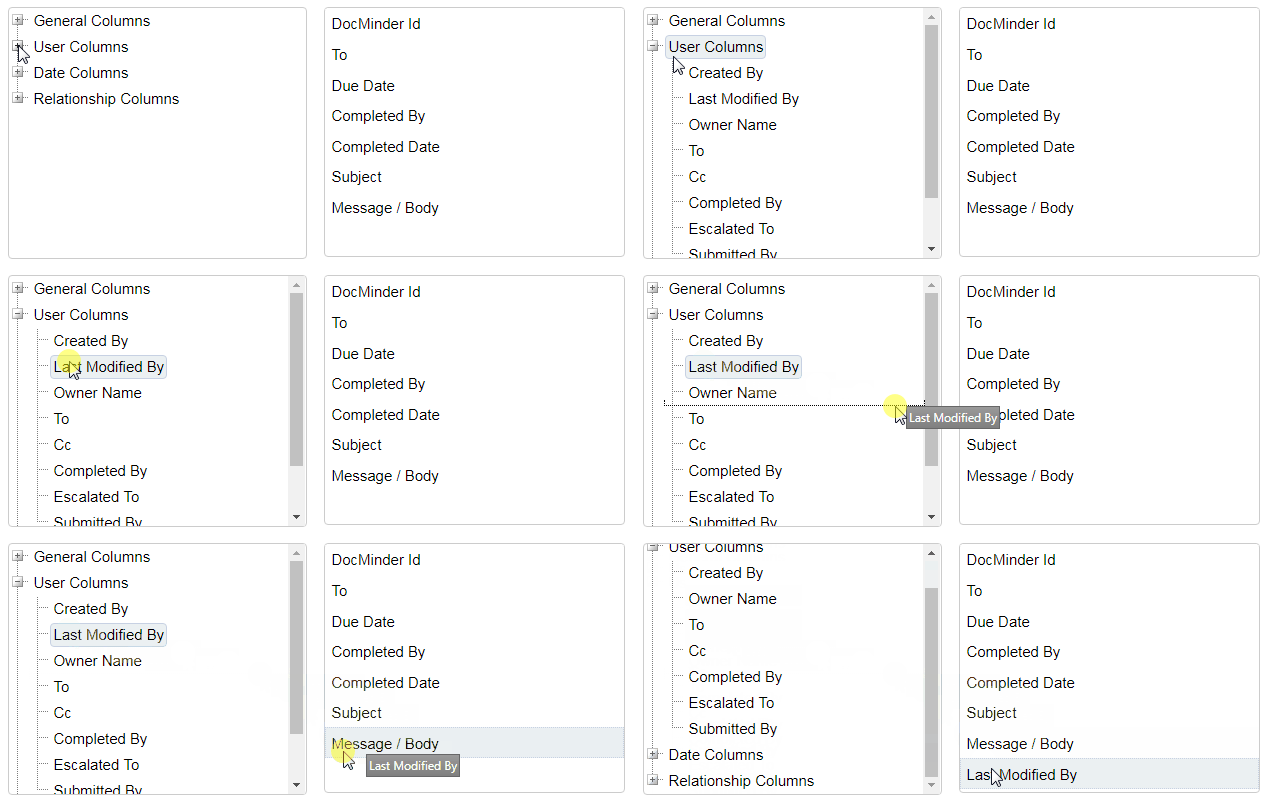
Select a column from the list-box on the Left, then Click Hold while dragging;
And then drop onto the list-box on the Right.
Select the column from the list-box on the Right, then Click Hold while dragging;
And then drop onto the list-box on the Left.
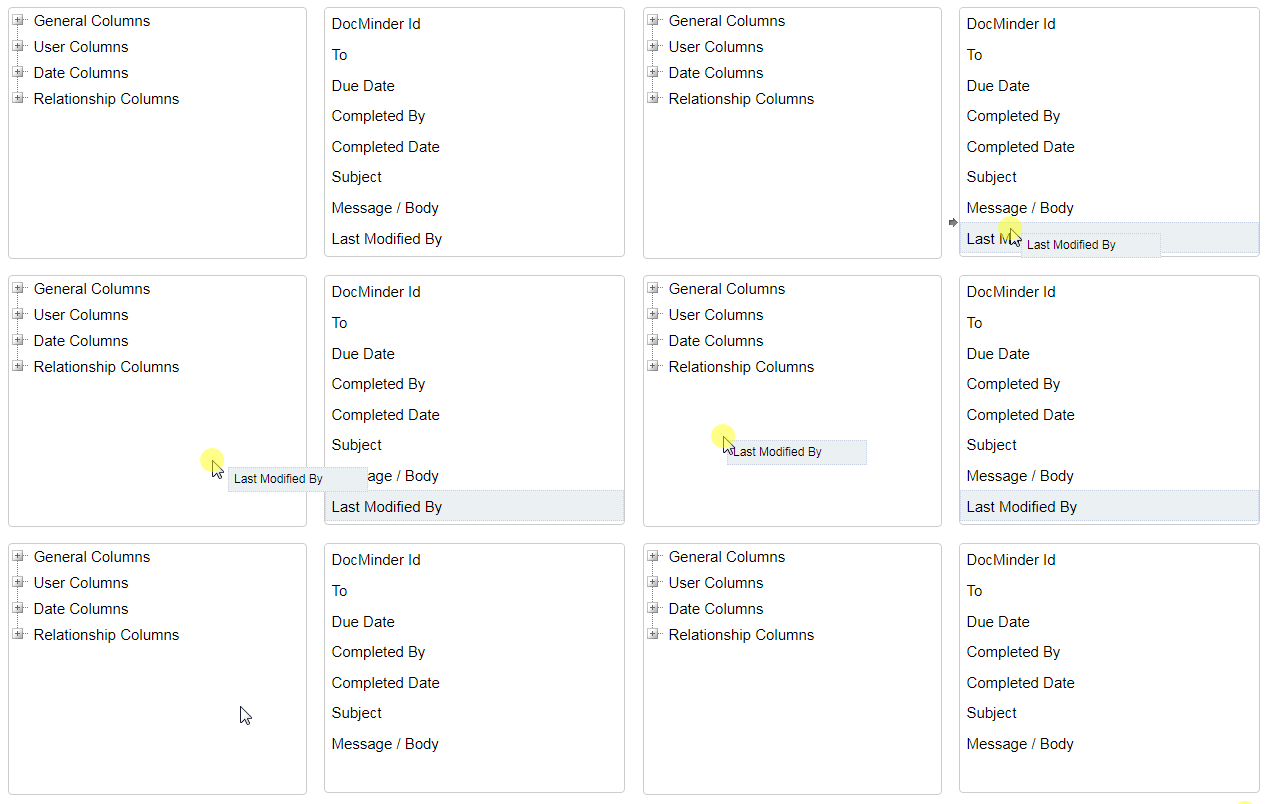
To re-order your columns, select a column on the right, then drag-and-drop (e.g., move up, move down) the column in the order you would like it to appear.
Filter by date range (e.g., notification date or due date); fixed date (e.g., starting/ending dates) or by relative date (e.g., period or time span).
To access; click Date Range from the Left Navigation bar.
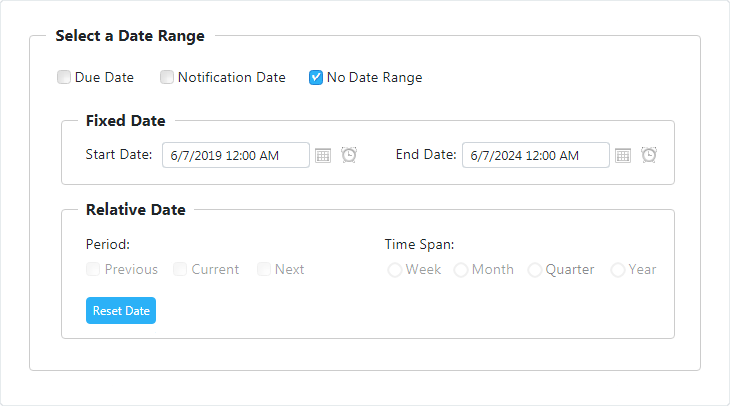
Select a Date Range option to Filter by (e.g., due date, notification date, no date range).

| Option | Description |
|---|---|
Due Date |
Filters and displays tasks by the assigned Due Date. |
Notification Date |
Filters and displays tasks by the Notification Date. |
No Date Range |
Filters tasks without specifying a Date Range. |
Fixed Date filter conditions include a specific date value (e.g., between Aug. 1, 2018 and June 2, 2019) which can be entered by choosing a date from the date picker.
To filter by a Fixed Date click the calendar icon and select the Start Date and End Date.

Relative Date filters make it easier to create lasting report views that you can share with others. Filter by a range of dates that define fixed points and offsets.
To filter by Relative Date, select an option under Period or Time Span.

| Period | Description |
|---|---|
| Previous | Displays tasks for the Previous period. |
| Current | Displays tasks for the Current period. |
| Next | Displays tasks for the Next period. |
| Time Span | Description |
|---|---|
| Week | Displays tasks within a time span of a Week. |
| Month | Displays tasks within a time span of a Month. |
| Quarter | Displays tasks within a time span of a Quarter. |
| Year | Displays tasks within a time span of a Year. |
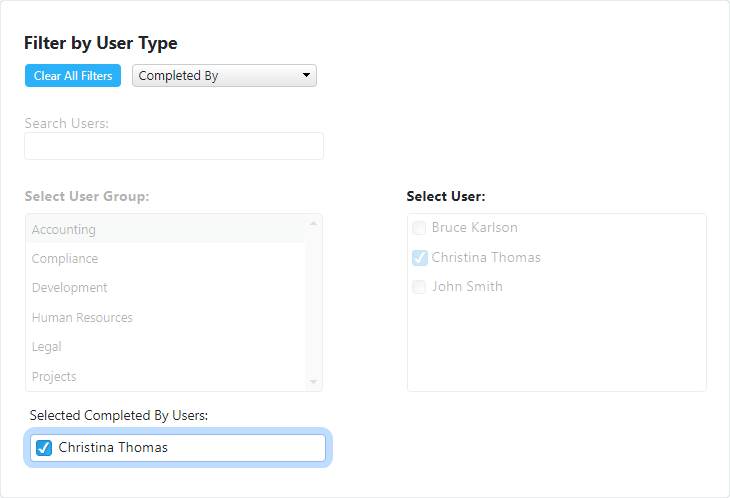
You can use the User Type filter to generate a report of tasks and projects based on the type (e.g., Completed By, Created By, Escalated To and Owned By) of a user.
The User Type filter replaces the Completed By, Created By, Escalated To and Owned By filters from the Left Navigation bar.
To access; click User Type from the Left Navigation bar.
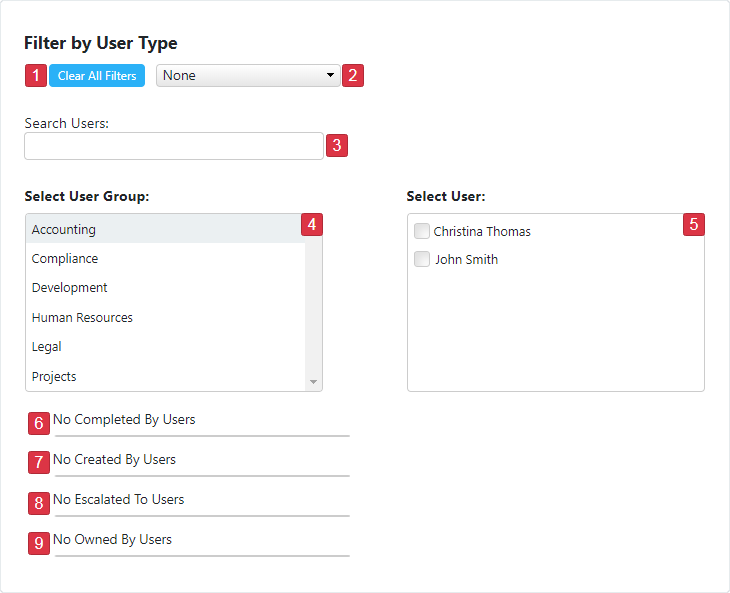
| 1 | Click the Clear All Filters button to reset this filter. |
|---|---|
| 2 | Click the User Type dropdown and select the type of user to filter. |
| 3 | Type in a user's name into the Search User(s) textbox and select from the list. |
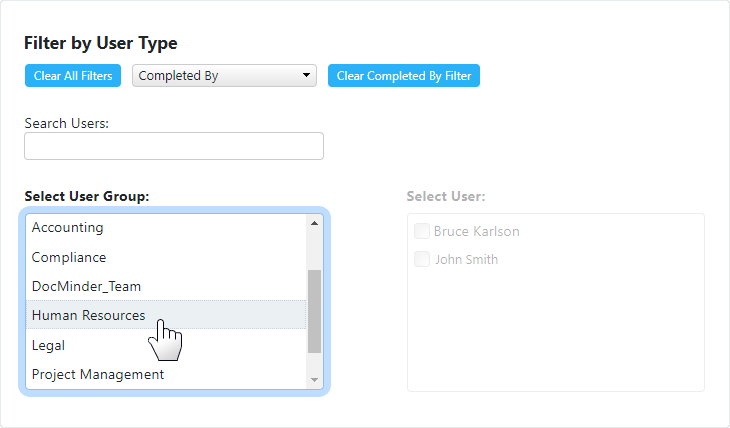
| 4 | Displays all DocMinder User Group(s). |
| 5 | Displays User(s) based on the what is selected in the User Group(s) listbox. |
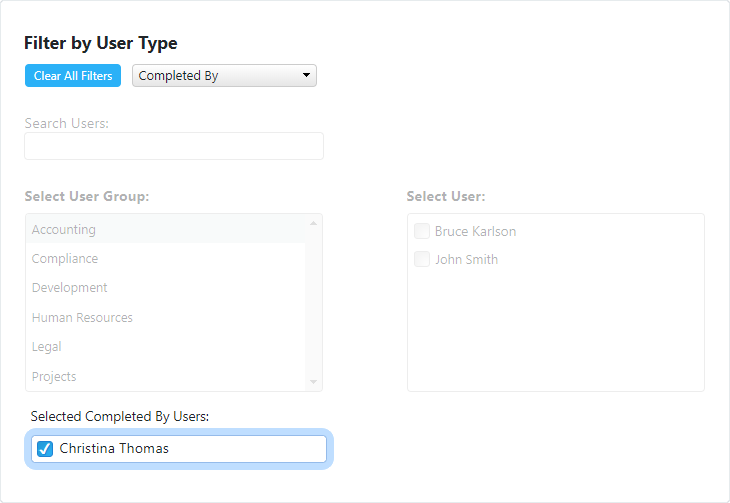
| 6 | Displays the selected Completed By User(s). |
| 7 | Displays the selected Created By User(s). |
| 8 | Displays the selected Escalated To User(s). |
| 9 | Displays the selected Owned By User(s). |
Select a type from the User Type dropdown;
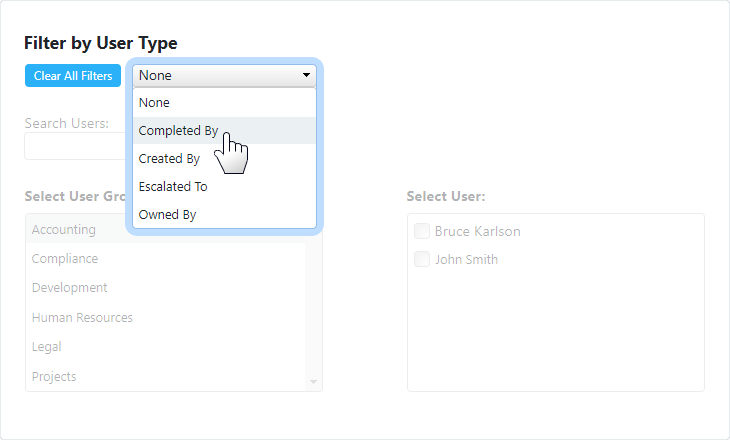
Click in the Search Users textbox and type the user's name, then select from the list;
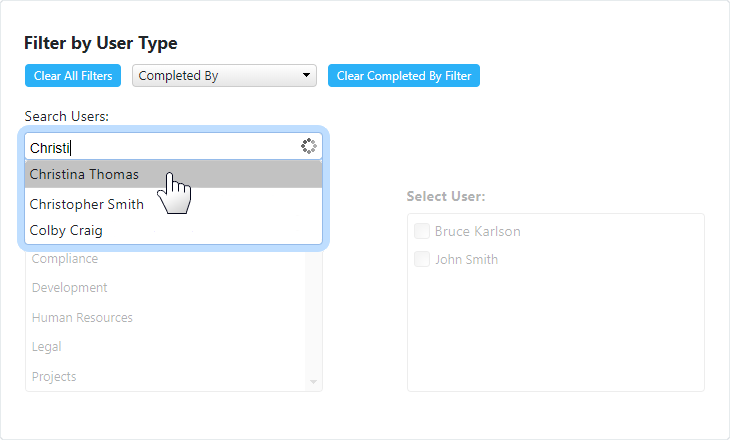
The Selected Completed By User will appear in the box below.
Select a type from the User Type dropdown;

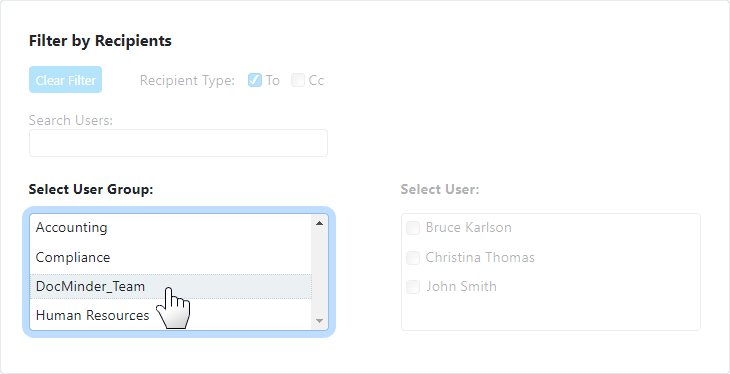
Select a User Group from the listbox on the Left.
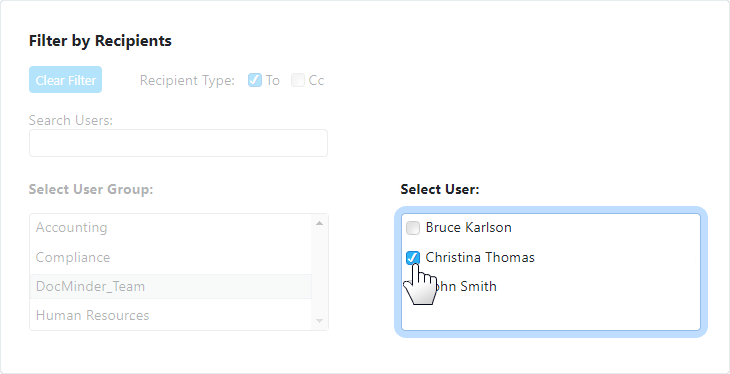
Then select a User from the listbox on the Right.
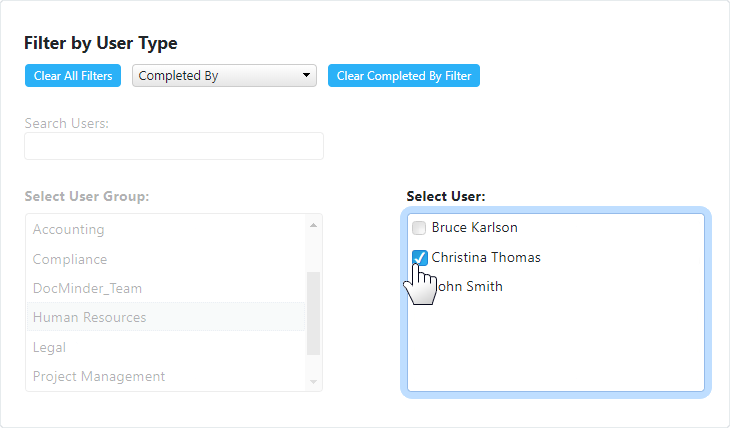
The Selected Completed By User will appear in the box below.
