DocMinder® gives you the ability to quickly create tasks or projects and attach key documentation (e.g., project drawings and specifications).
You must be a licensed DocMinder® user to create new tasks or projects.
To create a new task; click on New DocMinder from the Top Navigation-Bar.

Every task and project must have a recipient assigned on the TO line.
Recipients receive email notifications when their task approaches its due-date and when updates have been made (e.g., document added, comments added, etc.).

Type the Recipient's name in the To: line textbox and select from the populated list.

To assign a Recipient from your address book; click the To: button.

Type the Recipient's name and select from the list; then click Add Addresses: To button.
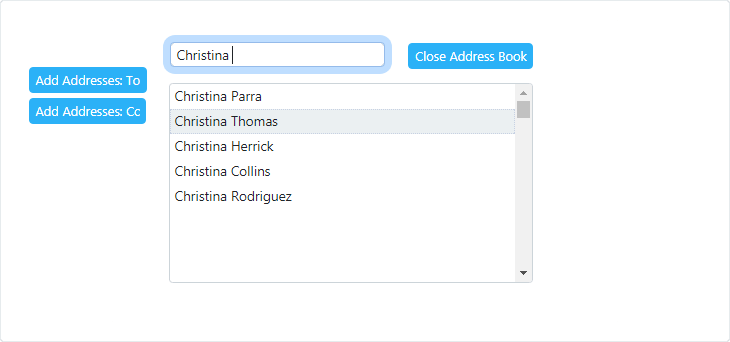
Click Close Address Book when finished.
To remove a Recipient; click the  to the right of the Recipient's name.

The Subject identifies the task item to a recipient. Recipients view tasks by subject line from their email inbox, Homepage, Reports, Calendar, Dashboard Report and Workflow
Type a Subject name into the subject text-box.

Email notifications are sent when a recipient is assigned to a task and when the task becomes past-due.
If multiple recipients are assigned to the task, all recipients will receive an email notification about the task.
Choose a Notification Date.
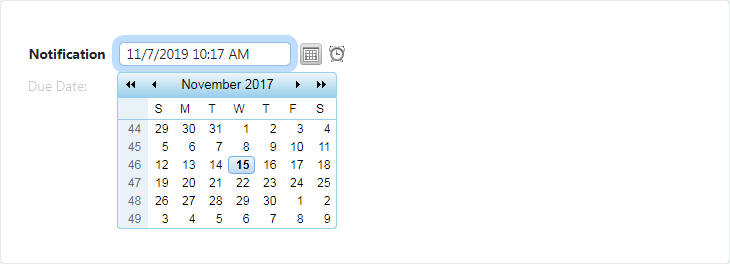
Select a Due Time by clicking the clock icon. If you do not select a Due Time, the email notification will send at the default time (e.g., 12:00 AM).
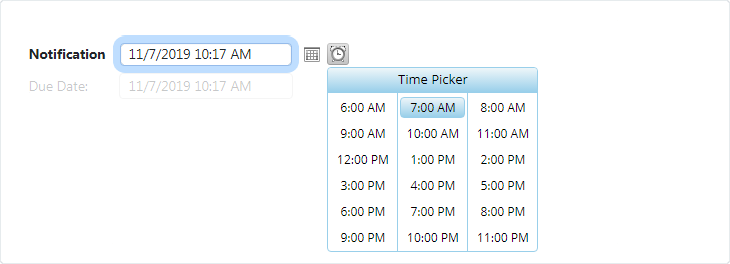
Select a due-date to let your Recipients know when the task should be completed.
Both tasks and projects must be assigned a due date. Set a due date when the task or project has to be completed within a certain date.
To select a Due-Date; click in the due-date text-box to select a date from the calendar.
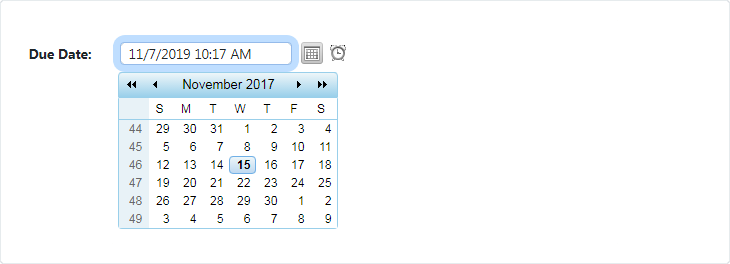
To add a Due-Time; click the clock icon to select a time.
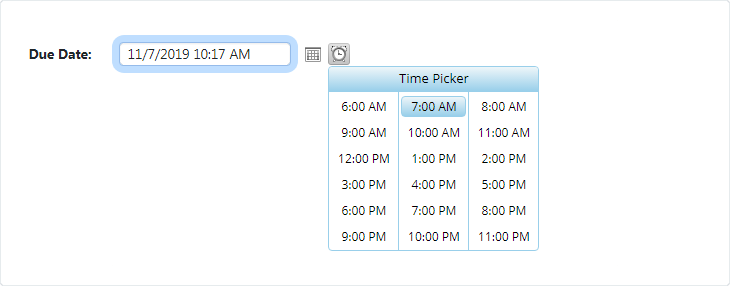
Email notifications notify you when other users make changes to tasks you created, tasks assigned to you, and tasks which you own.
To access, click on Notifications from the Left Navigation bar.
Basic notifications are based on the number of day(s), week(s), month(s) or year(s) and is scheduled to remind the Recipient(s), before or after the due-date.

Enter in a number into the send text-box.

From the day(s) dropdown choose day(s), week(s), month(s) or year(s).

Select either Before OR; After the due-date; then click Display Patterns button.

Once you have added notifications, the notification review box will display.

Select the title Send On # day(s) before; then click the Delete All button.

Learn how to create custom Daily, Weekly, Monthly and Yearly notifications; click a heading below to get started.
Daily Notifications

Select Daily from the Custom Patterns dropdown.
For the Every __ Day(s) Option:
Click the Every ____ Day(s) radio-button;
Enter the number of day(s) to send before/after the due-date;
For the Every Weekday Option:
Click the Every Weekday radio-button;
Weekly Notifications

Select Weekly from the Custom Patterns dropdown.
Enter number into the Repeat Every ____ Week(s) On text-box;
Check a box to select the day(s) of the week the notification will repeat;
Monthly Notifications
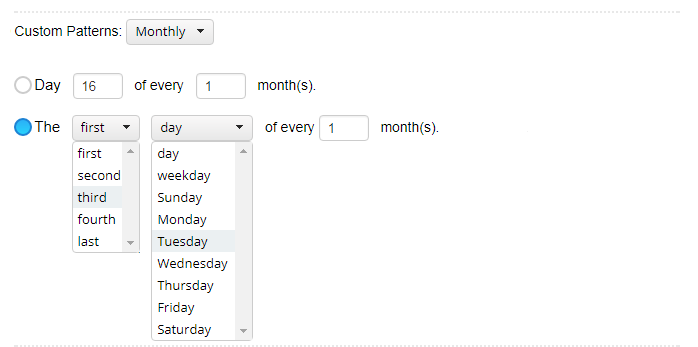
Select Monthly from the Custom Patterns dropdown.
For the Day of Every ____ Month(s) Option:
Click Day of Every ____ Month(s) checkbox.
Enter the day of the month and the number of month(s) into the text-boxes;
For the First Day of Every ____Month(s) Option:
Click The First Day of Every ___ Month(s) radio-button;
Select the dropdown labeled First and choose an option from the list;
Select the dropdown labeled day and choose an option from the list;
Enter the number of Month(s) into the text-box;
Yearly Notifications

Select Yearly from the Custom Patterns dropdown.
Month Day of Every __ Year(s) Option:
Click the dropdown labeled January and select a month from the list;
Enter the day of the month (e.g., 16th) into the first text-box;
Enter the number of years into the second text-box;
Second Radio-Button Option:
Click the dropdown labeled First and select an option from the list;
Select the dropdown labeled Day and select an option from the list;
Select the dropdown labeled January and select an option from the list;
Give teammates easy access to relevant documents by attaching files directly to your tasks. Documents are displayed in the documents table and the review panel.
To access, click on Documents from the Left Navigation bar.
Click the Select button next to the search text-box.
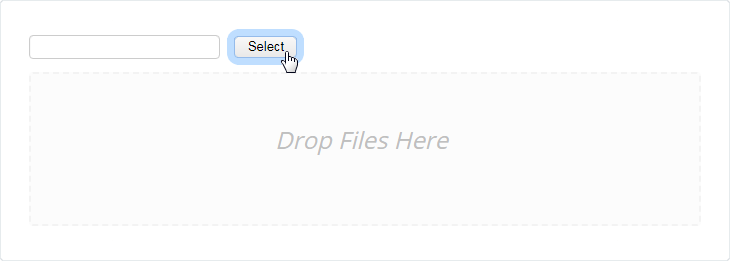
Browse and select a document from a Shared Drive.

With Browse and Select, documents are displayed directly below the select area.
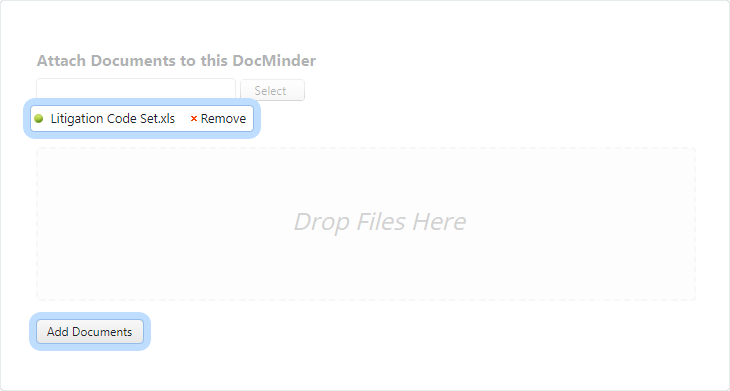
Click the Add Documents button to attach your document.
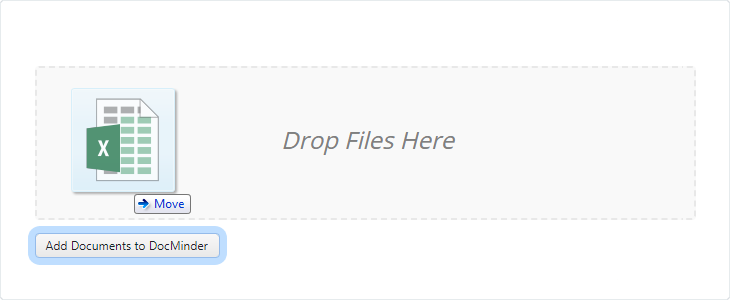
Drag the file from a Shared Drive
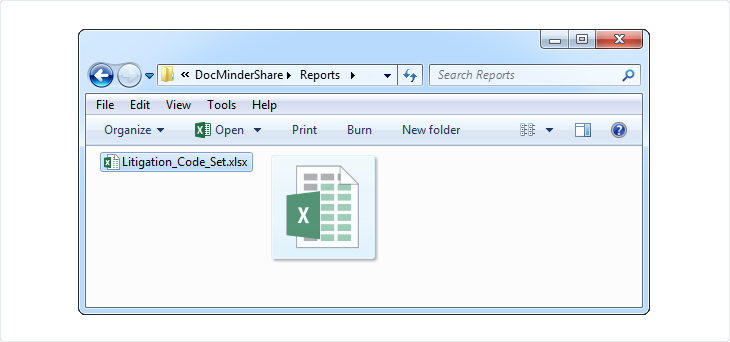
Drop the file onto the area labeled "Drop Files Here"; then click Add Documents button.
Once you have added documents, the Documents Table will display. If you have added multiple documents, they will also display here.

| 1 |
Displays the Title (e.g., document name) of the document attached. |
|---|---|
| 2 |
Check the Copy box to attach a copy of the document to the task. |
| 3 |
Check the Link box to attach a link to the document to the task. |
| 4 |
Displays the Doc# (e.g., number) of the document. |
| 5 |
Check the Primary box to associate metadata from document management systems. |
| 6 |
Click the Remove button to delete the document from the task. |
To remove a document; click the Remove button within the Document Table;

DocMinder allows you to generate filtered reports based on Relationships.
Relationships allow you to provide additional context or group similar tasks for easy viewing, reporting, and more. You can use relationships to track or to categorize tasks.
To access, click on Relationships from the Left Navigation bar.
There are two (2) ways to add Relationships to your project(s).
Select from dropdown.
Type and choose from textbox.
-
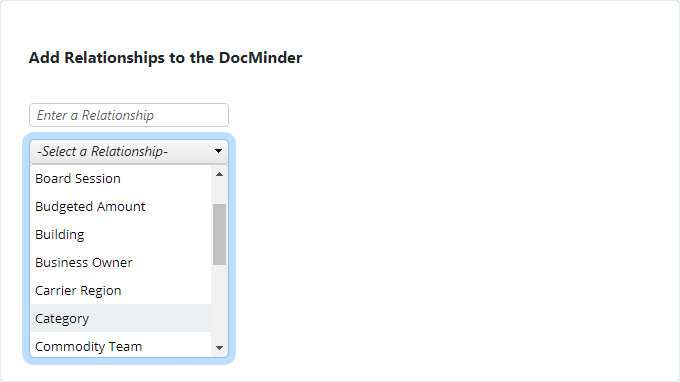
Add Relationship from Dropdown
Select a Relationship from the dropdown labeled -Select a Relationship-.
-
Add Relationship from Textbox
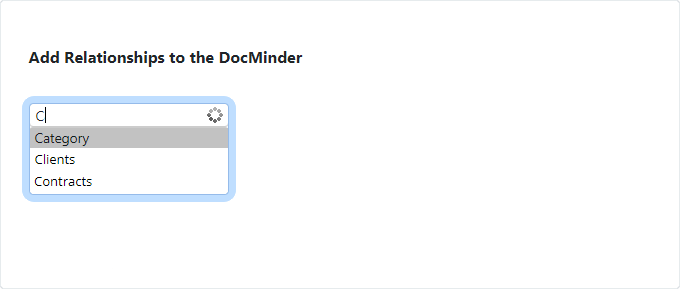
Type the Relationship title (e.g., Category) into the textbox;
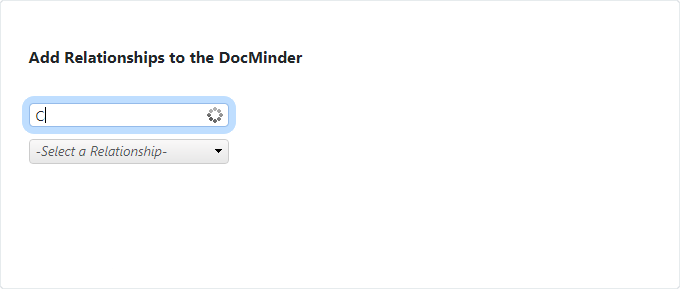
Then select the Relationship title from the auto-complete list.
Finally, select a Value for the Relationship from the Table.
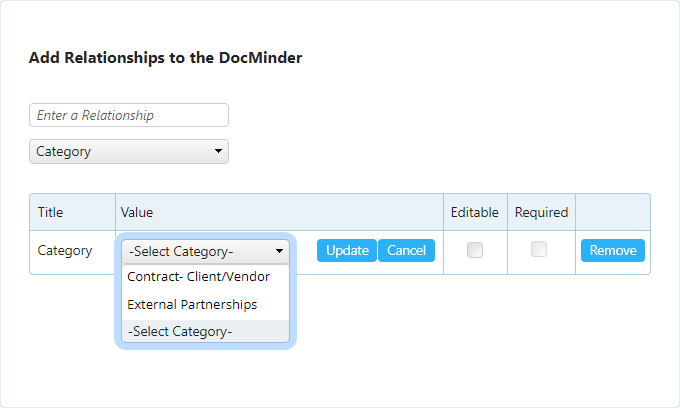
Once you have added relationships, the Relationship Table will display, allowing you to select and edit Values and remove Relationships.

| 1 |
Displays the name of the Relationship Title. |
|---|---|
| 2 |
Displays the name of the Relationship Value . |
| 3 |
Click Update if you want to save changes made to a Relationship's Value. |
| 4 |
Click Cancel if you want to undo changes made to a Relationship's Value. |
| 5 |
Check the Editable box to allow Recipient(s) to edit Relationship Value(s) from the Progress Page. Learn more about Editable Relationship Values, here. |
| 6 |
Check the Required box to enforce Recipient(s) to edit Value(s) from the Progress Page. |
| 7 |
Click Remove to delete a Realtionship from the table. |
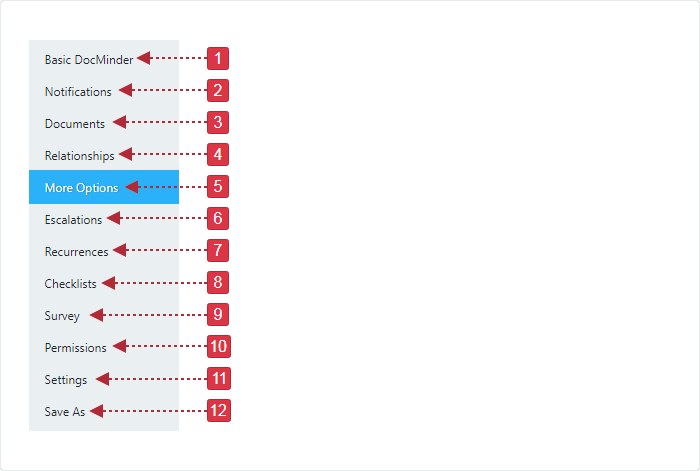
DocMinder®provides you with More Options to add to your task item(s) such as, Escalations, Recurrences, Checklists and more.
To access; click on More Options from the Left Navigation bar.
Escalations are alerts that notify an individual when a task has not been completed by the due-date. You can create multiple escalation events with different escalation dates.
Escalations are based on the number of days Before OR; After the due-date which defines the date of the escalation event.
To access, click on Escalations from the Left Navigation bar.
You can assign escalation events to a manager, supervisor or another person responsible for completion of the task in case the assigned recipient has missed the due-date.
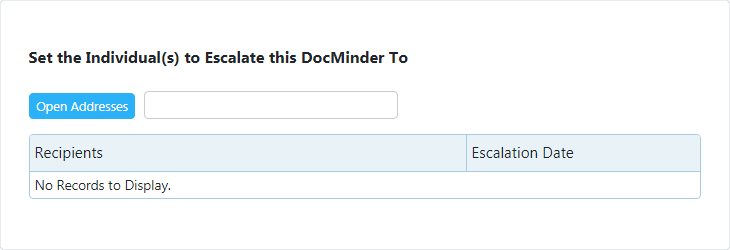
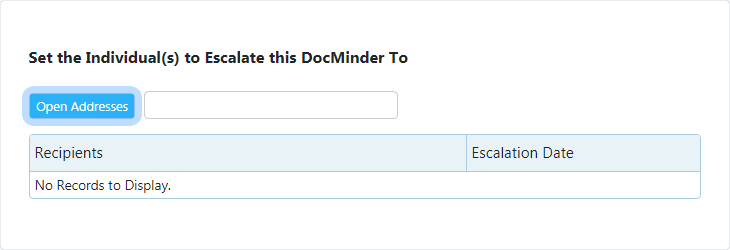
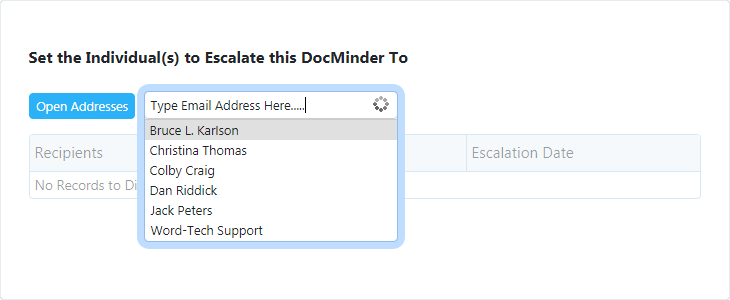
Click the Open Addresses button.
Select, or type the individual's email into the text-box; and then click Add to Escalations.
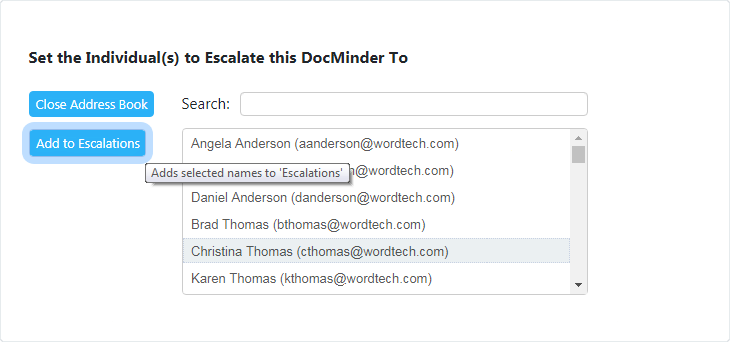
Type individual's email into the Auto-Complete text-box, and select from the list.
Once you have added an escalation event, the Escalation Table will display.
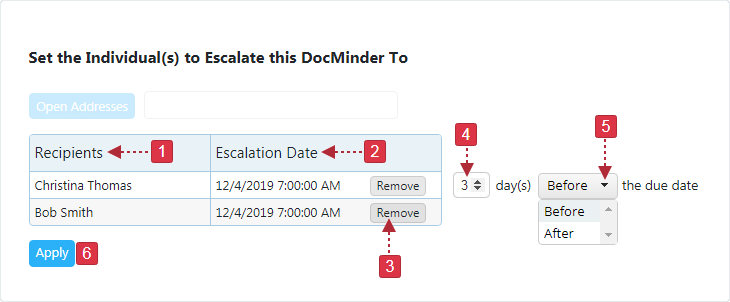
| 1 | Displays the Recipient's full-name (e.g., the individual who receives the Escalation). |
|---|---|
| 2 | Displays the Escalation Date (e.g., the day the Escalation will activate). |
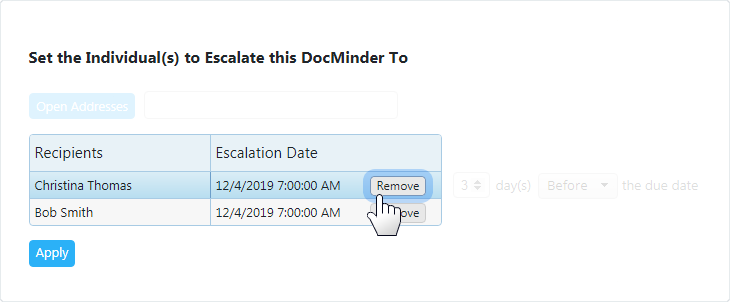
| 3 | Click the Remove button to delete an Escalation. |
| 4 | Enter the number of Day(s) into the textbox (e.g., # of days to activate the Escalation). |
| 5 | Select to activate the Escalation Before or After the due date. |
| 6 | Click Apply to save your Escalations. |
To change the date of escalation, follow the procedure outlined below:
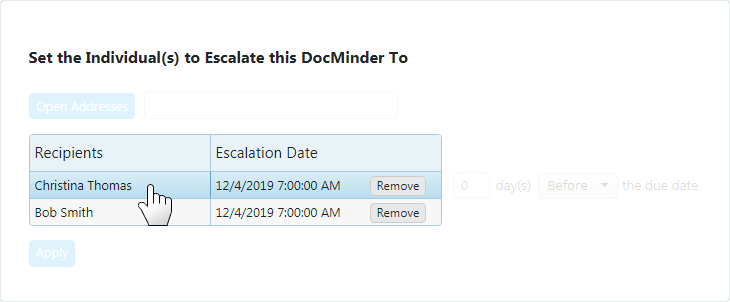
Select an Escalation Event from table.
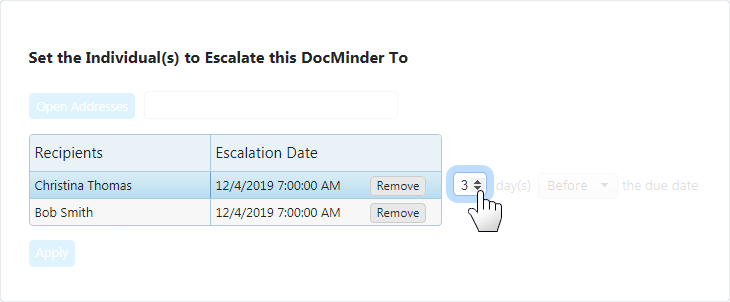
From the Day(s) box, select the number of days to trigger the escalation.
Select either Before OR; After the due-date from dropdown.
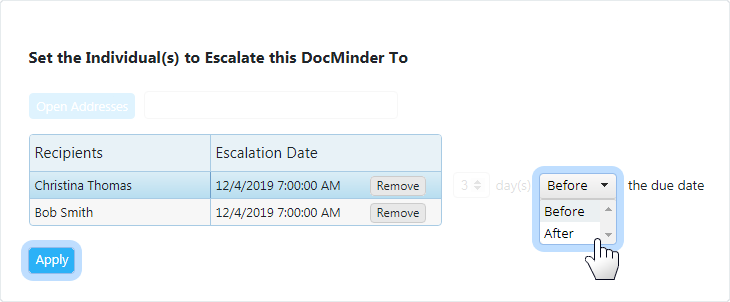
Click the Apply button when finished.
To remove an escalation; select the Escalation from the table and click Remove.
Recurrences are tasks with a due-date that cycles back as another task.
For example, during an IT project, many software applications need to be backed up at regular intervals. Creating a Recurrence reduces the time needed to set up multiple tasks.
To access; click on Recurrences from the Left Navigation bar.
Choose the frequency of the recurrence (e.g., Daily, Weekly, Monthly or Yearly).
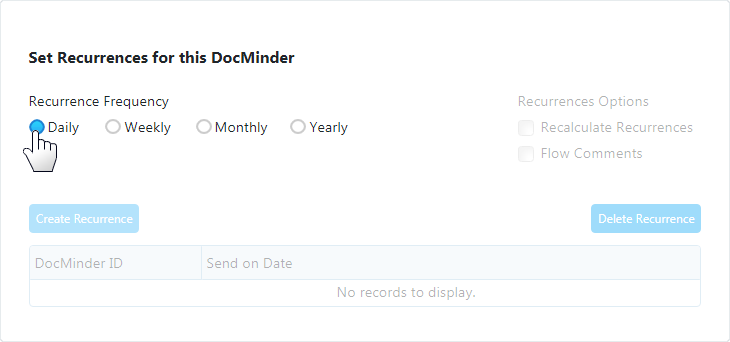
| Frequency | Description |
|---|---|
Daily |
Repeats every day, every # of day(s) or every weekday; |
Weekly |
Repeats each week on the day you select (e.g., M, T, W, TH, F) |
Monthly |
Repeats on a specific date of the month that you select; or on a specific day of the week with a specific week of every month (e.g., the 3rd Wednesday of every month). |
|
Yearly |
Repeats on a specific date of the year that you select; or on a specific day of the week with a specific week of every year (e.g., the 1st Thursday of every December). |
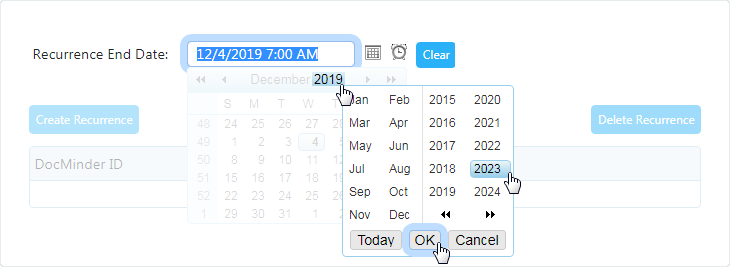
Click the End Date text-box and select the Recurrence End Date (e.g., the day it stops);
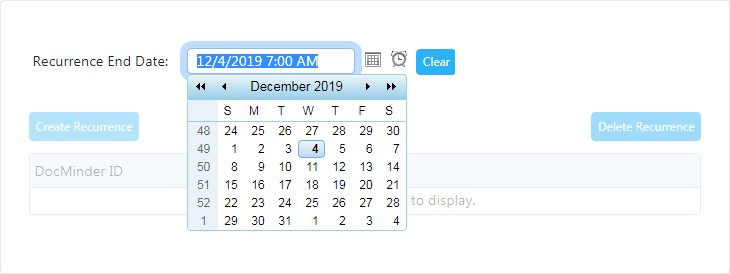
Click on Year (e.g., 2019) in the calendar and select the year it will end; then click OK.
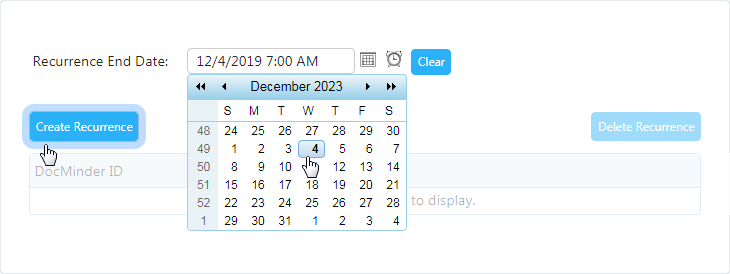
Select the date (e.g., Dec. 4) it will end for the Year; click Create Recurrences.
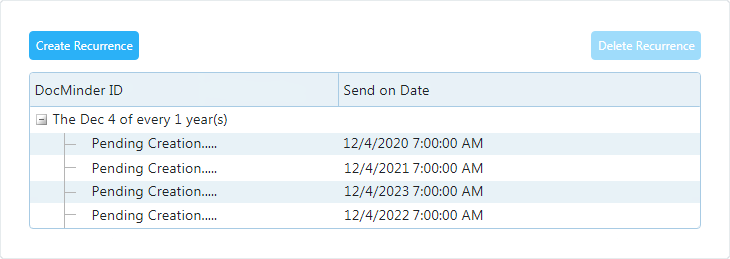
You can view the creation dates and send times for each recurrence in the table below.
To delete a Recurrence, click Delete Recurrence button to remove it.
Checklists capture all of the smaller action items or sub-tasks that need to be done on a task, event, or milestone and eliminates creating a bunch of tiny tasks.
To access; click on Checklists from the Left Navigation bar.
Click on the control labeled Click ONCE to Add Item.

A new task-item is added to the checklist table.
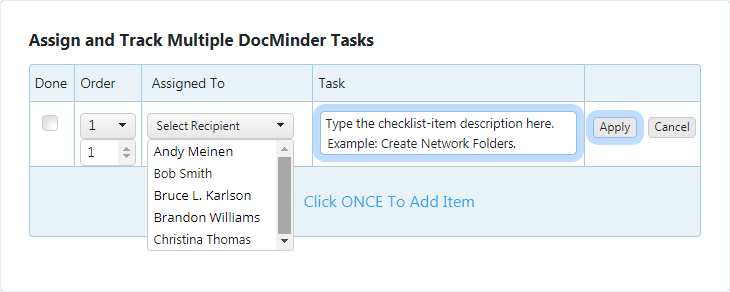
Click Apply to save the Checklist Item.
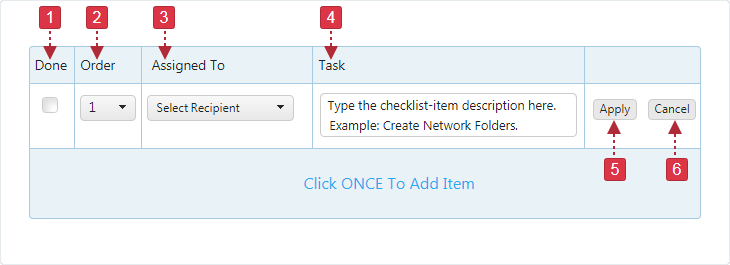
| 1 |
The Done column shows a checked box when the item is completed. |
|---|---|
| 2 |
Click the Order dropdown to arrange items by number. |
| 3 |
Click the Assigned To dropdown to assign a Recipient. |
| 4 |
Enter a description (e.g., Create Network Folders) into the Task column textbox. |
| 5 |
Click the Apply button to save changes made to a checklist item. |
| 6 |
Click the Cancel button to cancel changes made to a checklist item. |
To Edit; select an the item within the Checklist Table;
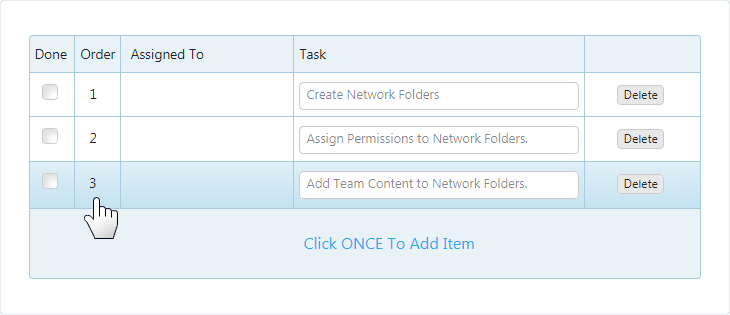
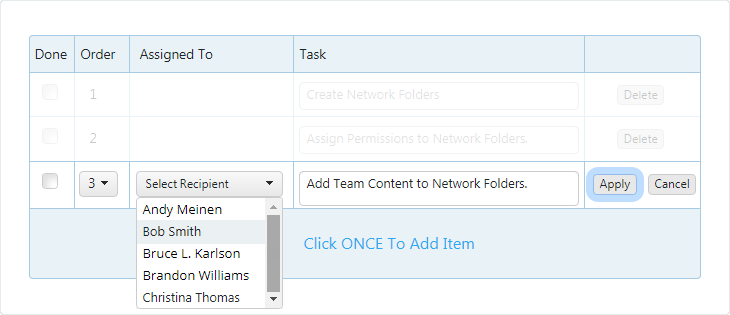
The checklist item will collapse down allowing you to edit; click Apply when finished.
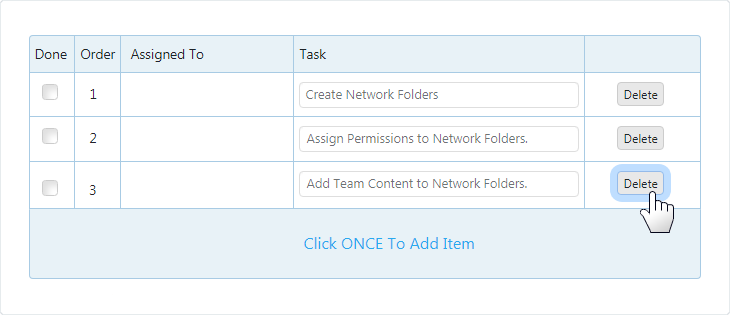
Click the Delete button in the same row of the item you want to remove.
Creating a survey helps you ask a question in an organized way and assists in collecting response data from multiple individuals.
To access, click Survey from the Left Navigation bar.
To create a New Survey follow the procedure outlined below:
Click Create New Survey radio-button.
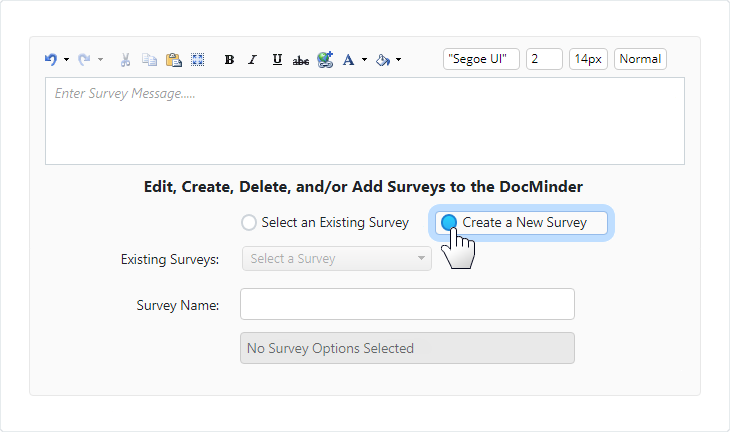
Type in the name of your Survey into the Survey Name textbox.
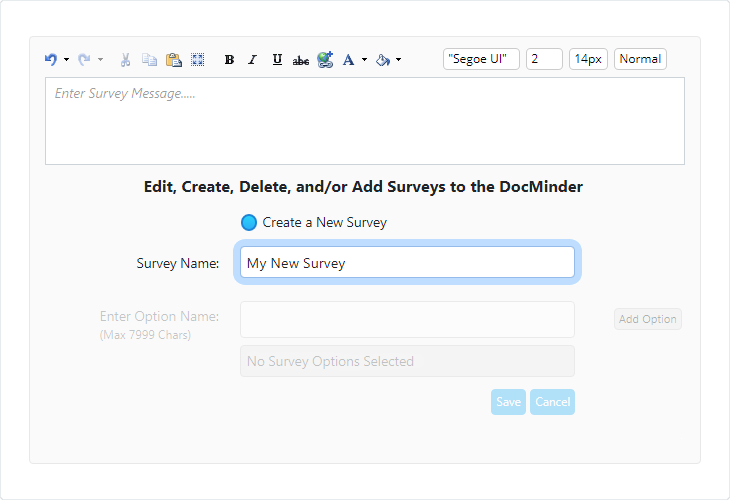
Type in an option into the Enter Option textbox; then click Add Option button.
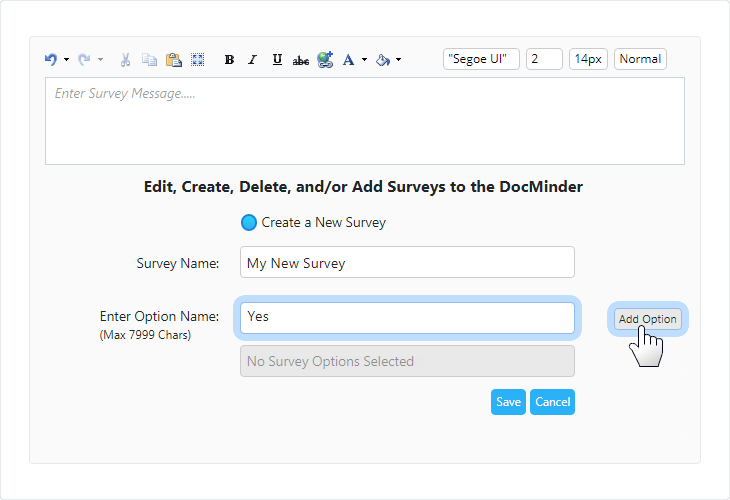
Repeat to add more options.
Click the Save button.
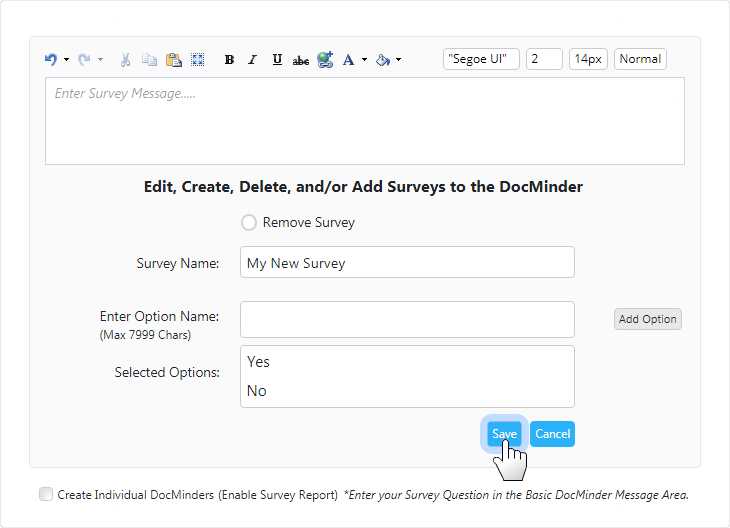
Click on the Select Existing Survey radio-button.
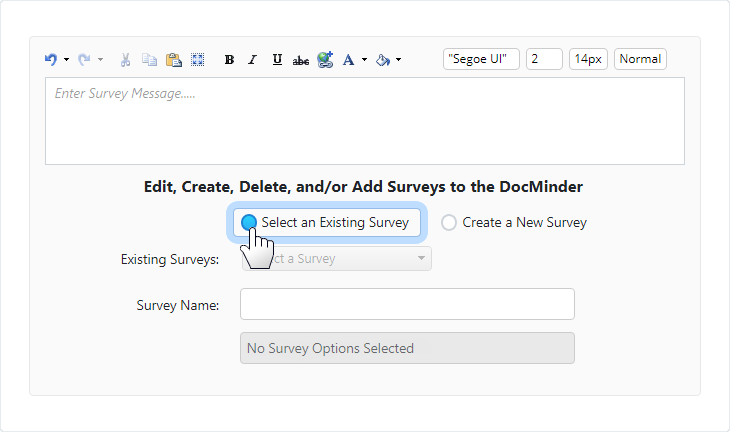
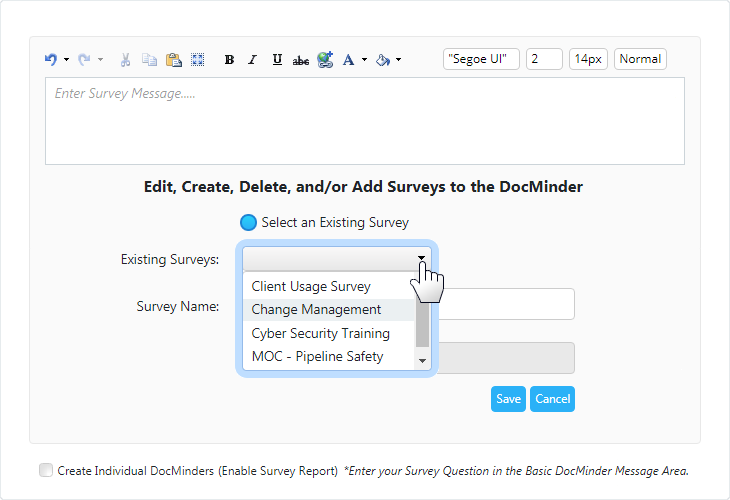
Select an existing survey from the Existing Surveys dropdown.
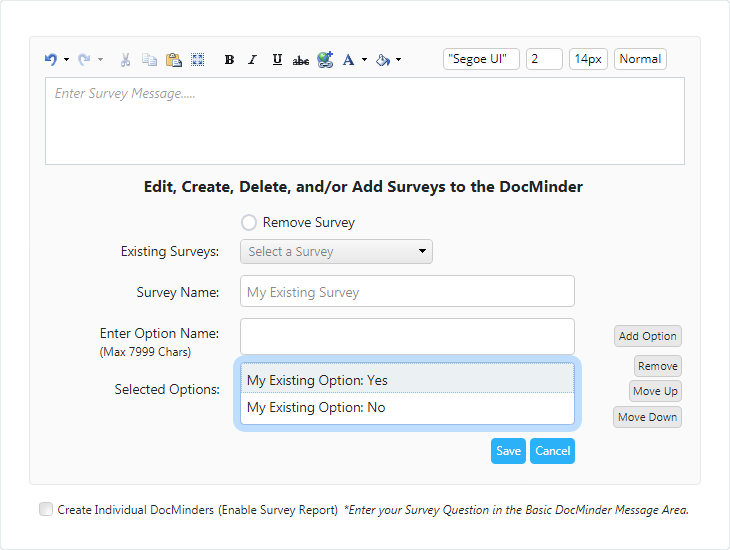
From here, you can review the Selected Options for the existing survey.
Add more survey options in the Enter Option textbox and click Add Option.
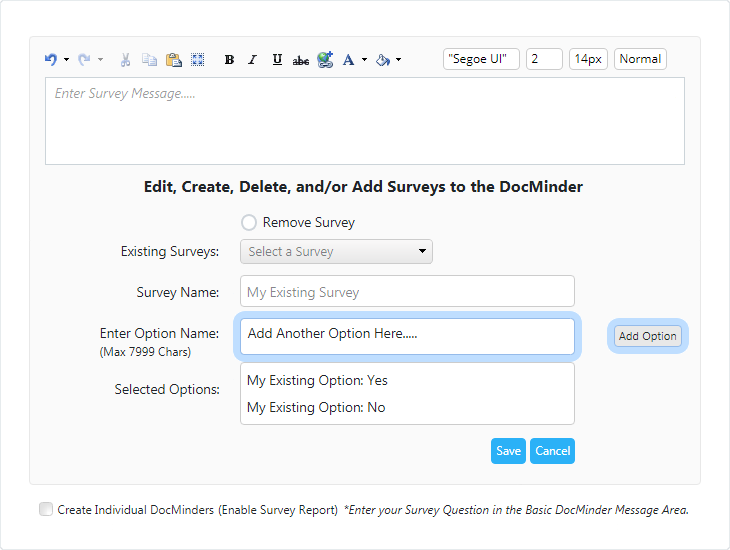
The new option will now appear inside the Selected Options box;
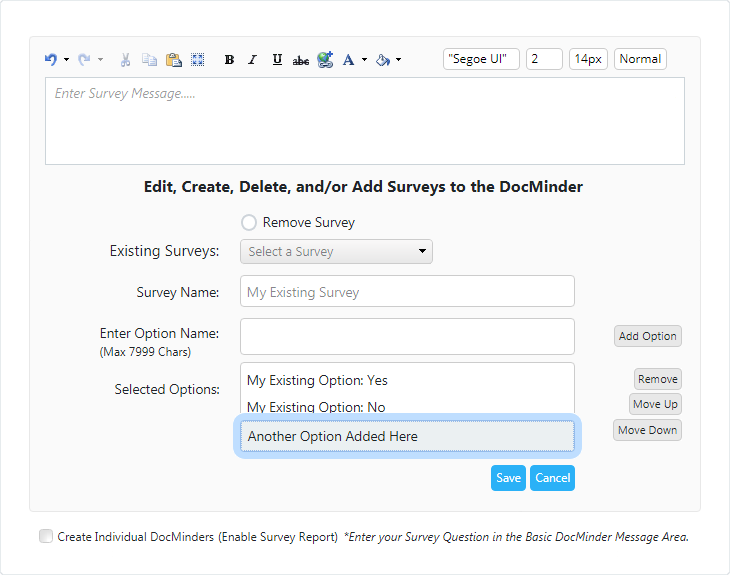
Change the order of your options by clicking the Move Up and Move Down buttons.

To delete an option from your survey, select the option and click the Remove button.

Settings allows users to change their individual DocMinder Settings to define specific preferences for past-due items, escalation, document uploads and more.
To access; click Settings from the Left Navigation bar.
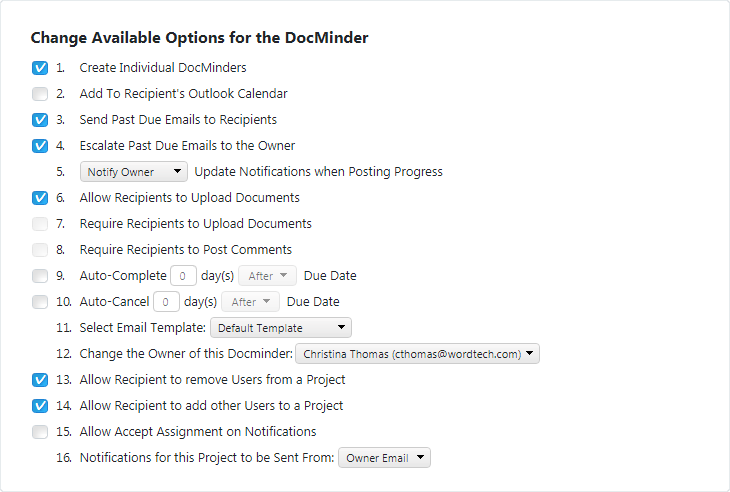
| #1 | Create Individual DocMinders
If checked, DocMinder items created by you with multiple Recipient(s) assigned on the TO line, will receive their own individual DocMinder for completion.
|
|---|---|
| #2 | Add to Recipient's Outlook Calendar
If checked, Recipient(s) you assign to DocMinder items will have their DocMinder item added to their Outlook calendar.
|
| #3 | Send Past Due Emails to Recipients
If a DocMinder item is not completed by it's due-date., the assigned Recipient(s) will receive a past-due notification every day until the DocMinder is complete.
|
| #4 | Escalate Past Due Emails to the Owner
If checked, DocMinder items not completed by the due-date the Owner/Creator of the DocMinder will receive a past-due notification.
|
| #5 | Update Notifications when Posting Progress
If checked, you will receive email notifications when Recipient(s) you assign add comments, upload documents, complete a checklist item, status changes, etc., to DocMinders you have created.
|
| #6 | Allow Recipients to Upload Documents
If checked, will allow Recipient(s) you assign to upload documents to the DocMinders you created.
|
| #7 | Require Recipients to Upload Documents
If checked, Recipient(s) will have to upload a document in order to complete their DocMinder item.
|
| #8 | Require Recipients to Post Comments
If checked, Recipient(s) will have to add comments in order to complete their DocMinder item.
|
| #9 | Auto-Complete
If you want to automatically complete the DocMinder a number of day(s) before or after the due-date. Check the box and type a number (e.g., 3) into the text-box; then select the dropdown and choose Before or After.
|
| #10 | Auto-Cancel
If you want to automatically cancel a DocMinder in a number of day(s) before or after the due-date. Check the box and type a number (e.g., 3) into the text-box; then select the dropdown and choose Before or After.
|
| #11 | Select Email Template
Click the dropdown to select an email notification template - email notification templates are emails notifications that Recipient(s) receive informing them of their task.
|
| #12 | Change the Owner of this DocMinder
Click the dropdown to select a different Owner for this DocMinder.
|
| #13 | Allow Recipient to remove Users from a Project
If checked, Recipients assigned will have the ability to remove (e.g., un-assign) others from the DocMinder. (Recipient must be a licensed user in order to remove others from a DocMinder).
|
| #14 | Allow Recipient to add Users to a Project
If checked, Recipients assigned will have the ability to add (e.g., assign) others to the DocMinder. (Recipient must be a licensed user in order to add others to a DocMinder).
|
| #15 | Allow Accept Assignment on Notifications
If checked, and when multiple Recipient's are assigned, each will receive an email notification that includes an Accept Assignment button which allows them to take ownership for completing the DocMinder.
|
| #16 | Notifications for this Project to be Sent From:
Click the dropdown and select who the email notifications are sent from (e.g., Owner's email or System account).
|
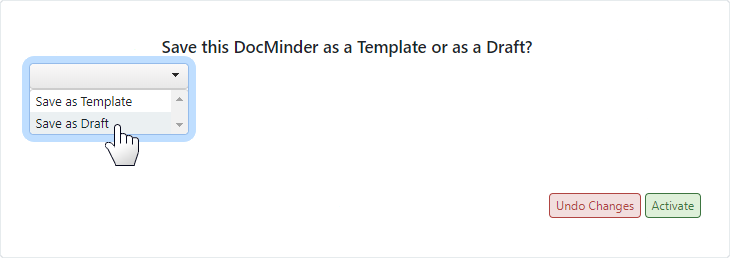
DocMinder® allows you to create a new task and Save As a Template; or Save As a Draft so that you can come back later to finish setting up the task.
To access; click Save As from the Left Navigation bar.
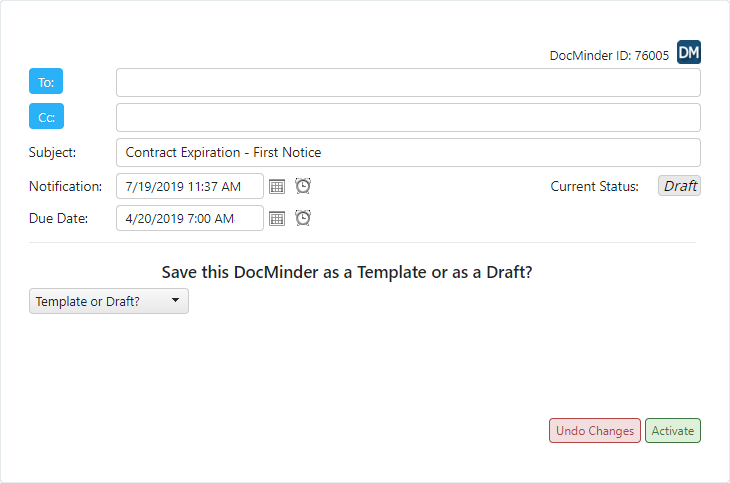
When you Save As Template your task can include assigned Recipients, Subject, Message/Body, etc., and project settings (e.g., notifications, escalations, etc.) are preserved within the template.
To access; select Save As Template from dropdown.
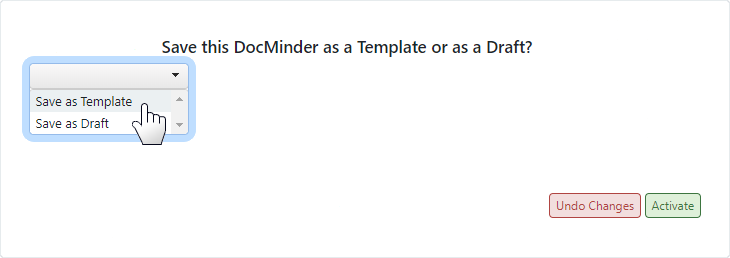
The Save As Template option allows you to share the template by granting access to a selected DocMinder® Group or; you can restrict access to Personal.
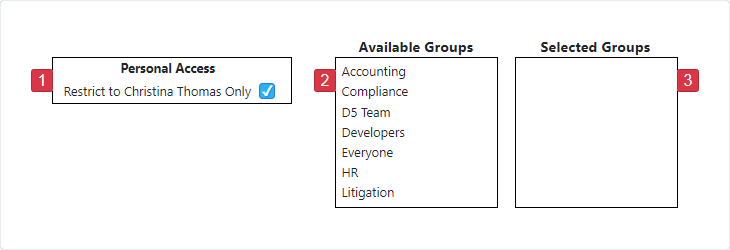
| 1 |
Check the Personal Access box to restrict access to template. |
|---|---|
| 2 |
Displays the Available Groups you can select to provide access to the template. |
| 3 |
Displays the Selected Groups that have access to the template. |
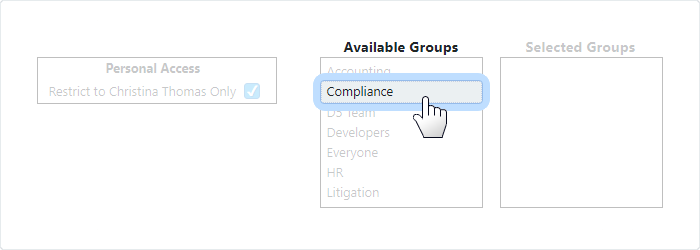
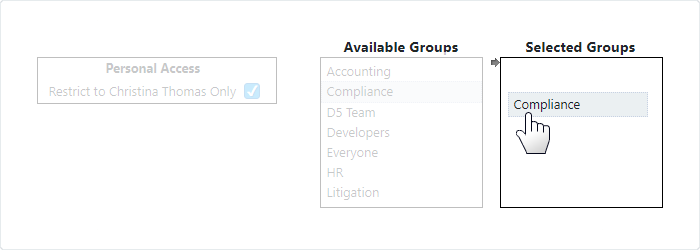
To grant access to a DocMinder® Group; follow the procedure listed below.
-
Select a Group from the Available Groups listbox on the
Left; -
Click Hold and drag onto Selected Groups listbox on the
Rightand drop.
When you Save As Draft your task you can finish task setup (e.g., assign Recipients, add documents, etc.) and activate the task at a later time.
To access; select Save As Draft from dropdown.
The DocMinder Saved message will display along with the task's ID.

