DIRM Administration Guide
This guide describes the configuration of DIRM, and is intended for the configuration and administration of the software.
If you run into difficulties or have a question, you can email Technical support at support@wordtech.com, or contact us by phone at (913) 722-3334.
Please refer to the documentation in the Knowledgebase for more information.
DIRM is a program that queries your iManage Records Manager (IRM) system to create a workflow in DocMinder®that allows user(s) to review records for a Retention Event Type including the ability to Approve or Disapprove those records for processing.
The DIRM program is an executable that runs from the DocMinder®server and user desktop(s)/workstation(s).
Locate the directory that contains the DIRM.exe and copy that to a location on the workstation or server you want to run from.
Workstation:
If ran from a workstation; a registry key needs to be added to point to the DocMinder®system.
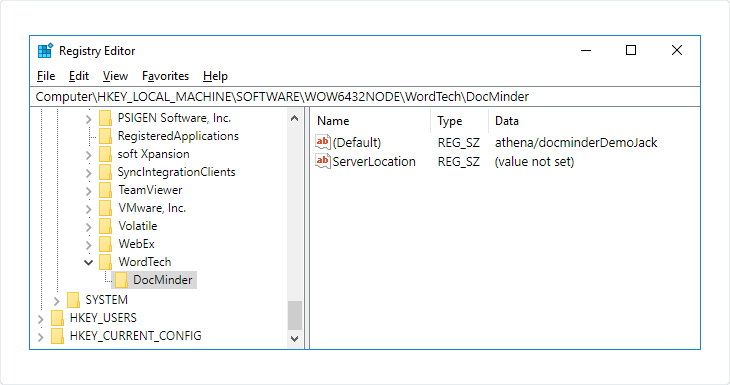
If running from the DocMinder®server, the regkey should already be in place.
To start the program run the DIRM.exe
When you first open the DIRM program, you need to complete the configuration section.
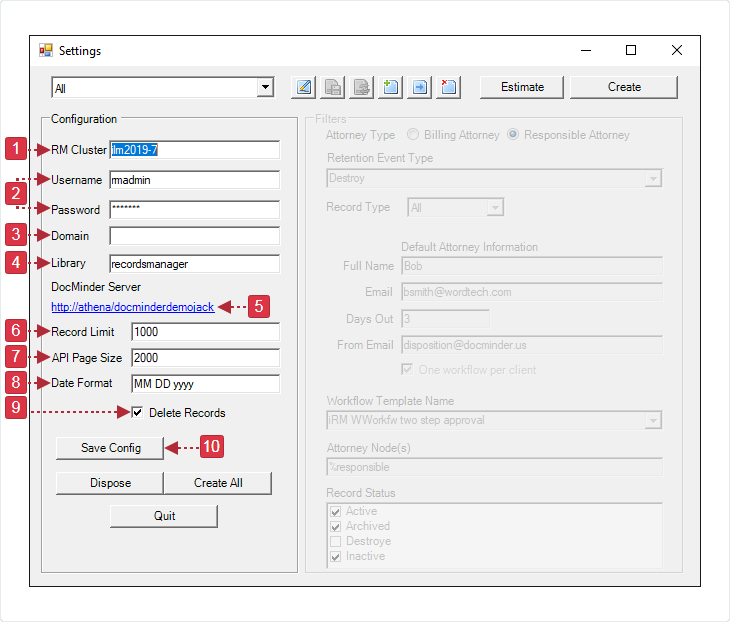
| 1 |
RM Cluster The RM cluster you want to pull records from. |
|---|---|
| 2 |
Username/Password Of the IRM user with rights to run the disposition process and must have the permission to "View Federated Records" assigned. |
| 3 |
Domain The configuration setting for domain is not required. |
| 4 |
Library The library where your iManage cluster resides. |
| 5 |
DocMinder Server Displays the server that DIRM is connected to for workflows, and comes from the configuration of the registry key. Click on the Link to access the DocMinder®system. |
| 6 |
Record Limit Enter the maximum number of records to be processed per workflow. This is the number of records the workflow will present the recipients of the workflows on the web page where the approvals are done. Keep the number to a reasonable amount for users. The process will keep one Client/Matter together even if it hits this number while reading through a Matter. The process will stop at the end of the Matter and start a new workflow with the next Matter for the Client. |
| 7 |
API Page Size The number of records read at a time during the execution of the query/database read. |
| 8 |
Date Format determines how the date that will be displayed on the records review page. |
| 9 |
Delete Records Check this box to have documents processed in IRM during the DISPOSE process. If this box is not checked, the status of the records will not change. |
| 10 |
Save Config Click the save config button to save your configuration settings. |
From the Filters, you can create a configuration to pull records from IRM. You can create and save as many different configurations as needed.
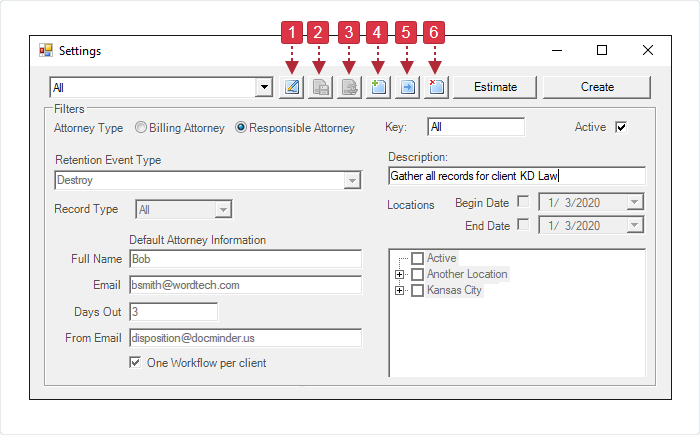
The Filters can be located near the top of the DIRM settings window.
- 1 Edit: click to make changes to a configuration;
- 2 Save: click to keep any changes made to a configuration;
- 3 Cancel: click to exit without saving changes to a configuration;
- 4 Add: click to create a new configuration;
- 5 Copy: click to replicate a configuration;
- 6 Delete: click to remove a configuration;
To create a New Filter; perform the following actions listed below:
- Click the Add Filter button.

- Enter a name into the Key textbox provided; letters and numbers, no spaces.

- Check the Active checkbox;

- Enter the Description of the filter into the textbox provided;
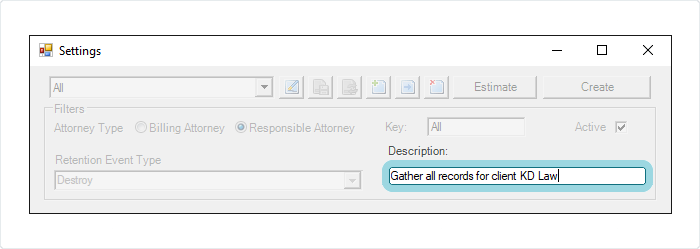
- Choose the Option(s) for your filter:
- To finish; click the Save Filter button.

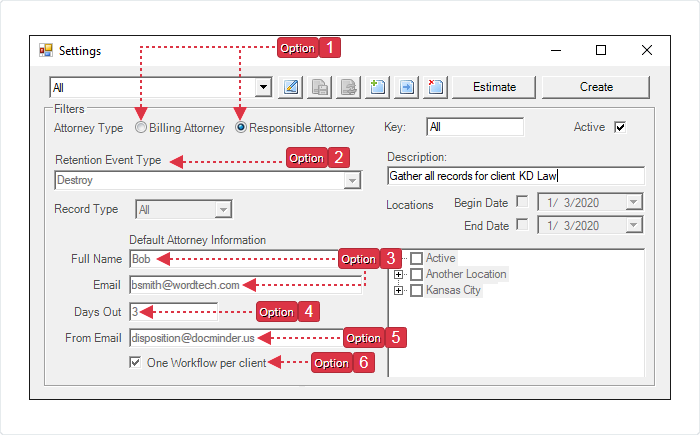
| 1 |
Records are pulled from IRM and grouped for the workflow by selecting the Attorney Type (e.g., Billing or Responsible Attorney). |
|---|---|
| 2 |
Choose a Retention Event Type to process. The items in the dropdown list are pulled from iRM. Choose an item from the dropdown list. |
| 3 |
Workflows are assigned based on the Attorney Type radio button selected and found in the records pulled. If no Responsible or Billing attorney exists in either of the Records, Folder, Matter or Workspace, the user listed in the Default Attorney Information will receive the workflow email notifications. The user is not required to be an iManage user; but they are a DocMinder user. |
| 4 |
When a workflow is created a due date is selected. The due date is when the workflow step(s) are expected to be completed by the assigned recipients. If workflow step(s) are incomplete by the number listed in the Days Out textbox, past-due email notifications are sent until the Workflow Step(s) are complete. |
| 5 |
The workflow email notifications are sent from the email listed in the From User Email textbox. This is a user of DocMinder who has creation rights. |
| 6 |
If the filter pulls multiple Clients; check the One Workflow Per Client checkbox to create separate workflow(s) for each Client. This allows you to add a step in the workflow and notify the Client that there are records ready to be destroyed. |
Workflow Template Name
By default, the DocMinder Workflow for IRM, comes with two (2) workflows:
-
One step approval – the IRM Workflow one (1) step approval process is configured to send to the Responsible Attorney only.
-
Two step approval – the IRM Workflow two (2) step approval process is configured to send to the Responsible Attorney first, and then to the Records Manager.
The dropdown list for Workflow Template Name is generated by DocMinder, and identifies any workflow(s) that contain *IRM in the template's name.
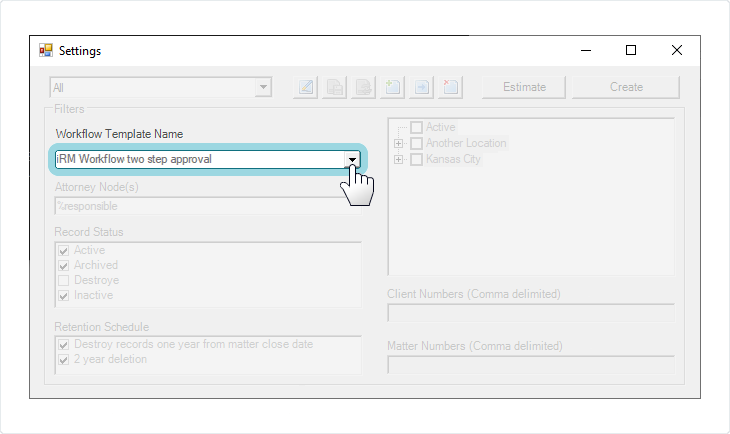
DocMinder Workflow module allows you to modify and create additional workflow processes if needed.
If you create additional workflows for DocMinder IRM, be sure to include IRM into the workflow's name, for example; IRM Workflow Process.
Attorney Node(s)
The wildcard phrase displayed for Attorney Node(s) corresponds to the workflow step's name; note the step labeled "Responsible Attorney Review" in the workflow below.
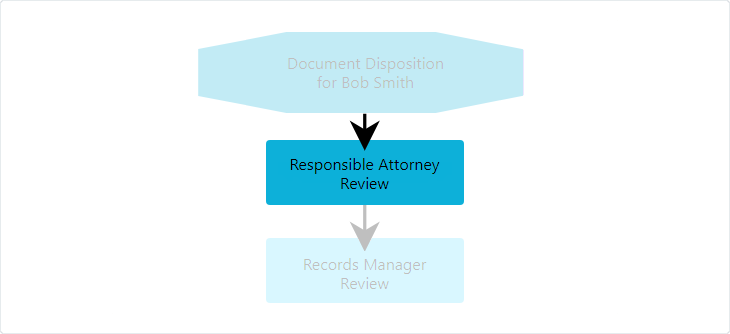
The recipient assigned to the workflow step is based on the selected Attorney Type (Billing or Responsible) and appears on the records collected by the filter.

From the Attorney Node(s) textbox, enter the exact name of the step, Responsible Attorney Review, or; the wildcard search %responsible%.
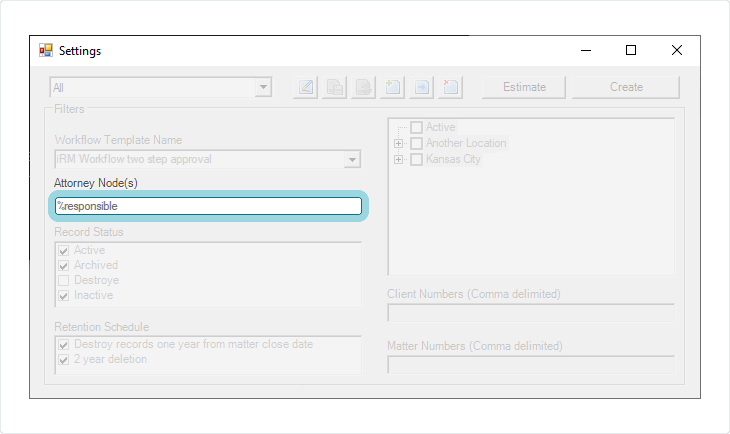
This pulls the Billing / Responsible Attorney information from the records collected by the filter and assigns them to the Responsible Attorney Review workflow step.
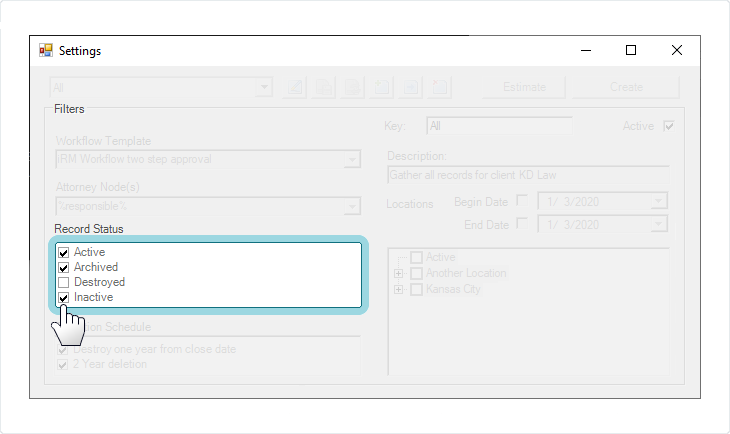
Check which Record Statuses should be collected in the list.
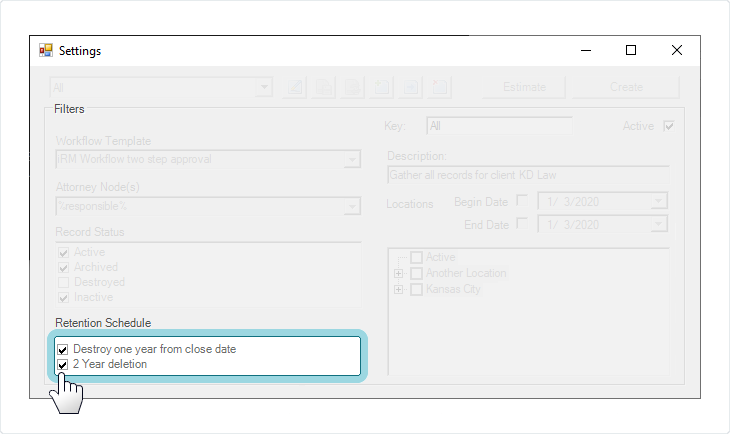
Check which Retention Schedules should be collected in the list.
Checking one or more Locations here will collect records with that location only; if Locations are un-checked, All Records will be collected.
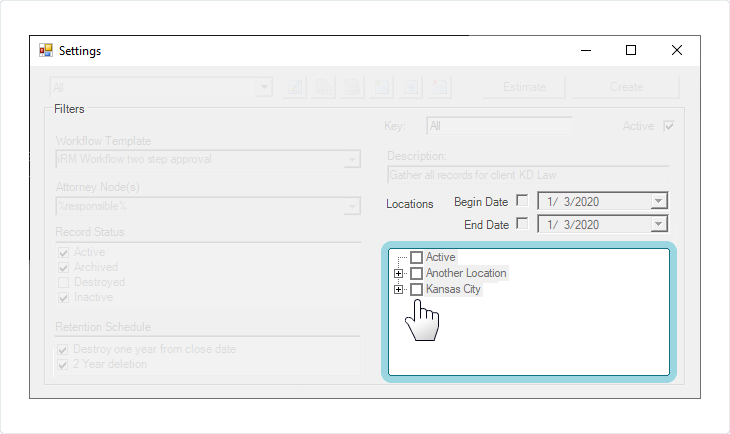
Click the Save Filter button once all choices are made. The filter is available to Estimate results and Create the processes.

The Estimate and Create buttons are found to the right of the Filter buttons.
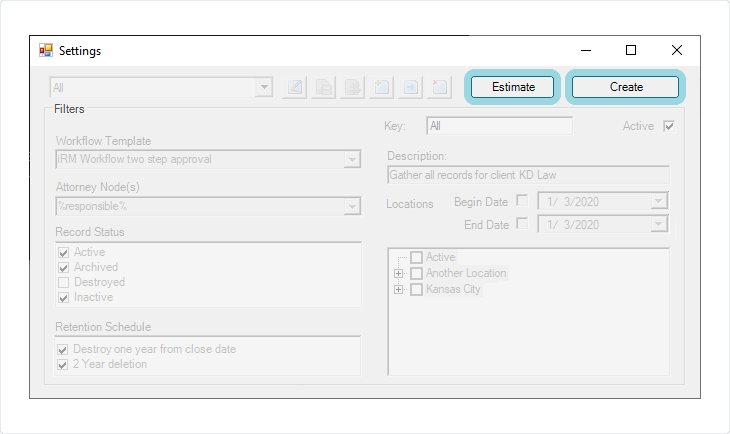
Select a filter from the dropdown and choose whether you want to run a test of the filter's output or proceed with creating the workflows.

The Estimate button allows the process to go through the system based on the filters.

Once the Estimate is complete, a dialog box will display the total number of items (e.g., records) found based on the selected filter.
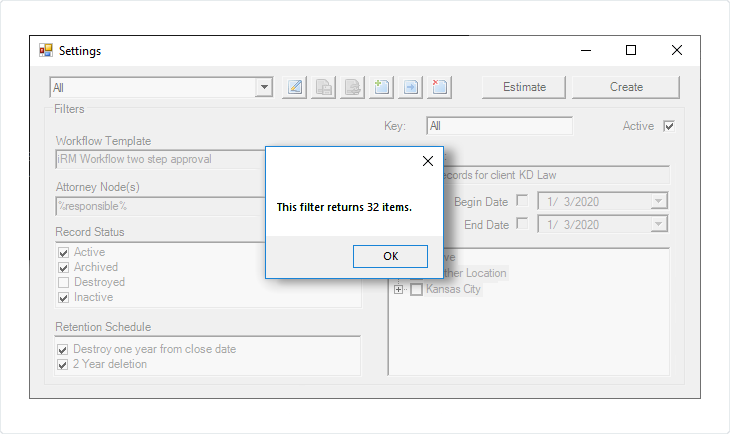
A text file is also created that lists all records pulled for your review.
The text file is located in the same directory as the DIRM.exe program, and labeled as Records_Date_and_Time.txt (e.g., Records_20200121092917.txt)
When you click the Create button, a workflow is produce based on the selected filter. Note: any records in a workflow from a previous process, are not included.

The Create All, Dispose, and Quit buttons are found under the configuration section in the left pane of the settings window.
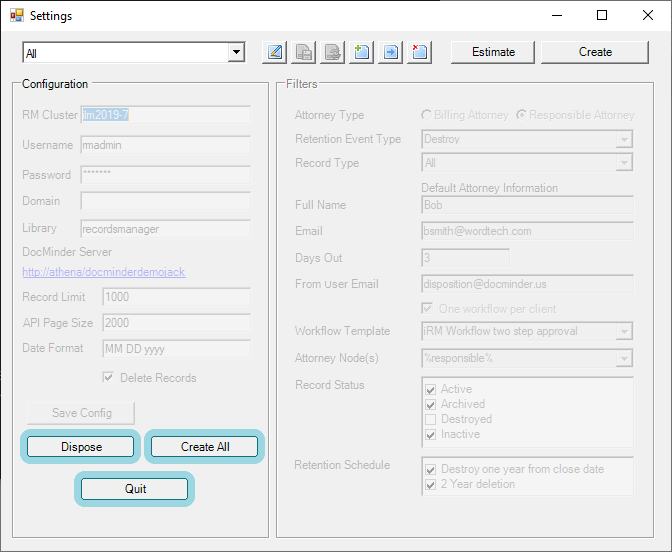
The Create All button runs the process that creates the workflow(s) for All Filters that have been configured and saved.
Click the Dispose button to run the disposal process.
Any records that are set to be destroyed by any workflow(s) will be processed along with any workflow(s) that have ran since the last-time disposal process was performed.
The disposal process can also be set up to run automatically as Scheduled Tasks through command line switches. For more information check out the section on Command Line Switches.
After disposal is complete, information is sent to iManage to remove the documents and then to IRM with an audit trail that the documents have been destroyed and includes a reference number to the workflow.
If you're working with physical records, SharePoint (e.g., anything other than iManage documents), an extra workflow step may be needed to require confirmation that the physical or SharePoint site records are destroyed.
Click the Quit button to exit the DIRM program.
During the testing phase it is possible to prevent the DIRM program from sending outgoing email to the attorney(s) listed.
A group must be created in DocMinder that includes Test in the group name (e.g., DIRM_Test) and then add users to the group.
For more information check out the docs on Groups.
To restrict email during the test phase; perform the following steps listed below:
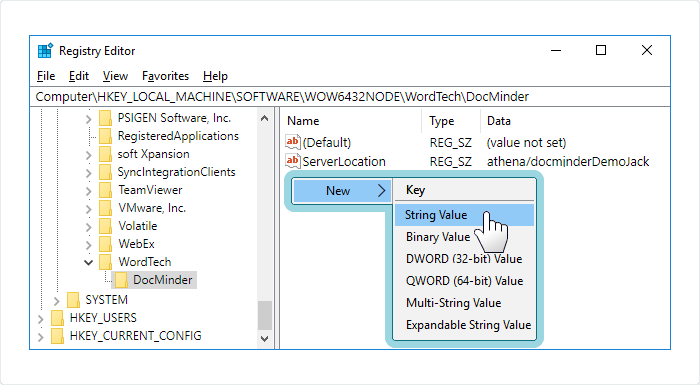
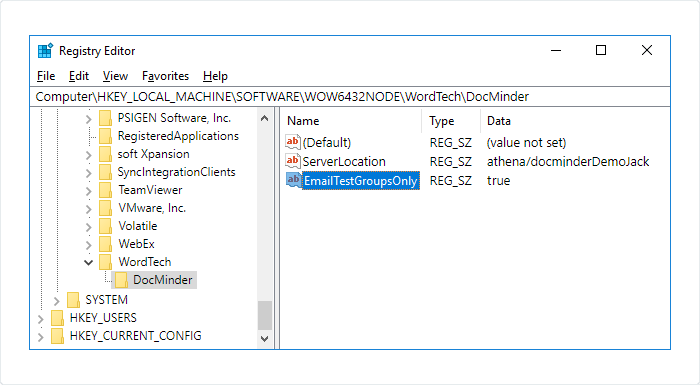
- In Registry Editor locate the WordTech folder expand it, and select DocMinder;
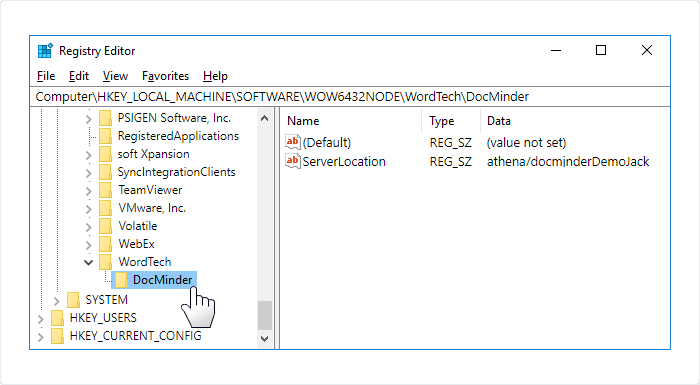
- Right-click in the blank area, select New >> String Value and enter the name as EmailTestGroupsOnly;
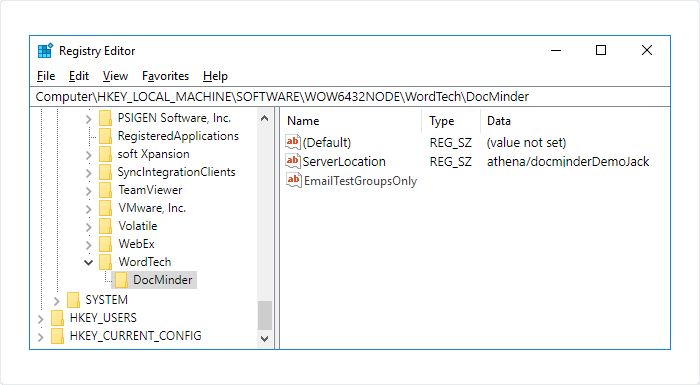
- The New String is present but will have no value in the data field;
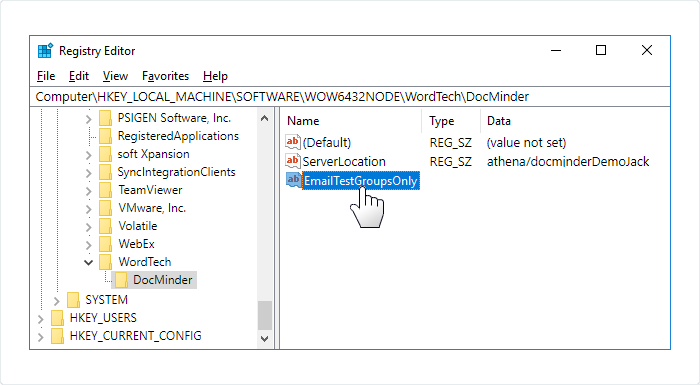
- Double click the String to open the edit dialog box;
- From the edit dialog box, set the Value to True;
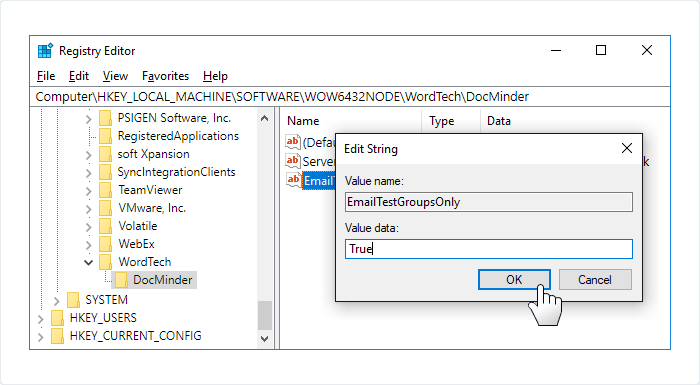
- With this key in place, only members of the Test group in DocMinder will receive email(s) during the testing phase.
Through the Windows command prompt you can use Command Line Switches to automatically run the create process as Scheduled Tasks.
What are command line switches
A command line switch is a modifier that is added to an .exe file. The switch consists of a forward slash and a word or abbreviation that indicates the switch's action.
For example, a switch for the Outlook.exe file would look like this:
In the example above, the switch tells Outlook to launch without the preview pane.
Switch names cannot be abbreviated and are not case-sensitive. However, their parameters are sometimes case-sensitive.
Available DIRM Switches:
| dirm.exe |
No parameters, setting form shows. |
|---|---|
| dirm.exe -c ALL |
Process All Filter(s) and creates workflow(s). |
| dirm.exe -c Key1 |
Process only the Filter with the key of Key1 and create workflow(s). |
| dirm.exe -c Key1 Key2 Key3 |
Process the Filter(s) with the key of Key1, Key2 and Key3 and create workflow(s). |
| dirm.exe -d |
Dispose record(s). |
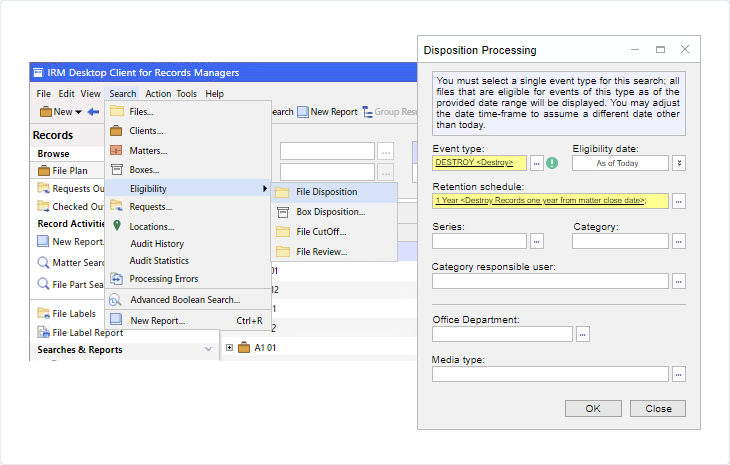
In IRM you can search for available records by Event Type and Retention Schedule; all files that are eligible for events by type and the date range provided will display. You can adjust the date timeframe to simulate a different date.
To run a query of IRM to see if there are records available for the event type and retention schedule you chose in your filters:
