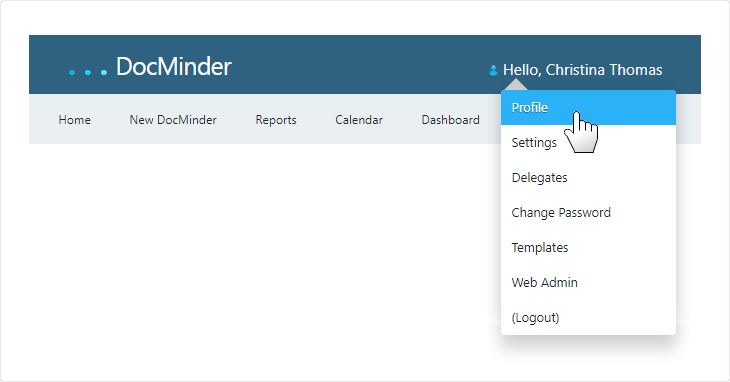
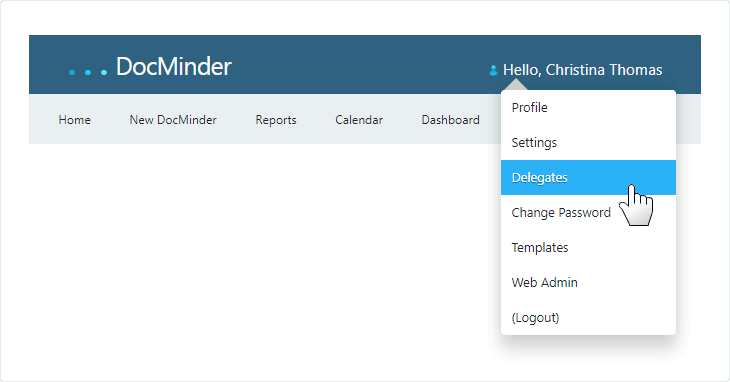
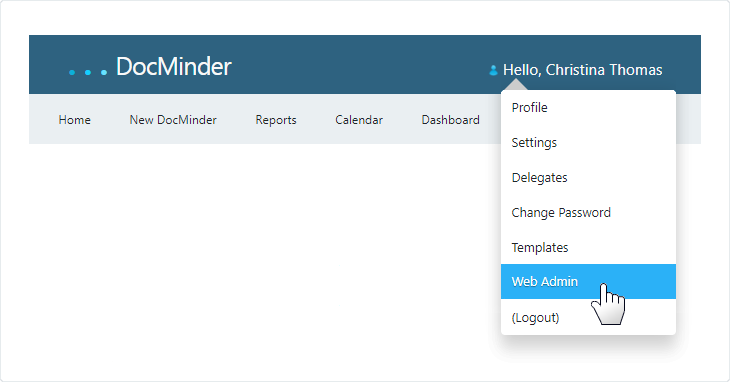
The User Profile Menu allows users to navigate to their Profile, Settings, Delegates, Change Password, Templates and Web Admin.
To access your profile, select Profile from the menu.
The user profile page displays your full name, email address, total number of tasks you are the owner of and tasks you are recipient of; user-type and access rights, along with groups and your membership within the group.
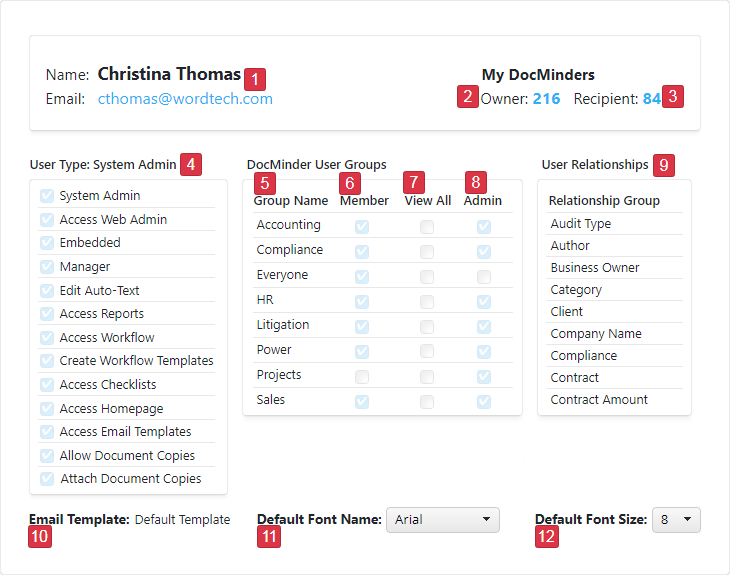
| 1 | User Info: displays the full user name and email address. |
|---|---|
| 2 | Owner (Creator): the total number of DocMinders you own (or have created). |
| 3 | Recipient (Assigned To): the total number of DocMinders you are assigned to. |
| 4 | User Type: displays your user type along with access permissions. |
| 5 | Group: displays the name of group(s) you are in. |
| 6 | Member (of Group): if checked, you are a member of the group. |
| 7 | View All (of Group): you can view all tasks created by anyone in the group. |
| 8 | Admin (of Group): you can view all, and edit all tasks created by anyone in the group. |
| 9 | Relationships: displays the relationships you have access to. |
| 10 | Email template: displays the email template you are currently using. |
| 11 | Default Font name: displays the font name you are currently using. |
| 12 | Default Font size: displays the font size you are currently using. |
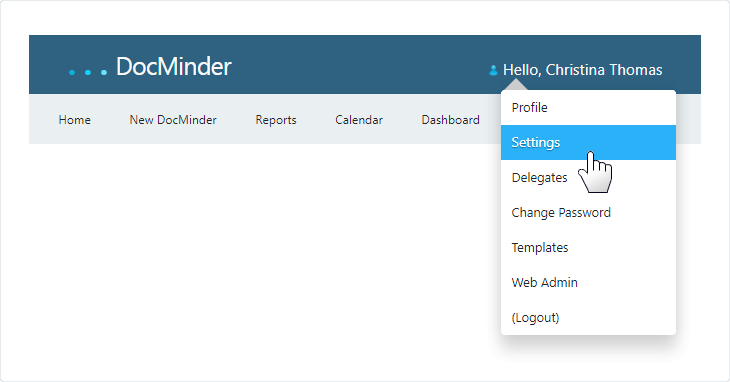
The default Settings are typically setup by your DocMinder® administrator; however, you can adjust your Settings by turning the setting on or off.
To access; select Settings from the Profile menu.
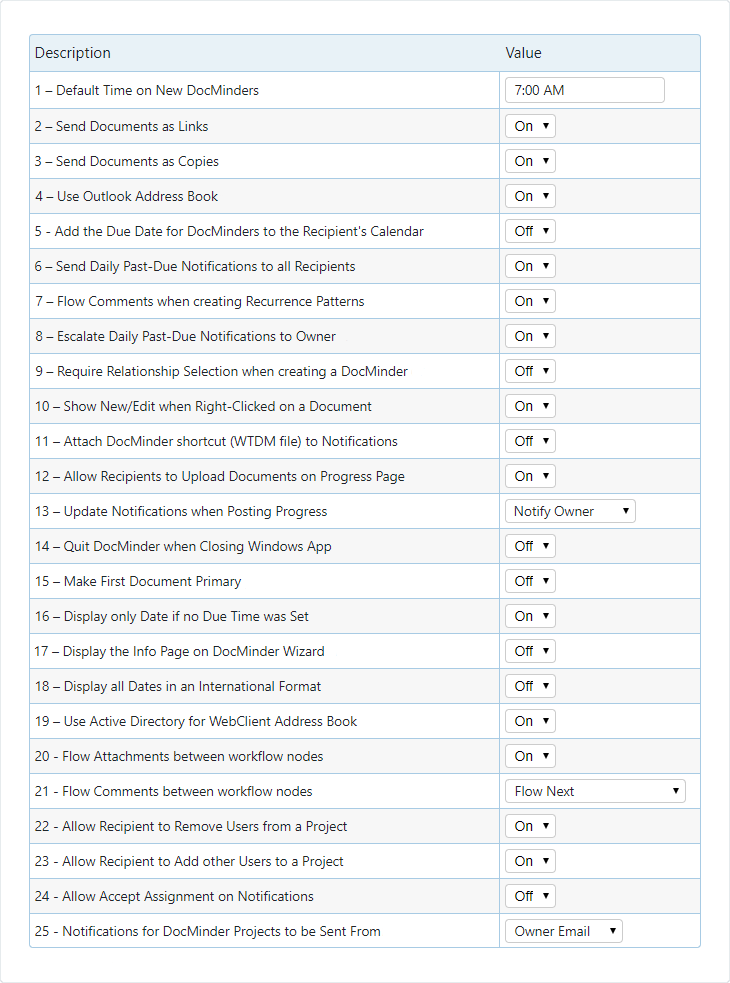
| 1 - Default Time | This is the time of day DocMinder tasks are sent each day; Default Time is usually set for 12:00 A.M. |
|---|---|
| 2 - Document Links | Allows you to attach a document from a shared source (i.e., SharePoint, DM System, and Windows Files) as a Document Link. Recipients must have access to the shared source where the document is stored in order to open the document. |
| 3 - Document Copies | Allows you to attach a Document Copy of the document instead of a link. With a copy, recipient(s) do not need access to the shared source where the document is stored. |
| 4 - Outlook Address-book | Allows you to use your Outlook Address Book to assign recipient(s). |
| 5 - Due Date to Calendar | Sends a meeting invite to the assigned recipient(s) and is added to the recipient's Calendar with the Due-Date. |
| 6 - Daily Past-Due | Sends recipient(s) Daily Past-Due notifications every day until the task is completed. |
| 7 - Flow Comments | Flows Comments from a Recurrence in the pattern to the next recurrence in the pattern. |
| 8 - Escalate Past-Due | Sends an Escalated, Past-Due notification to the Owner/Creator of the task. |
| 9 - Relationship | Will not allow a user to send a task unless a Relationship field has been added to the task. |
| 10 - New/Edit | Anytime you right‐click on a document from your shared source (SharePoint, DM System or Windows Files) you will have the option to select DocMinder (e.g., New/Edit) from the short‐cut windows menu. |
| 11 - WTDM File | (WTDM=Word‐Tech‐Doc‐Minder) is a short‐cut to open and edit a DocMinder. If this setting is ON, all DocMinders will be sent with the WTDM attachment. |
| 12 - Upload Documents | Allows recipient(s) to Upload Documents to their task. If a recipient uploads a document it is accessible from the application and from the completion notification. |
| 13 - Update Notifications | An Update Notification is sent out to the responsible individual(s) informing them of the action that was performed. Options are: Notify Owner; Notify All or No Notifications. |
| 14 - Quit | Closes out of DocMinder completely. |
| 15 - Primary Document | If you have attached a document from a document management system, you can pass associated meta-data from the document by making it the Primary Document. |
| 16 - No Due-Time | If a Due-Time (e.g., 8:30 AM) was not set with the due-date (e.g., Due: March 5, 2018); only the due-date will display. |
| 17 - Info Page | Anytime you launch the DocMinder Wizard the information page will always display. |
| 18 - International Format | Displays all dates in International Format (e.g., YYYY-MM-DD). |
| 19 - Active Directory | Since Active Directory makes this data available via LDAP, you can use Active Directory to assign recipient(s). |
| 20 - Flow Attachments | Attachments of a Workflow task are carried throughout the Workflow and viewable/accessible by other recipients assigned to the Workflow tasks. |
| 21 - Flow Comments | Comments that are made by a recipient for a Workflow task are carried throughout the Workflow and viewable by other recipients assigned to the Workflow tasks. |
| 22 - Remove Users | If On; a Recipient can Remove Users from a Project they're assigned To. |
| 23 - Add Users | If On; a Recipient can Add Users to a Project they're assigned To. |
| 24 - Accept Assignment | The Accept Assignment allows a Recipient to click the button from an email notification. |
| 25 - Notifications Sent From | Select whether Notifications are sent from Owner Email or System Email. |
To Delegate your tasks means that for a certain period of time, you will grant another user the authority to complete tasks that are assigned to you.
This can be particularly useful if you are unavailable (e.g. vacation, sick leave, etc.).
To access; select Delegates from the Profile menu.
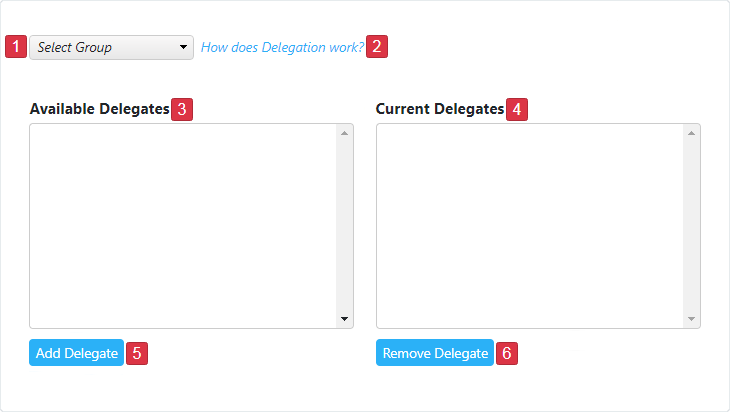
| 1 | The Select Group dropdown displays any DocMinder® created groups. |
|---|---|
| 2 | The How Delegation Works? link displays helpful information about Delegation. |
| 3 | Members of a selected Group display in the Available Delegates listbox on the |
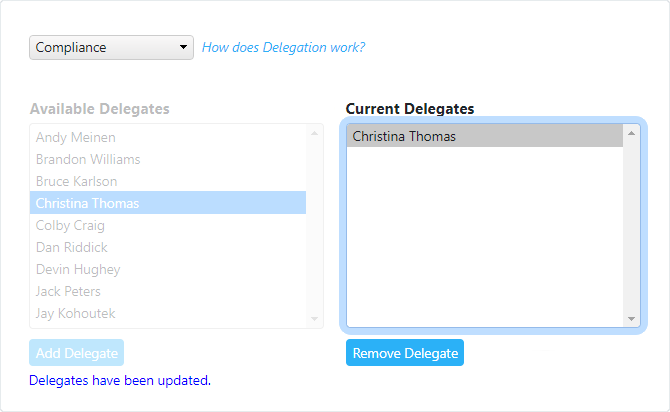
| 4 | Current Delegates display in the Current Delegates listbox on the |
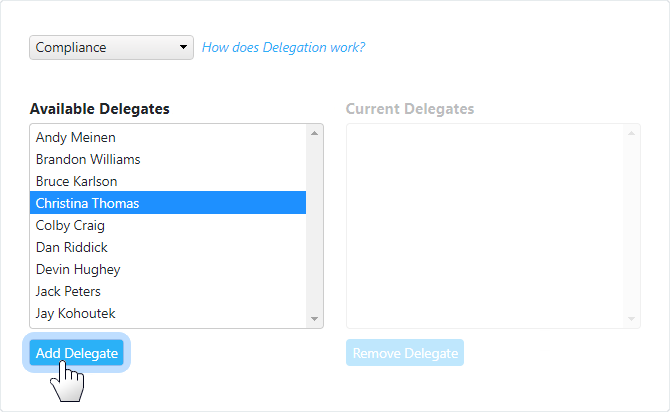
| 5 | To add a Delegate; click the Add Delegate button on the |
| 6 | To remove a Delegate; click the Remove Delegate button on the |
To view delegation information, click the How does Delegation Work? link.
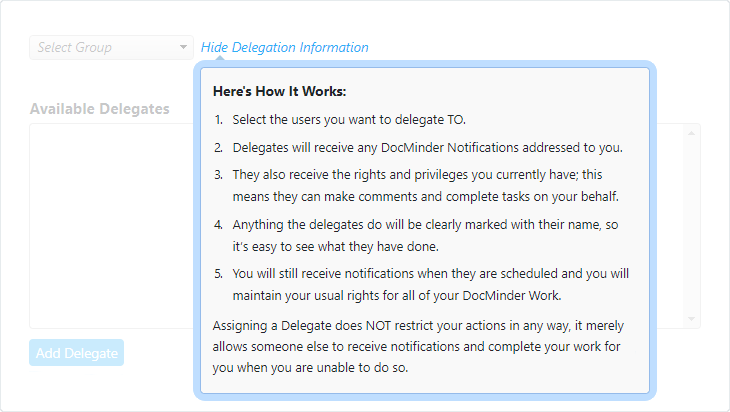
To add a Delegate; follow the procedure listed below.
- Select a Group from the dropdown;
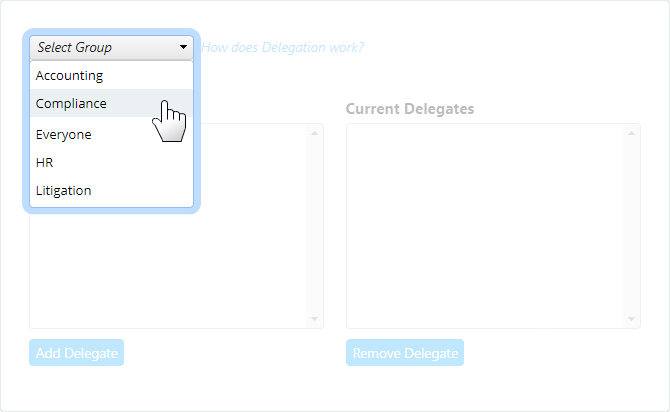
- Group Members are populated into the Available Delegates list-box on the
Left;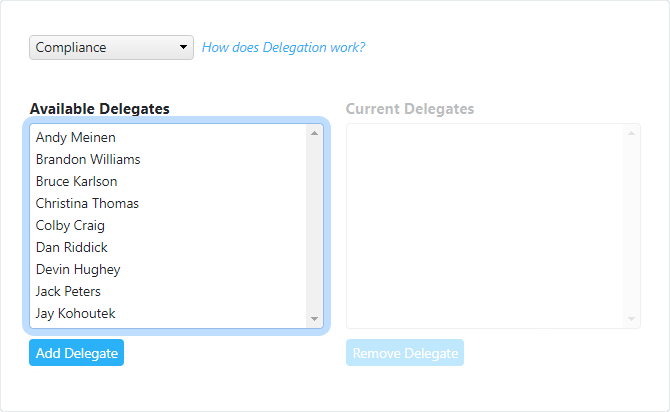
- Select a Member from the Available Delegates list-box and click Add Delegate;
- The selected Delegate will now appear in the Current Delegates list box.
To remove a Delegate; follow the procedure listed below.
- Select a Group from the dropdown;

- Select a Member from the Available Delegates listbox;
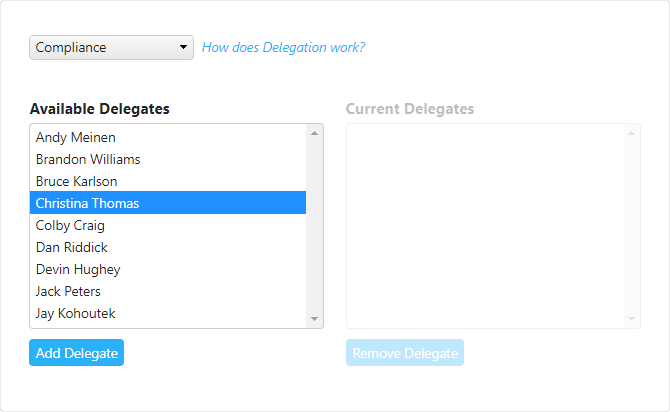
- Click the Remove Delegate button under Current Delegates on the
Right;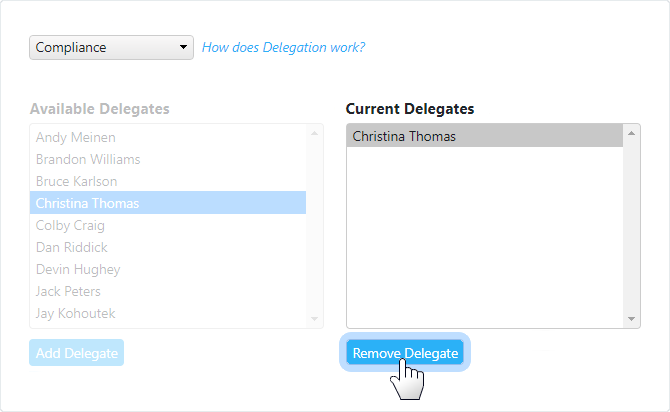
- The Delegate is now removed from the Current Delegates listbox.
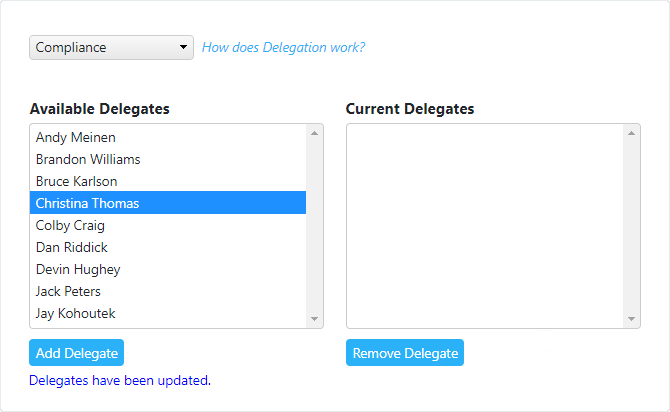
The Change Password profile item enables users to change their DocMinder® password using a self-service process. If you forget your password, you can reset it from the login screen by clicking on the Forgot Password link.
To access; select Change Password from the Profile menu.
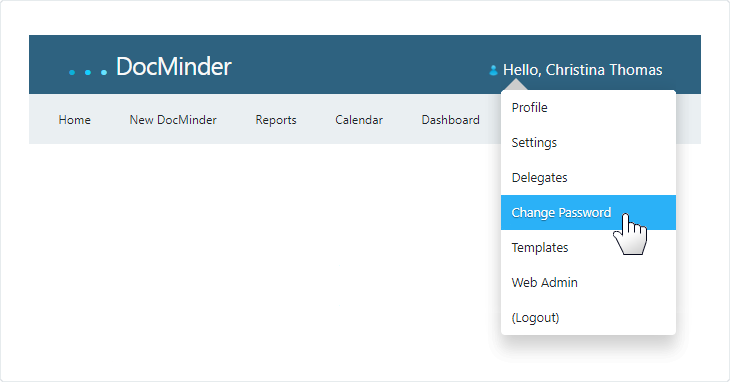
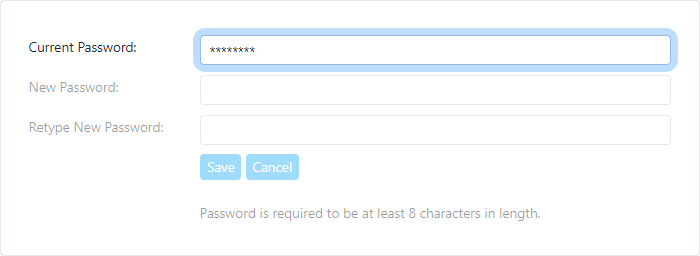
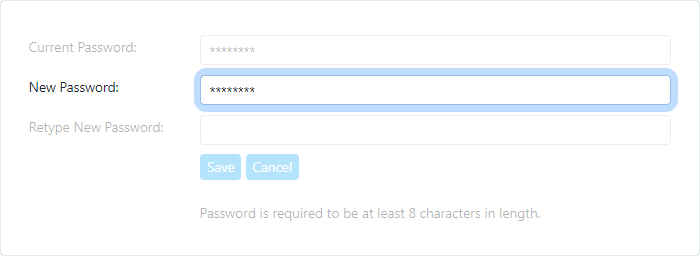
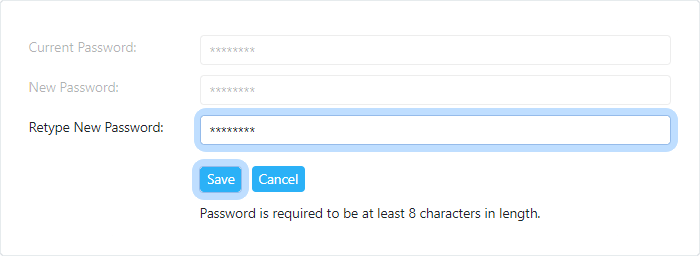
To Change Password; follow the procedure listed below.
- Type in your Current Password;
- Type in your New Password;
- Retype New Password; and then click, Save.
Create custom templates for common workflows and tasks to save time on future project setup and ensure that everyone is following the right process.
You can update your templates as you refine your processes and learn from past projects.
To access; select Templates from the Profile menu.
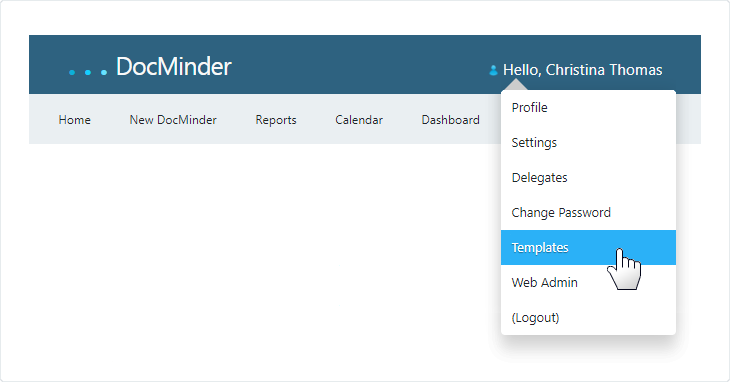
The Templates area has two (2) sections:
- The
leftsection displays all current Templates in your system. - The
rightsection displays Template Features (e.g., assigned recipients, message, attached documents, etc.).
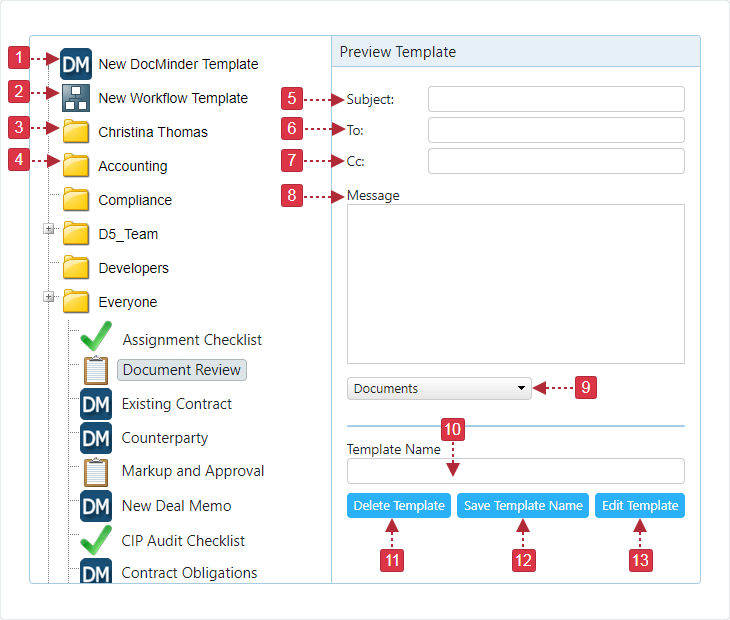
| 1 | Select the New DocMinder® Template to create a New Basic Task. |
|---|---|
| 2 | Select the New Workflow Template to create a New Blank Workflow. |
| 3 | Templates created by a User will display in their User_Name Folder. |
| 4 | Templates created by Group Members display in the respective Group_Name Folder. |
| 5 | Displays the Subject line of the selected Template. |
| 6 | Displays the To assigned recipient(s) of the selected Template. |
| 7 | Displays the Cc assigned recipient(s) of the selected Template. |
| 8 | Displays the Message (e.g., instructions to complete the task) of the selected Template. |
| 9 | Click the Documents dropdown to select to view relationships of the selected Template. |
| 10 | Displays the selected Template Name. |
| 11 | Click the Delete Template button to remove a Template from the list. |
| 12 | Click the Save Template Name button if you modified a Template's Name. |
| 13 | Click the Edit Template button to modify a Template. |
For more detailed information, check out the Templates docs.
The Web Admin is a multi-user application that allows you to grant different privileges and levels of access to DocMinder® user(s) and group(s).
In order to access the Web Admin you must have Web Admin rights enabled.
To access; select Web Admin from the Profile menu.
For more detailed information, check out the Web Admin docs.