Most organizations have a process or project that occurs on a repeatable basis; to streamline the repeatable work steps, DocMinder® allows you to create project templates which can include information such as Recipients, Subject, Message, etc., and preserves all project details and configuration.
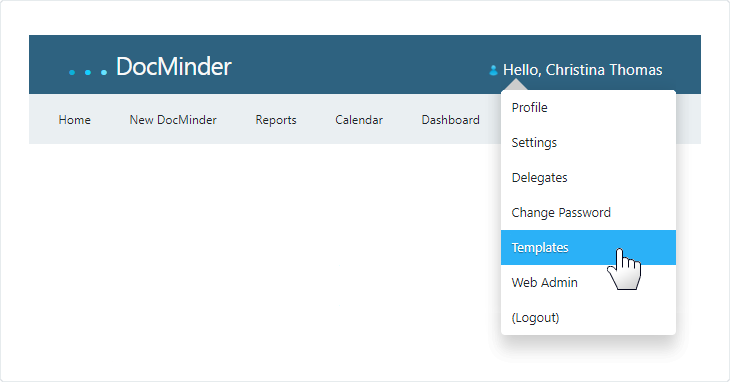
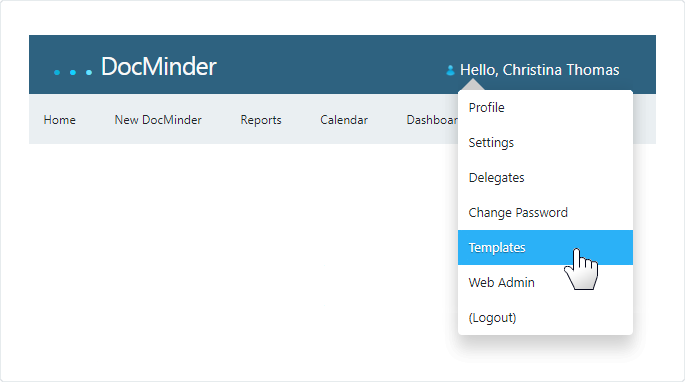
To access; select Templates from your Profile Menu;
To access Templates you must have Create/Edit Templates rights enabled.
If you do not have access and should; please contact your DocMinder® Administrator.
If you're new to Templates, here are few key terms:
'New DocMinder® Template'
Creates a template based on a Basic DocMinder® Task.
'New Workflow Template'
Creates a template with a blank Workflow.
'User_Name Folder'
Displays with your User_Name (e.g., Christina Thomas) and includes any templates created under your profile.
'Group_Name Folder'
Displays with the Group_Name (e.g., Accounting) and includes templates created for a DocMinder® Group.
'Template Security'
When you create a DocMinder® Template you can restrict access by Group and by User.
'Personal Access'
Allows you to restrict access to the User who creates the Template.
'Icon Type(s)'

The Templates area has two (2) sections:
- The
Leftsection displays all current Templates in your system. - The
Rightsection displays Template Features (e.g., assigned recipients, attached documents, etc.).
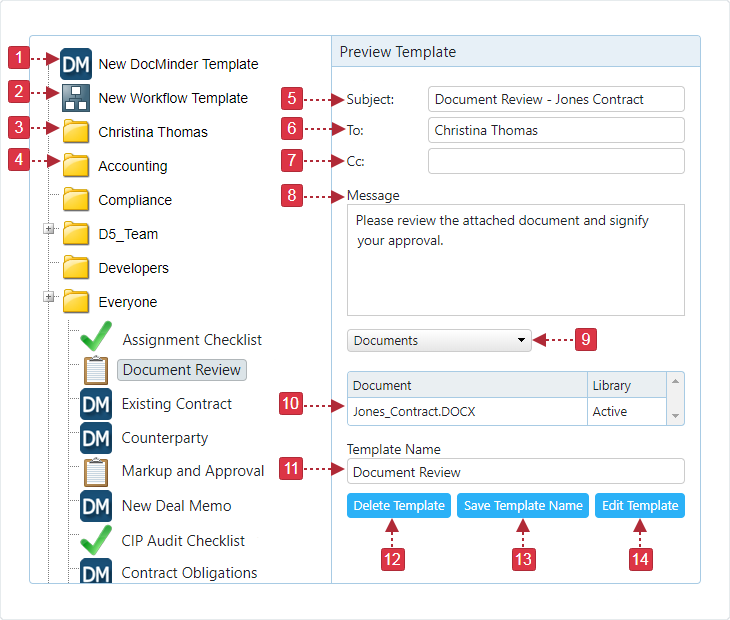
| 1 | Creates a blank New DocMinder® Template. |
|---|---|
| 2 | Creates a blank New Workflow Template. |
| 3 | Templates created by a User display in a Folder labeled with their User_Name. |
| 4 | Templates created for a Group display in a Folder labeled with the Group_Name. |
| 5 | Displays the Subject line of the selected Template. |
| 6 | Displays the To assigned recipient(s) of the selected Template. |
| 7 | Displays the Cc assigned recipient(s) of the selected Template. |
| 8 | Displays the Message (e.g., instructions to complete the task) of the selected Template. |
| 9 | Click the Dropdown to view Documents or Relationships of the selected Template. |
| 10 | Displays Documents or Relationships of the selected Template. |
| 11 | Displays the selected Template Name. |
| 12 | Click the Delete Template button to remove a Template from the list. |
| 13 | Click the Save Template Name button if you modified a Template's Name. |
| 14 | Click the Edit Template button to modify a Template. |
If your team has routine tasks and projects they normally follow, you don’t need to recreate those tasks and projects in DocMinder® every time.
To create a New DocMinder® Template, follow the procedure outlined below.
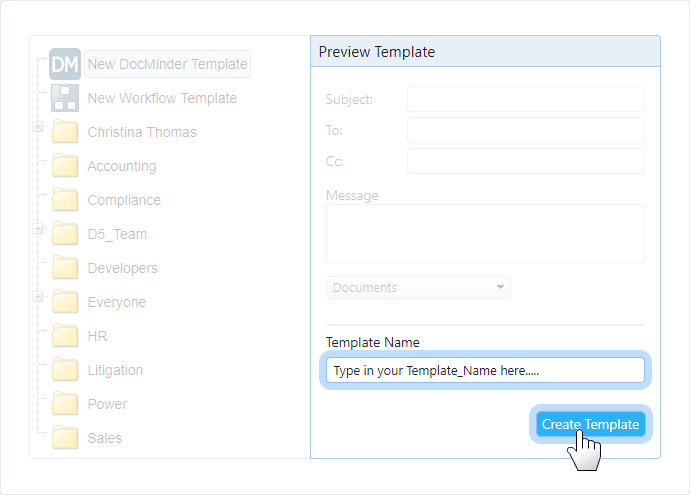
- Select New DocMinder® Template from the
Leftsection. - Type the Template Name into the textbox on the
Right; then click Create Project. - After clicking Create Project, the New DocMinder® page displays.

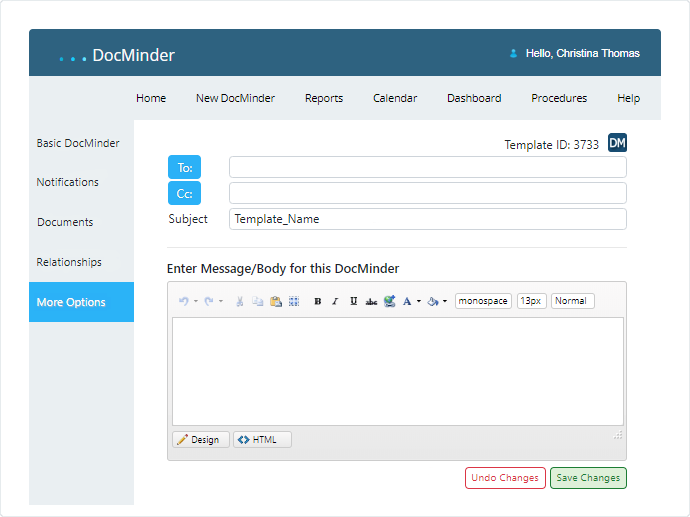
You can configure a New DocMinder® Template with more features such as documents, relationships, notifications, and more.
To add more features to a template, follow the procedure(s) outlined below.
To access; select Notifications from the Left-Navigation bar.
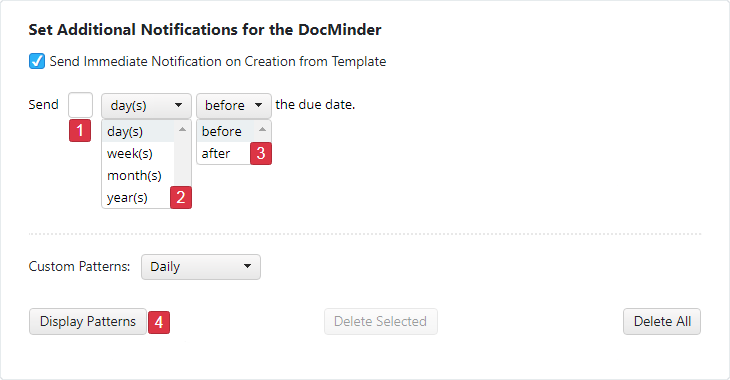
To add Notifications to a Template; follow the procedure listed below.
- Enter in a number into the Send textbox.
- From the Day(s) dropdown choose Day(s), Week(s), Month(s) or Year(s).
- Select either Before OR; After the Due Date.
- Then click Display Patterns button.
"Send Immediate Notification on Creation from Template"
If checked, when a New DocMinder® is created from the Template, an Immediate Notification is sent to the Recipient once you click Activate.
To access; select Documents from the Left-Navigation bar.
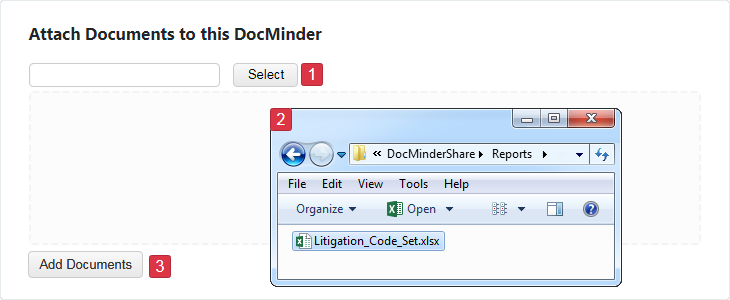
To add Documents to a Template; follow the procedure listed below.
- Click the Select button.
- Browse and select a document from a Shared Drive.
- Click the Add Documents button to add your document to the Template.
Documents can also be added via Drag-and-Drop from a Shared Drive.
To access; select Relationships from the Left-Navigation bar.
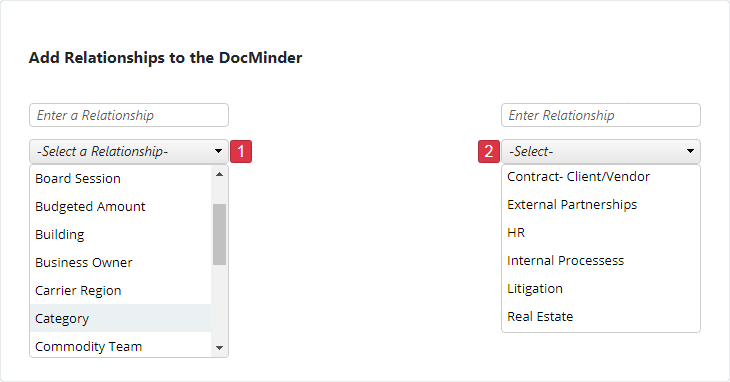
To add Relationships to a Template; follow the procedure listed below.
- Select a Relationship from the dropdown.
- Then, select a Value from the dropdown that appears on the
Right.
The Relationship Table will display after you add a Relationship to your Template.
To access; select Esclations from the Left-Navigation bar.
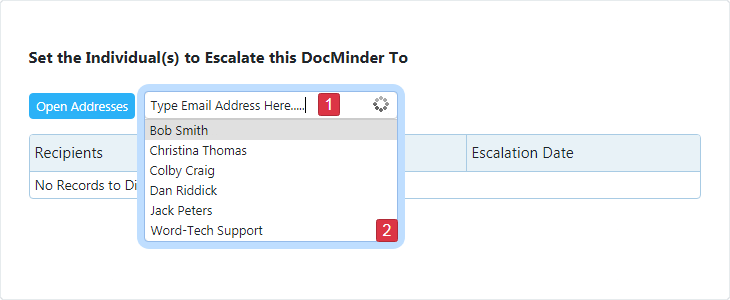
To add Esclations to a Template; follow the procedure listed below.
- Type the individual's email into the Auto-Complete textbox.
- Select the Escalation Recipient from the list.
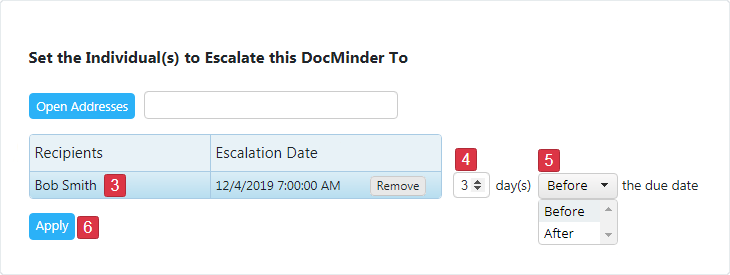
- Select the Escalation Recipient from the table.
- Enter the # of Day(s) the escalation will activate into the textbox.
- Select Before or After from the dropdown.
- Then, click the Apply button.
Escalations are based on the number of days Before OR; After the Due Date which defines the date of the escalation event.
To access; select Recurrences from the Left-Navigation bar.
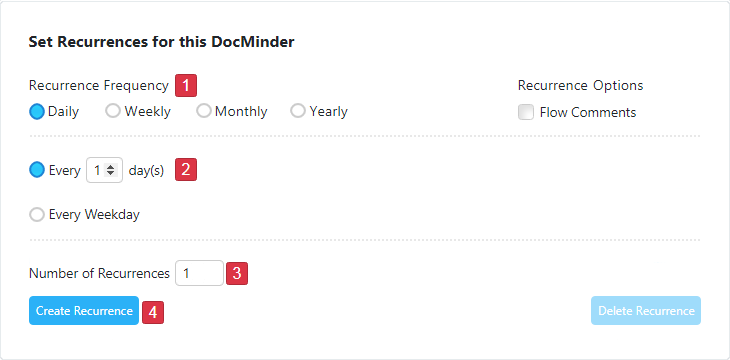
To add Recurrences to a Template; follow the procedure listed below.
- Choose the frequency (e.g., Daily, Weekly, Monthly or Yearly) of the recurrence.
- Select or enter the Number of Days(s) to repeat the recurrence.
- Enter the Number of Recurrences into the textbox.
- Then click the Create Recurrence button.
Recurrences are basic tasks with a due date; the task cycles back as another task.
To access; select Checklists from the Left-Navigation bar.
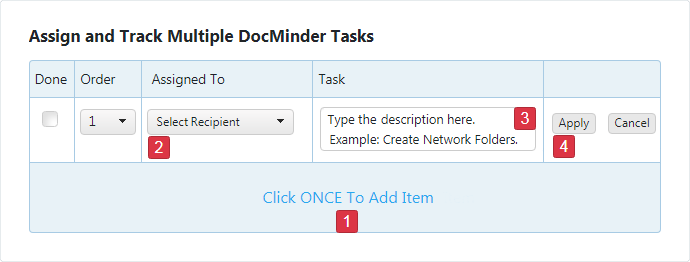
To add Checklist to a Template; follow the procedure listed below.
- Click on the control labeled Click ONCE to Add Item.
- Click the Select Recipient dropdown to Assign a Recipient.
- Type in a description for the checklist-item in the Task column.
- Click the Apply button to save the checklist-item.
For more information about, check out this section on Checklists.
To access; select Survey from the Left-Navigation bar.
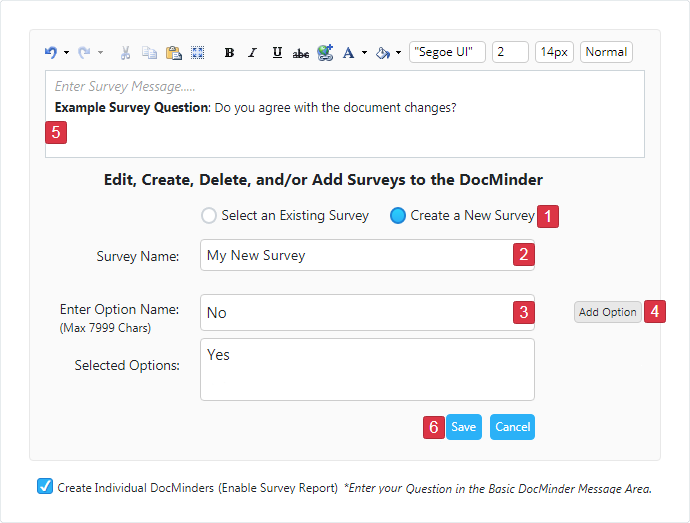
To add a Survey to a Template; follow the procedure listed below.
- Click the Create New Survey radio-button.
- Type in the name of your Survey into the Survey Name textbox.
- Type in an option into the Enter Option textbox. button.
- Click Add Option button.
- Enter your Survey Question into the blank Survey Message Area.
- Click the Save button.
(To add more options, repeat steps 3 through 4).
To use an Existing Survey with your template; check out this section on Surveys.
To access; select Security from the Left-Navigation bar.
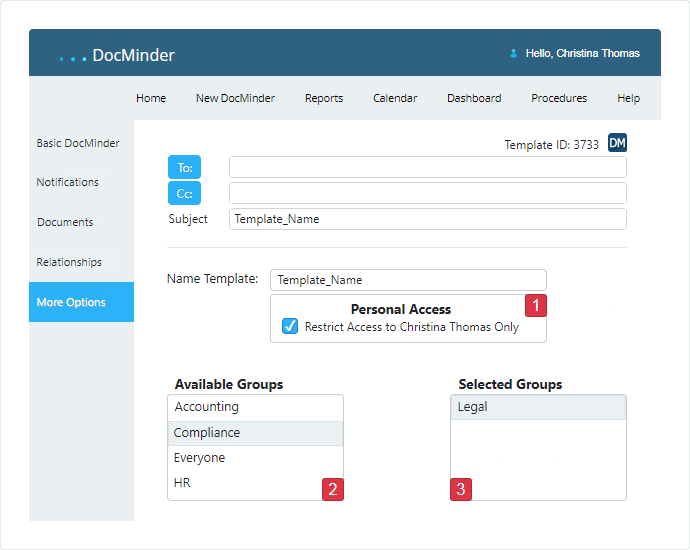
To add Security to a Template; follow the procedure listed below.
- Check/Uncheck the box under Personal Access to restrict access by Creator.
- Select a Group from the
Leftlistbox; - Then drag the selected Group over to the listbox on the
Rightand drop.
Templates can be edited to reflect changes in a project. After a template has been modified and saved, the changes are visible when a project is created from the template.
To access; select Templates from your Profile Menu.

Select the Template you would like to Edit from the listbox on the Left.
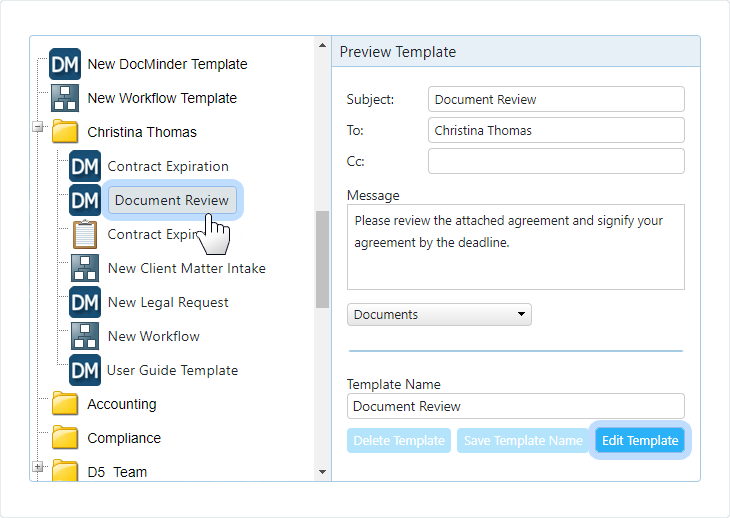
Then, click the Edit Template button from the listbox on the Right.
The New DocMinder® page displays where you can configure the Template with more features or remove features.
You can create future projects from an Existing Template that may contain similar information such as, assigned Recipients, documents, relationships, etc.
To use an existing template; click on New DocMinder® from Top-Navigation bar.

Select an Existing Template from the listbox on the Left.
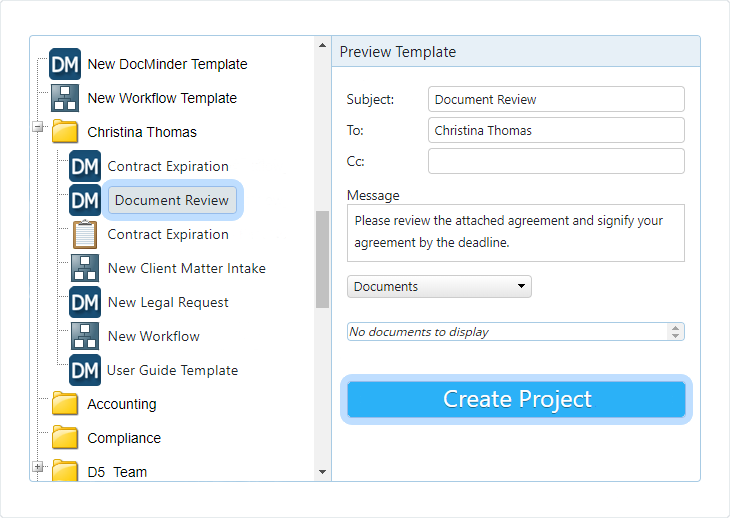
Then, click the Create Project button from the listbox on the Right.
When you create a New DocMinder® from an Existing Template you can modify its details to change its configuration.
The following items can be modified in an Existing Template:
| Add / Remove To: line Recipients. |
| Add / Remove Cc: line Recipients. |
| Modify the Suject line (e.g., from "New Task Subject" to "Task Subject"). |
| Create, Modify or Remove Notifications. |
| Modify the Due Date. |
| Add, Remove or Modify the Message/Body. |
| Add, Remove Documents. |
| Add, Remove Relationships. |
| Create, Modify or Remove Escalations. |
| Create, Modify or Remove Recurrences. |
| Create, Modify or Remove Checklists |
| Create, Modify or Remove Survey |
| Modify Recipient Permissions. |
| Modify Settings (e.g., Select email template, require recipient comments, etc.) |
Rather than creating a new template from scratch, you can Copy an Existing Template.
When you Copy an Existing Template, the configuration and settings in the template are applied to your New Template.
The process described below allows you to copy existing DocMinder®templates such as a single reminder template, a checklist template; or a survey template. You cannot copy existing Workflow Templates through this process.
To Copy an existing template, click New DocMinder® from the Top-Navigation bar.

Select an Existing Template; then click Create Project.

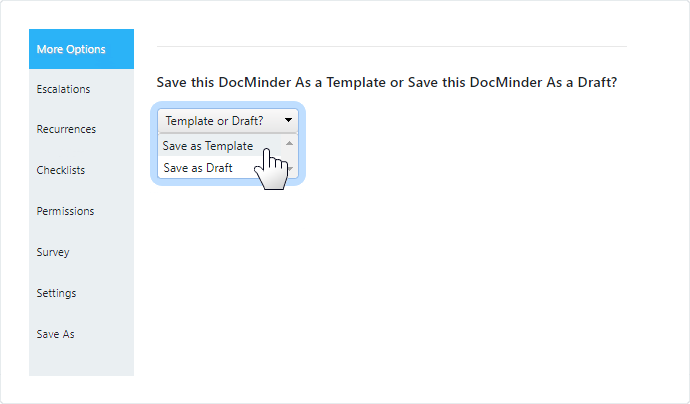
Click More Options; then Save As from the Left-Navigation bar
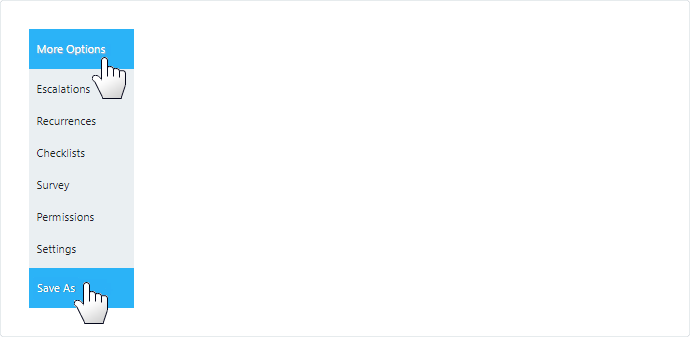
Select the Save as Template option from the dropdown.
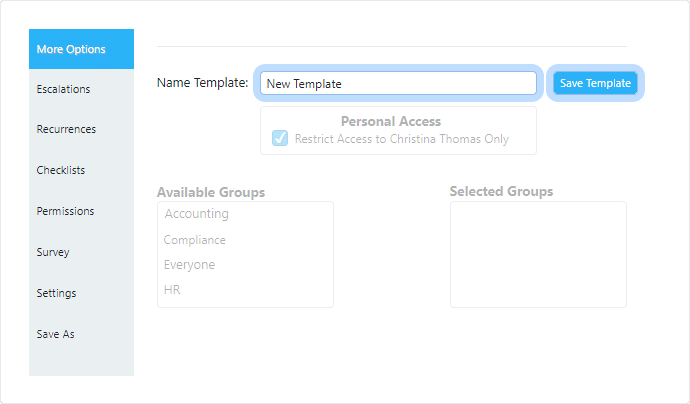
Type in the template name into the textbox; and then click Save Template.
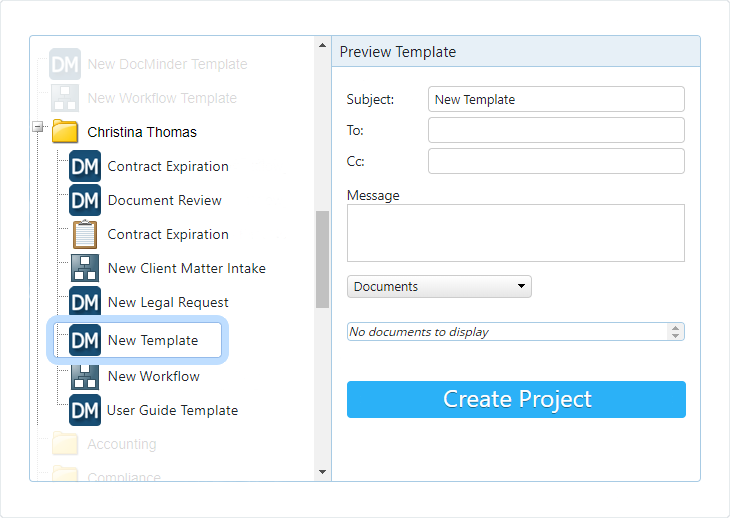
The copied template will now appear in your User_Name folder.
Workflow Templates are used to define the Steps that are required to complete a business process (e.g., approval; requests, etc.) and help to reduce human-error by following the same repeatable Steps for similar processes.
To create Workflow Templates the following User Access Rights are required.
- Manager
- Create/Edit Templates
- Access Workflow
To create a Workflow Template, follow the procedure outlined below:
- From your Homepage, click on your User Name and select Templates from the menu.
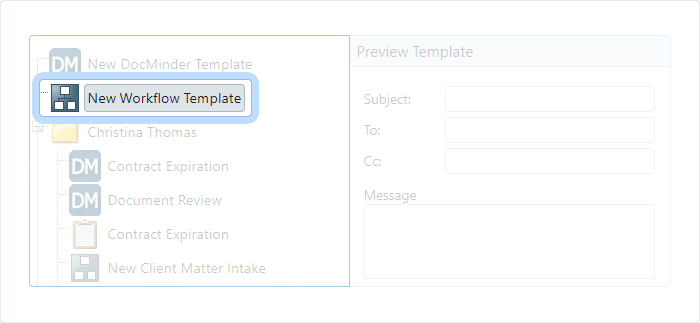
- Select New Workflow Template from the
Left. - On the
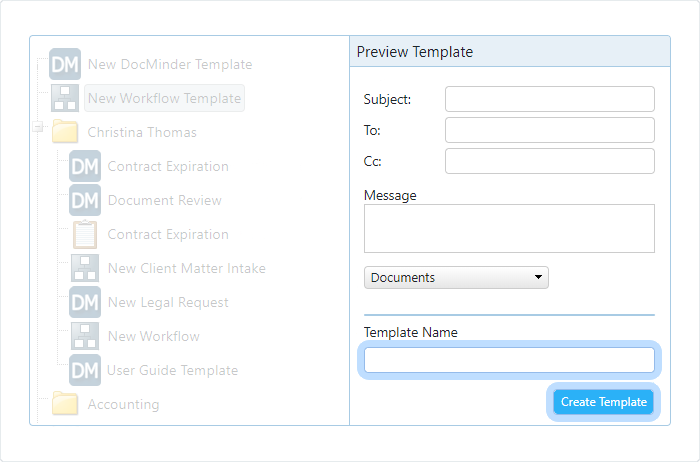
Right, enter the Template Name into the textbox and click Create Template.
For more information about Workflow Templates; check out the complete section on Creating Workflow Templates.