With automated processes, your business inevitably has transactions that require human interaction. For example; an order that requires approval.
DocMinder® Workflow helps you streamline your business processes by integrating these human interactions with automated workflow steps to ensure that the right people get the right data, at the right time.
Workflows can streamline the cost and time required to coordinate common business processes, such as project approval or document reviews, by managing and tracking the human tasks involved with these processes.
If you're new to Workflow, here are few key terms:
'Workflow'
An automated procedure in which information, tasks, and documents are passed among several participants.
'Workflow Template'
A pre-made sequence of tasks built for the most common business situations.
'Workflow Title'
Name of a process or procedure (e.g., Document Approval, Contract Request).
'Workflow ID'
Assigned in chronological order by the system, to identify a Workflow and related Steps.
'Workflow Status Type'
Represents a Workflow Step at a specific point in the workflow. A Workflow Step can have only one (1) status type at any given point.
Hover over a 'Status Type' below to learn what each type means.'Diagram'
The interface for visually defining a Workflow process. Use the Diagram to create and modify workflows by adding, arranging, deleting, and connecting Steps.
'Master Workflow Node'
Serves as a single point-of-access for all changes made to each Step in a Workflow.
'Workflow Step'
Defines the action of (e.g., task to be completed) a particular part of a Workflow.
'Workflow Step Type(s)'
There are five (5) types of Workflow Steps for the type of task feature it contains (e.g., Checklist, Survey, Basic or Decision) and each represented by a different shape.
'Workflow Step Shape(s)'

'Connection'
A visual indicator that depicts the flow from one step to the next.
'Quick Edit Tab'
Easily assign Recipients (e.g., To: and Cc:); a Due Date or Days Until Due and Subject.
'Open Full Edit'
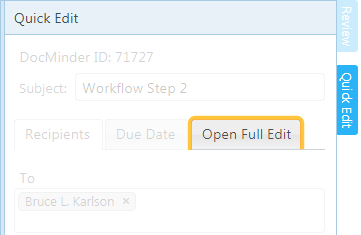
Open and fully edit a Workflow Step to attach Documents, provide instructions via the Message/Body, add Relationships and more.
'Due Date' (e.g., for Workflow Steps)
A set date a Workflow Step must be completed by (e.g., Due Date: March 29th, 2019).
'Days Until Due' (e.g., for Workflow Steps)
A set number of day(s) to complete a Workflow Step (e.g., Days Until Due: 3 Days).
'Activation Date'
A specific date when the Workflow will begin.
'Decision Tree' (e.g., Workflow Logic)
Provides logic to flow from one Step to the next.
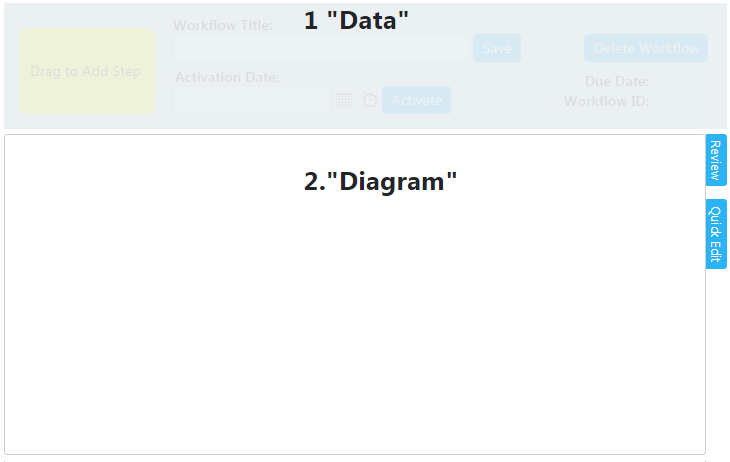
The Workflow Page consists of two (2) sections:
- The "Data" area (e.g., Top section);
- The "Diagram" area (e.g., Bottom section);

| 1 |
Drag to Add Step: Drag-and-drop onto the diagram area to add a step. |
|---|---|
| 2 | Workflow Title: Provide a descriptive name for your workflow process. |
| 3 | Save: Click to save changes made to the workflow title. |
| 4 | Delete Workflow: Click to delete a workflow. |
| 5 | Activation Date: Set a specific date when the workflow will begin. |
| 6 | Date Picker: Click the calendar icon to select a Date from the pop-out calendar. |
| 7 | Time Picker: Click the clock icon to select a Time from the time picker. |
| 8 | Activate: Click to start your workflow. |
| 9 | Due Date: Set the date the workflow process should be completed by. |
| 10 | Workflow ID: Unique # used to search and find a workflow and its steps. |
| 1 |
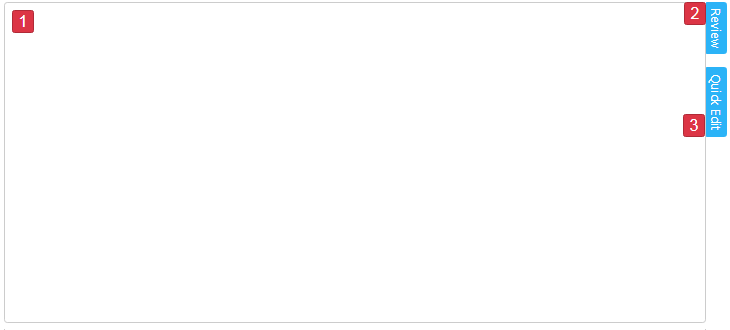
Diagram Area: The drag-and-drop design area to create workflows. |
|---|---|
| 2 |
Review Panel: Displays a step's task information (e.g., recipients, due date, etc.) |
| 3 |
Quick Edit Panel: Click to add Recipients, Subject, due date, etc., for a step. |
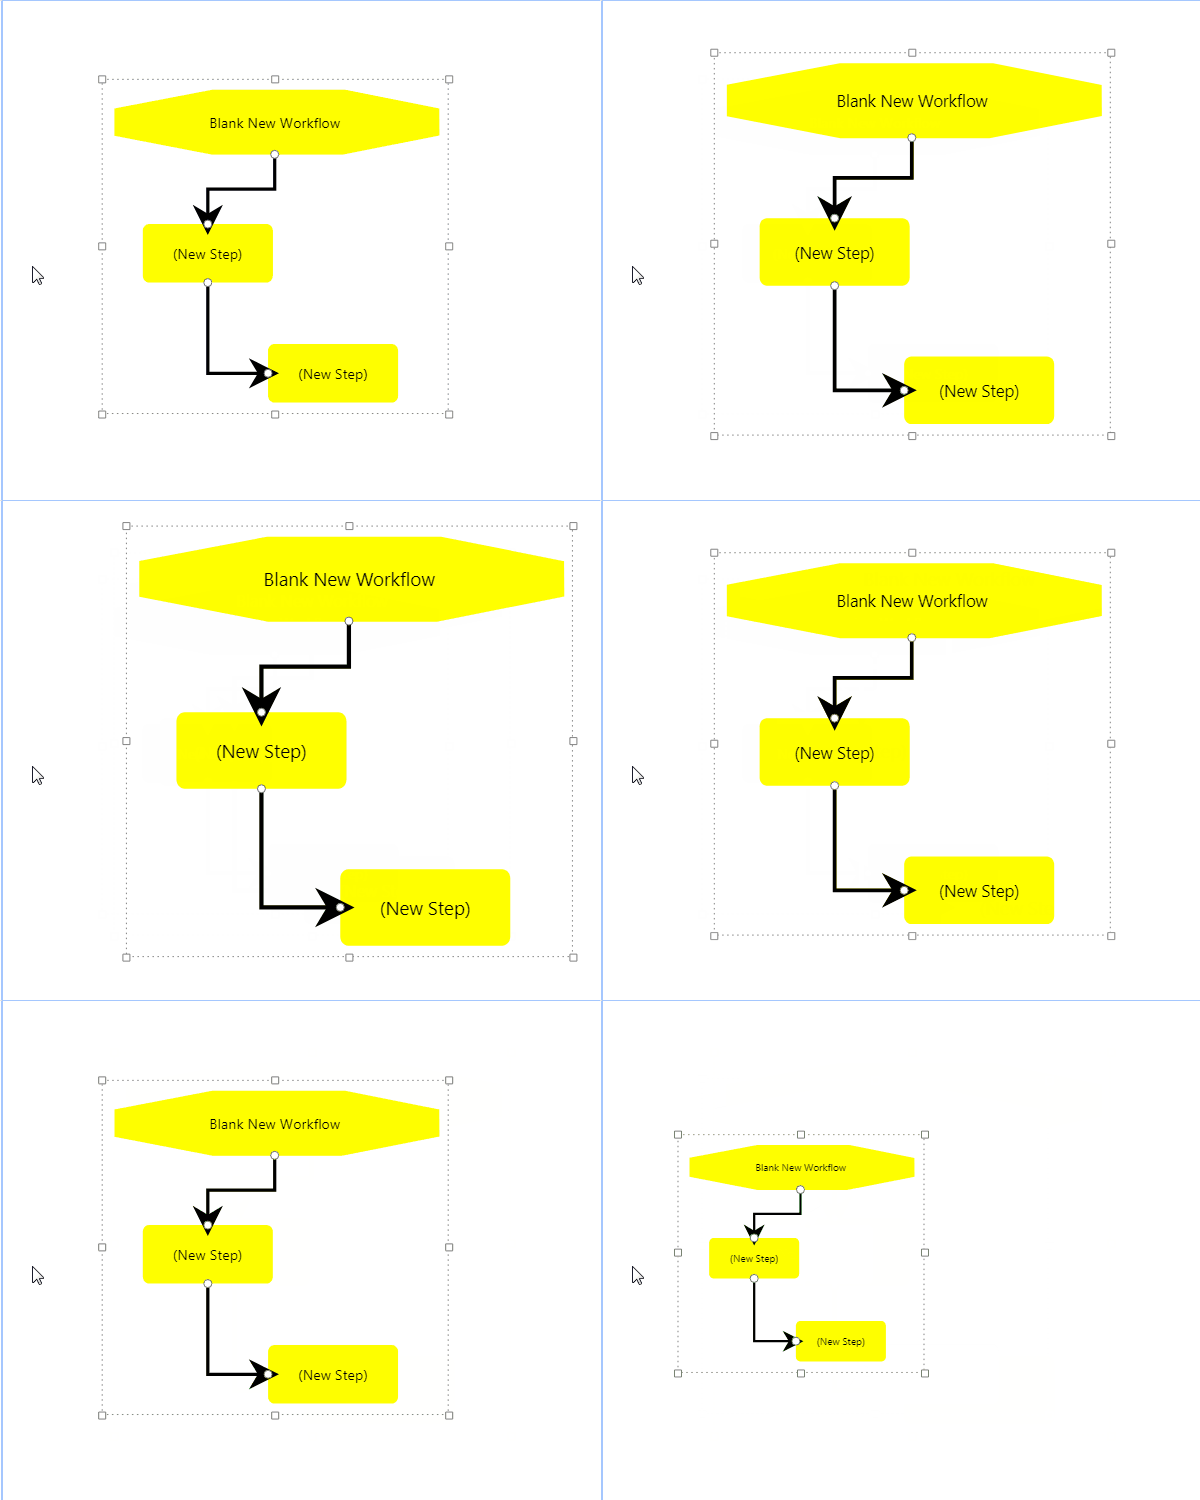
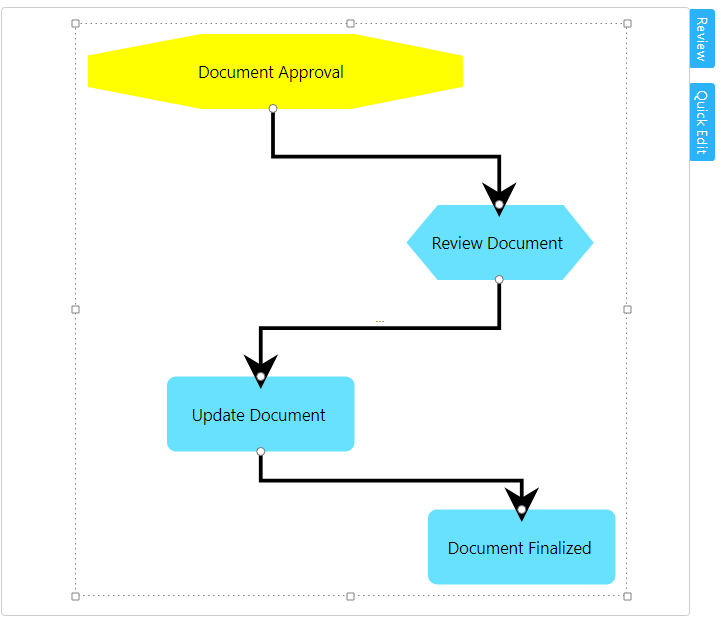
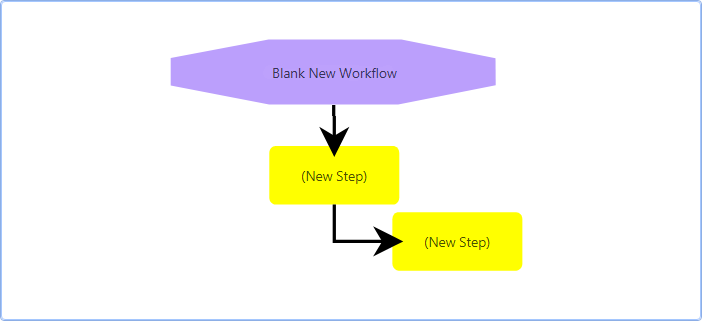
The Workflow Diagram area is a graphical interface that allows you to define a business process by allowing you to visualize and define how each step flows in the process.
Click on an action listed in the table below to see how to use these actions within the Workflow Diagram area:
To create a Workflow; perform the following actions listed below:
- From the top navigation-bar, select New DocMinder;

- Select New Blank Workflow from the
Leftsection;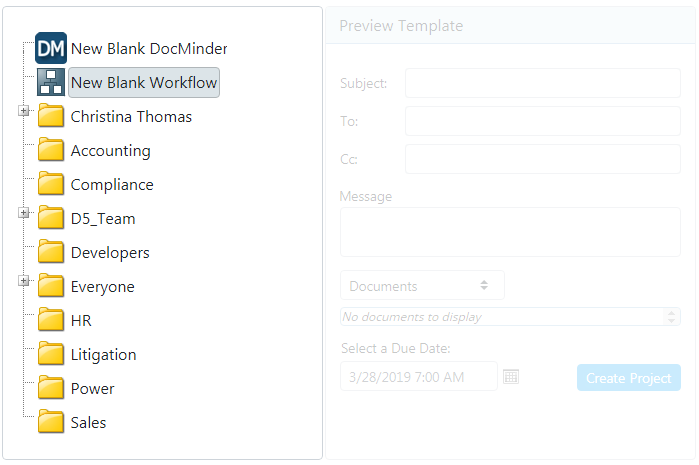
- From the
Rightsection, select a Due Date; then click Create Project.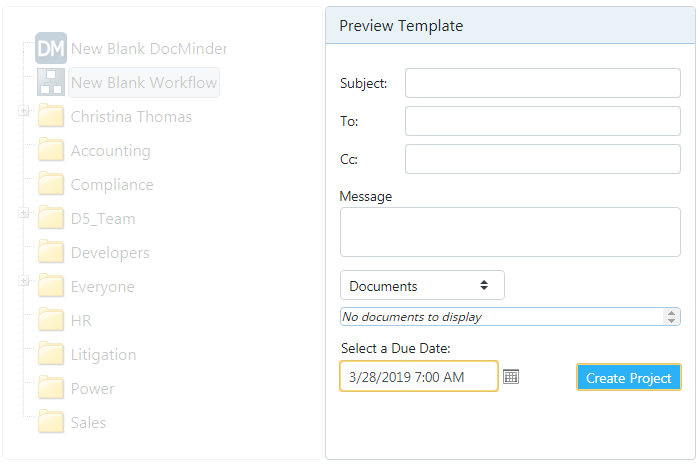 The Due Date selected here is when the Entire Workflow Process (e.g., all Workflow Steps) must be completed by.
- The Blank New Workflow page displays.
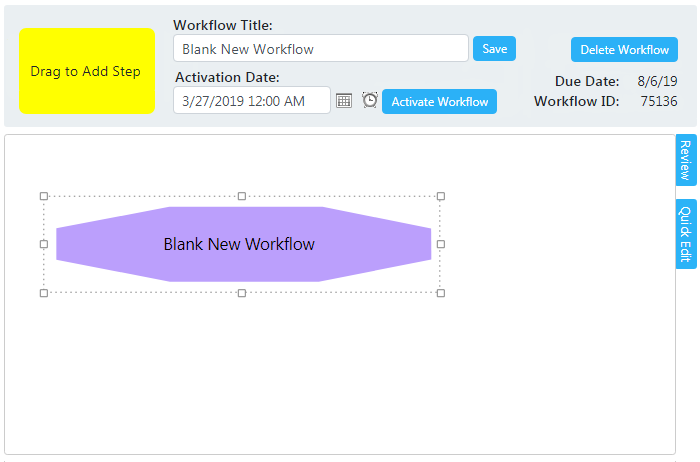
To add a Workflow Title follow the procedure listed below:
- Enter a name for your Workflow into the Workflow Title textbox; then click Save;
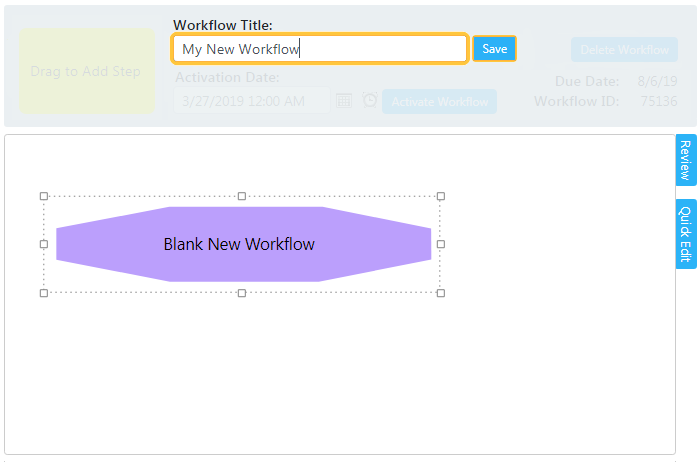
- The Workflow Title will now display inside the Master Workflow Node;
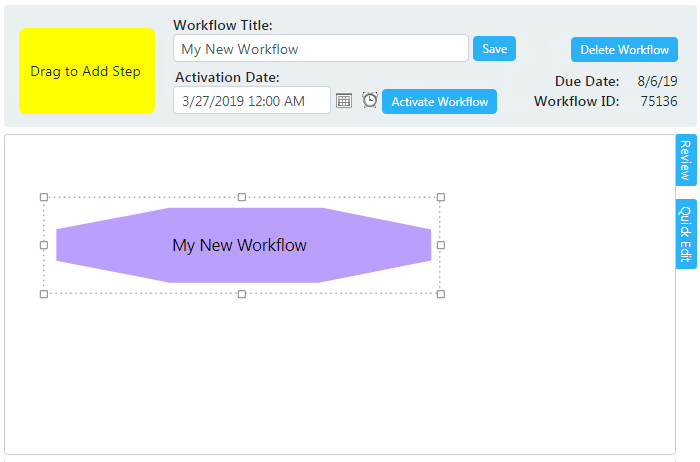
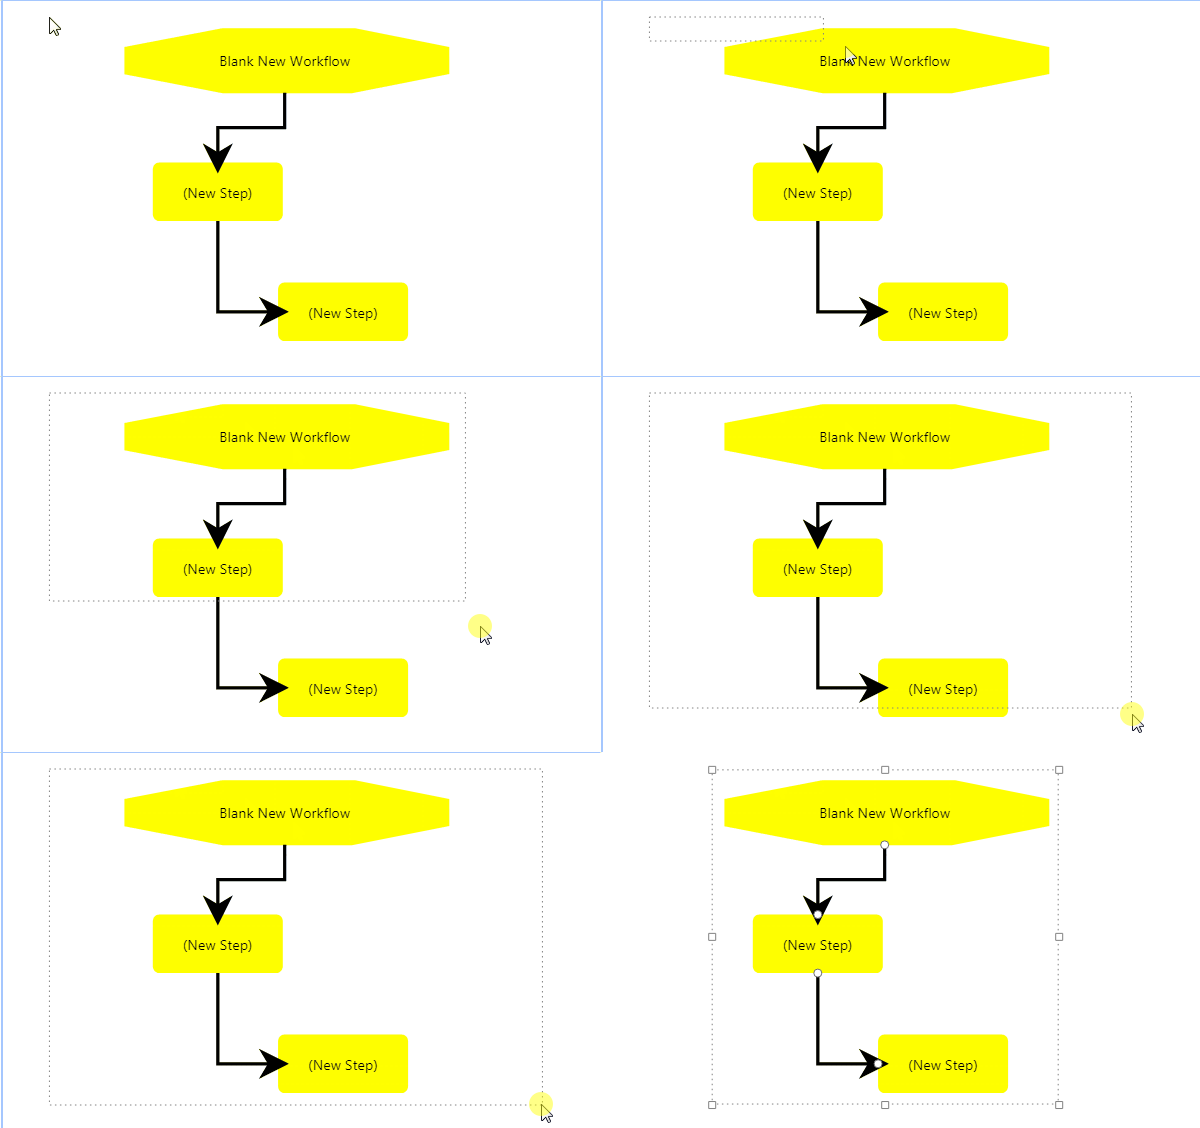
To add Workflow Steps (e.g., Workflow steps); Click Hold and drag the Add Step block to the diagram area and drop.
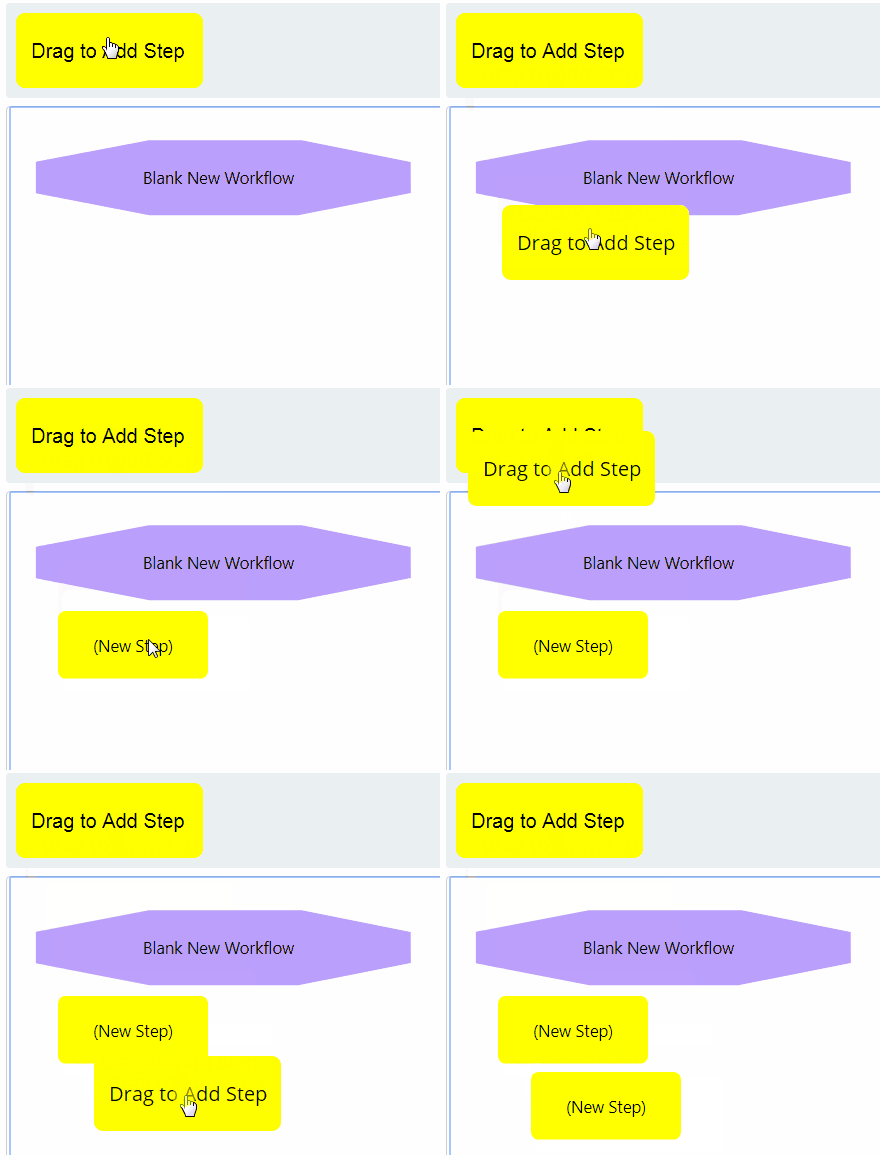
To remove a workflow step; click on the workflow step you want to remove and press Delete from your keyboard.
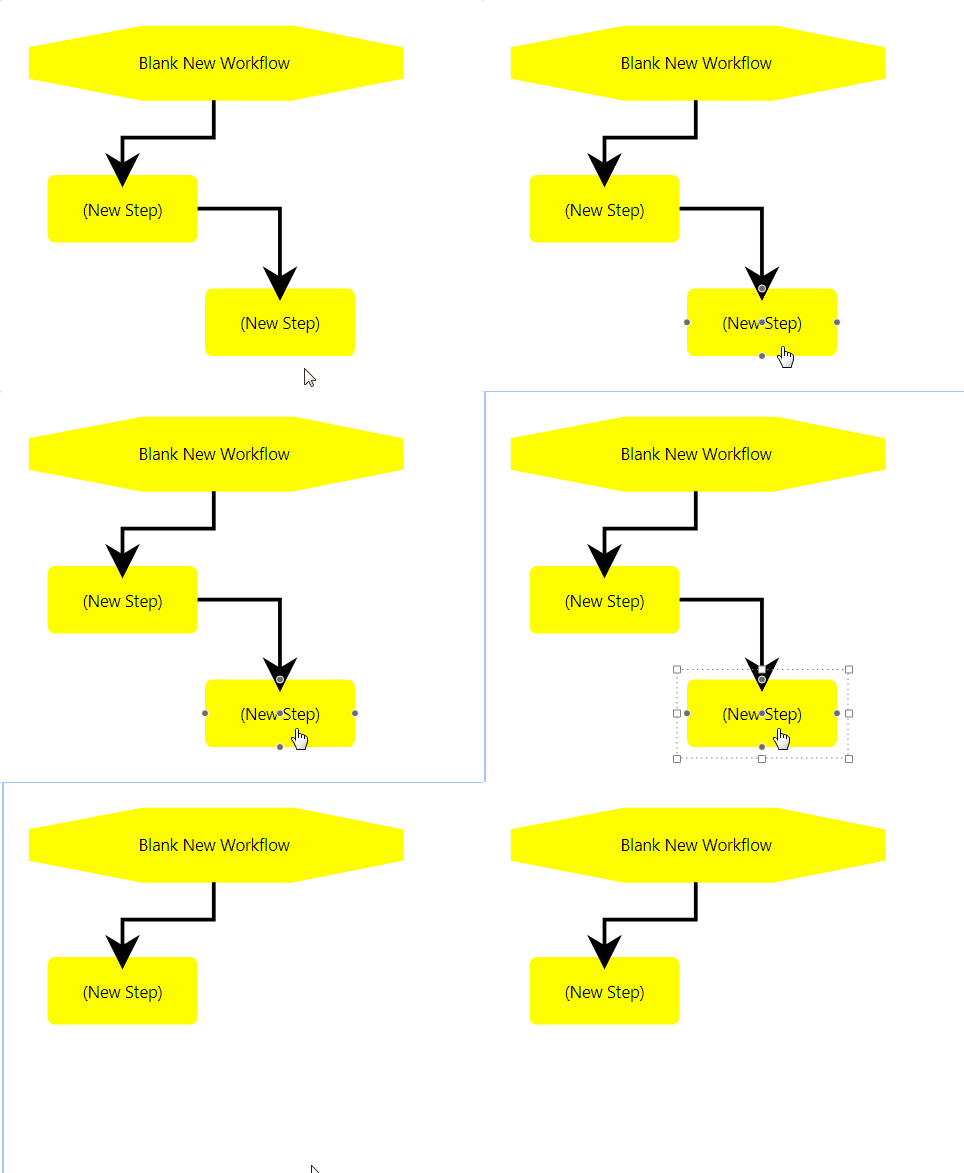
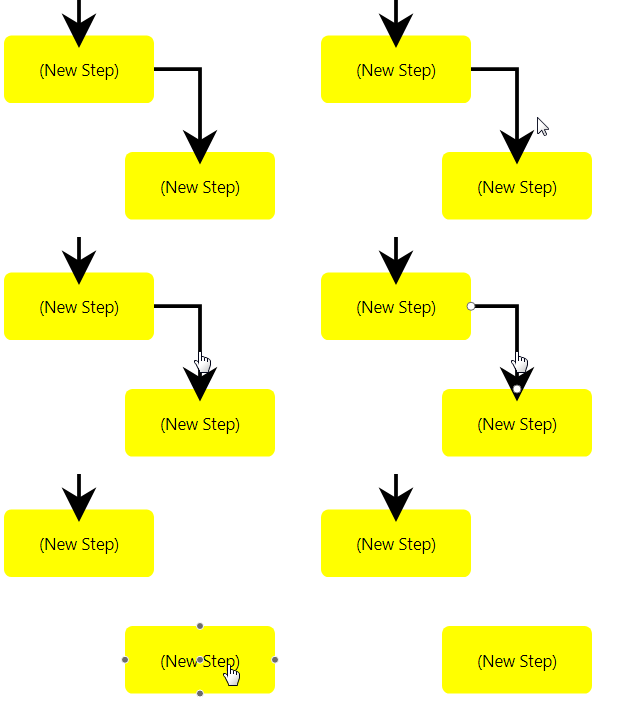
After you add Workflow Steps to the diagram area, you need to connect them.
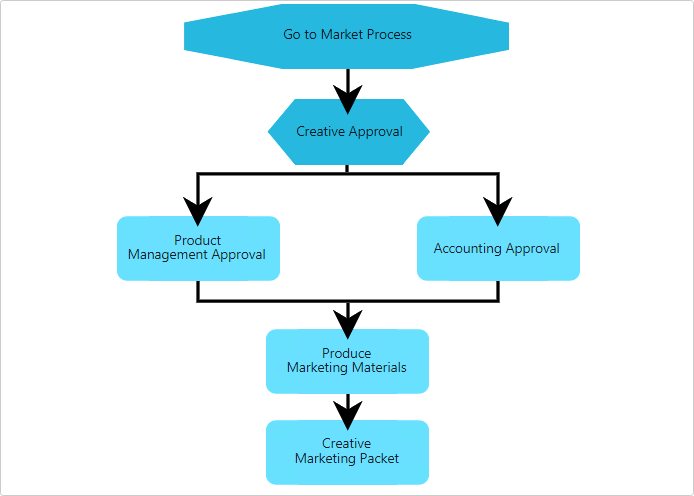
Arrowed lines in the diagram area Connect Workflow Steps to each other and show direction. Use them to organize your process and make it easier to follow different paths of your workflow.
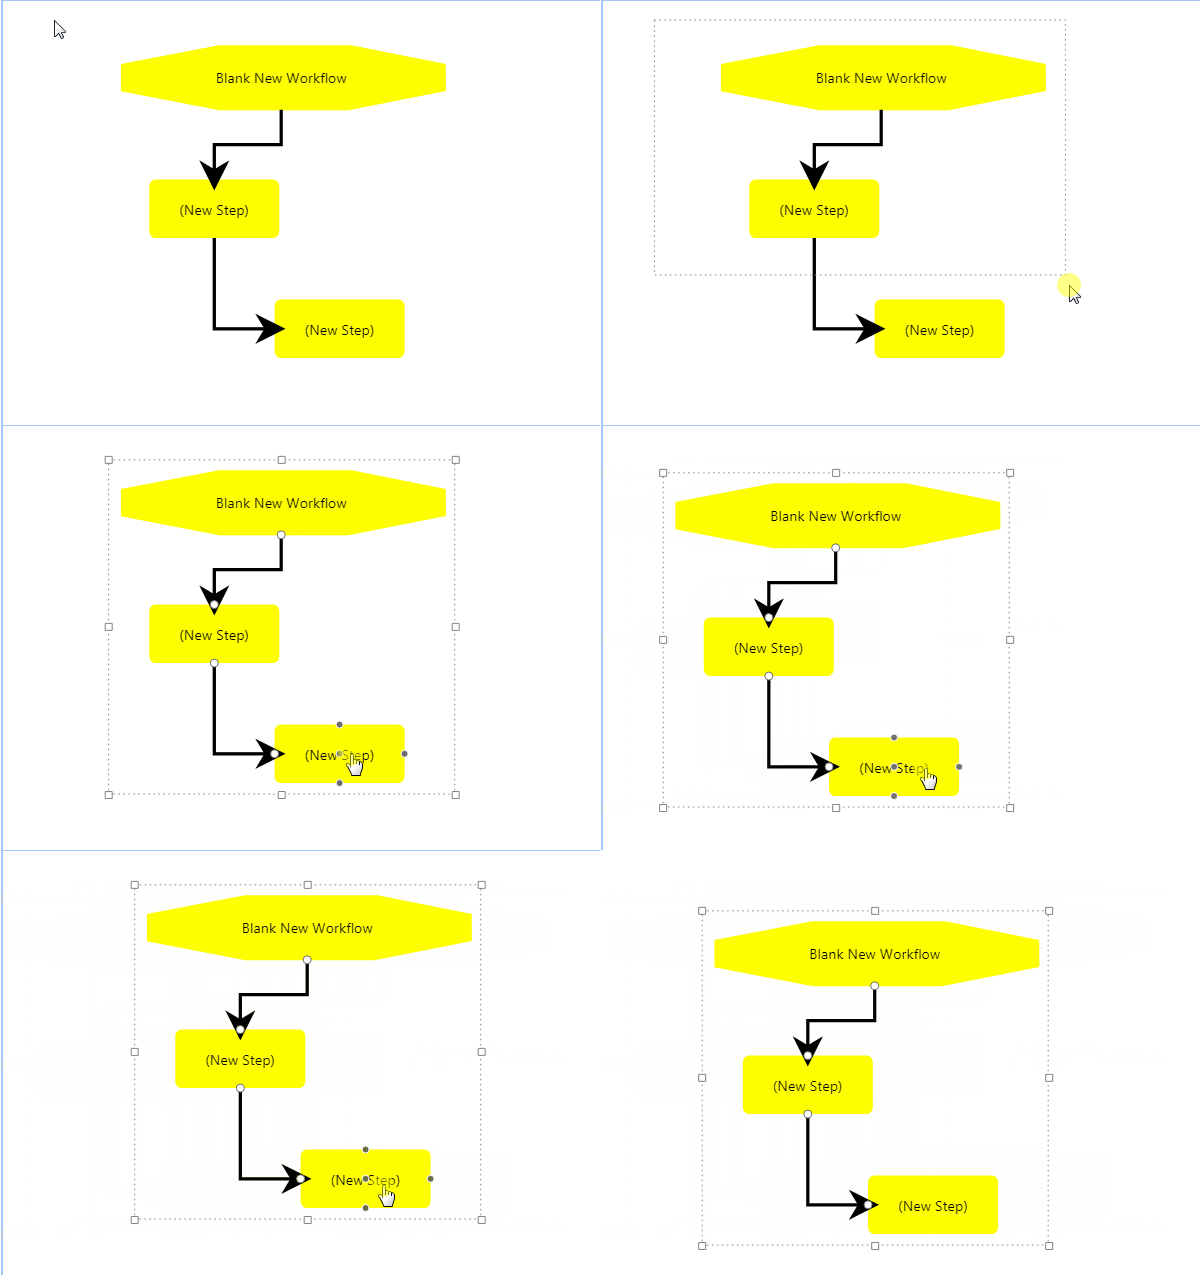
To connect Workflow Steps; hover over the middle of the step till you see a appear;
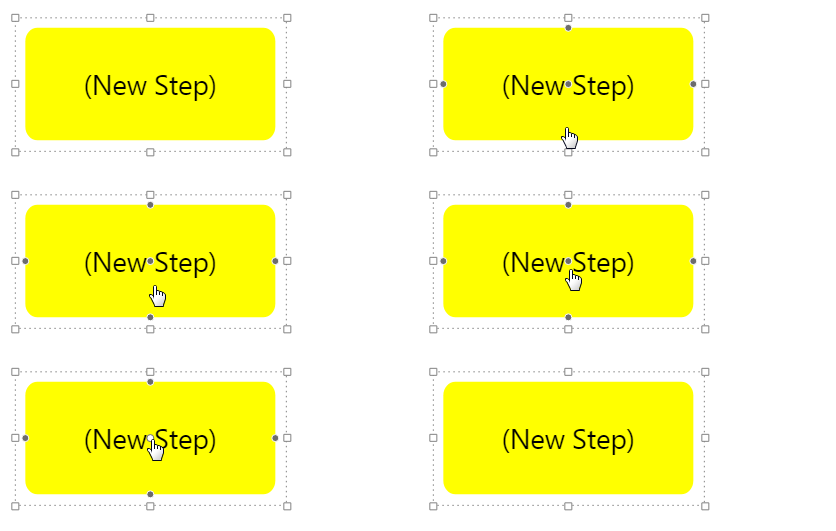
Then Click Hold your mouse while dragging the connection onto the next step.
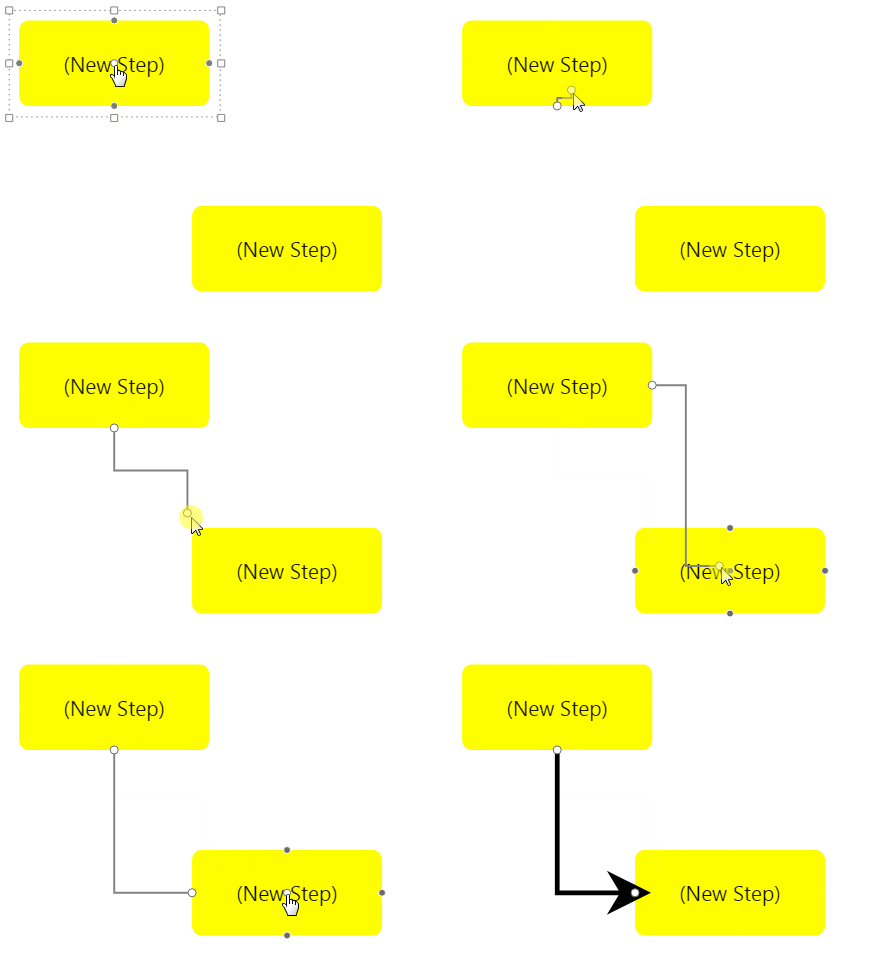
To disconnect a workflow step; click on the connection to the workflow step you want to remove and press Delete from your keyboard.
Each step in a workflow defines a particular part of the process and sets out the actions needed to complete the step (e.g., review and approve a document).
Through the Quick Edit Panel we can configure details (e.g., Subject/Description, Assign Recipients and Due Date) for each step in a Workflow.
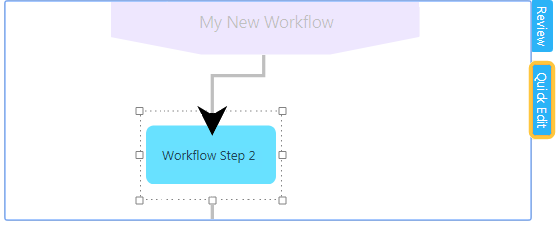
To access; select a Workflow Step and click on the Quick Edit tab.
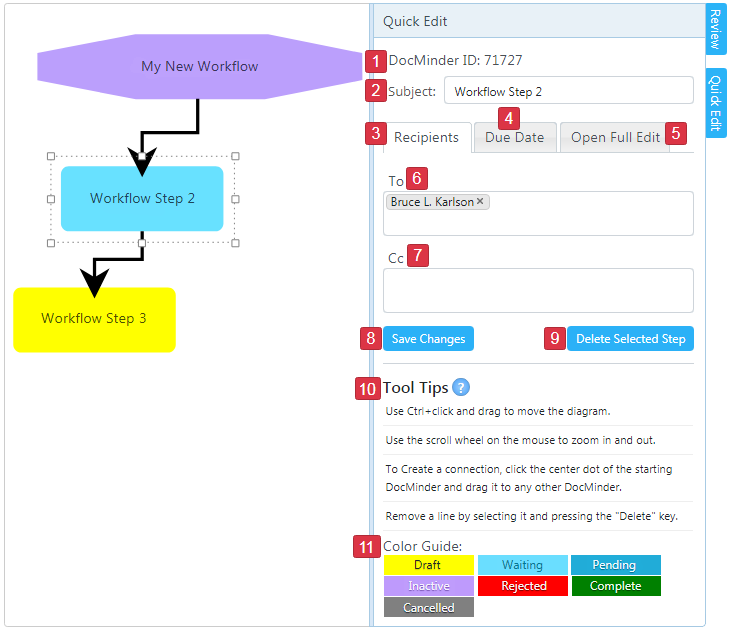
| 1 |
This is the DocMinder ID for the selected Workflow Step. |
|---|---|
| 2 |
Type into the textbox to add/modify a Workflow Step's Subject. |
| 3 |
Click the |
| 4 |
Click the |
| 5 |
Click |
| 6 |
Type into the To: textbox to add a To: Recipient. |
| 7 |
Type into the Cc: textbox to add a Cc: Recipient. |
| 8 |
Click Save Changes when modifying a Workflow Step from the Quick Edit panel. |
| 9 |
Click Delete Selected Step button to remove Workflow Step. |
| 10 |
Click the Tool Tips |
| 11 |
The Color Guide displays status types for a Workflow Step by color. |
To configure a workflow step with Quick Edit; follow the procedure listed below:
To add a Subject for a Workflow Step; follow the procedure listed below:
- Select a step from the Diagram area and click on the Quick Edit tab;
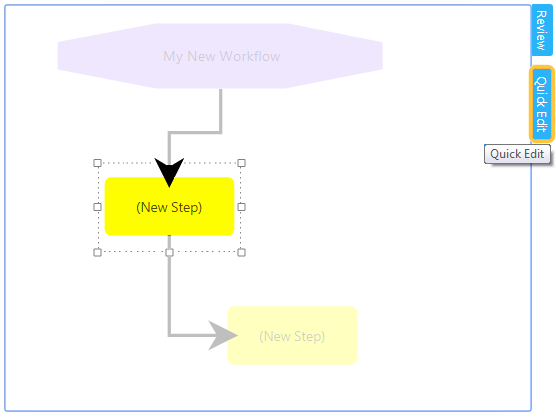
- When the Quick Edit Panel is displayed; enter a Subject for the Workflow Step;
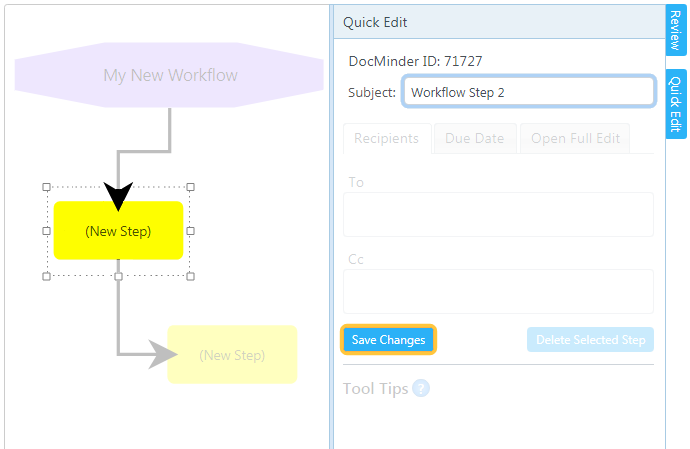 Click Save Changes when finished.
- The Workflow Step will now display its Subject Line.
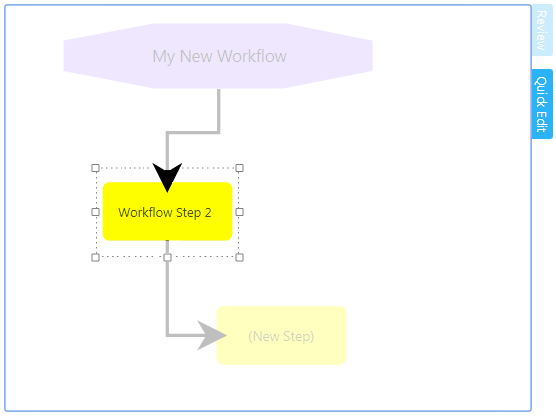
To Assign Recipients to a Workflow Step; follow the procedure listed below:
- Select a step from the Diagram area and click on the Quick Edit tab;
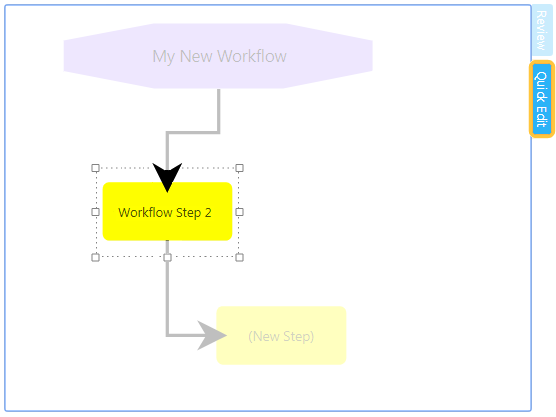
- From the Quick Edit Panel; type in a Recipient's name in the To: textbox;
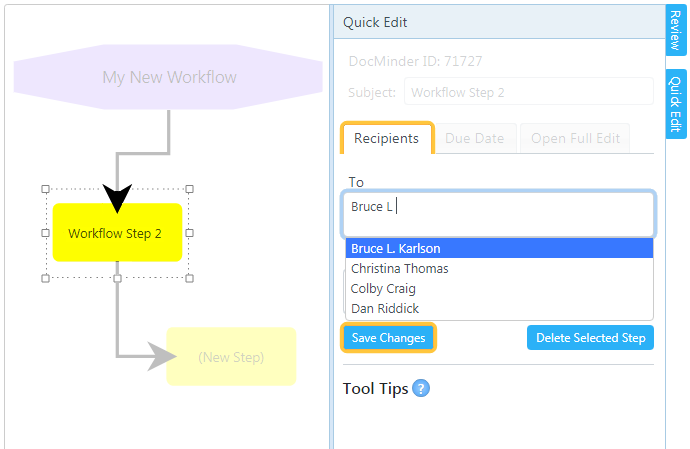 Select the Recipient's name from the Auto-Complete list and click Save Changes;
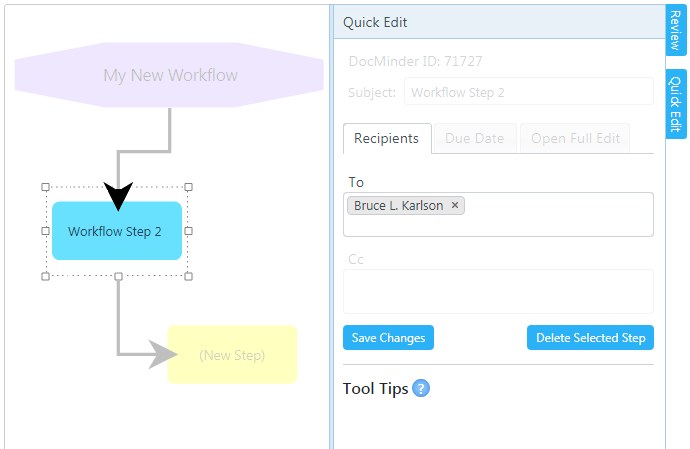
- Workflow Steps have a different background-color when Recipients are assigned.
To set a Due Date for a Workflow Step; follow the procedure listed below:
- Select a step from the Diagram area and click on the Quick Edit tab;
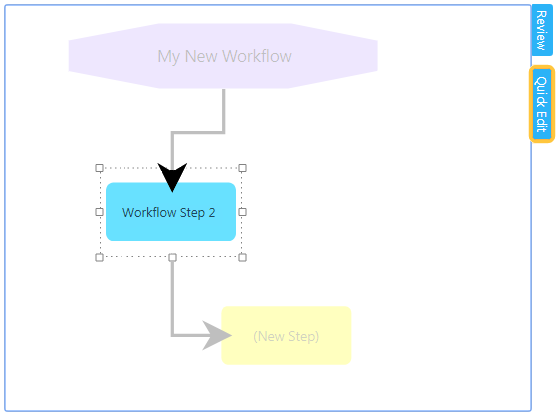
- From the Quick Edit Panel click on the Due Date tab;
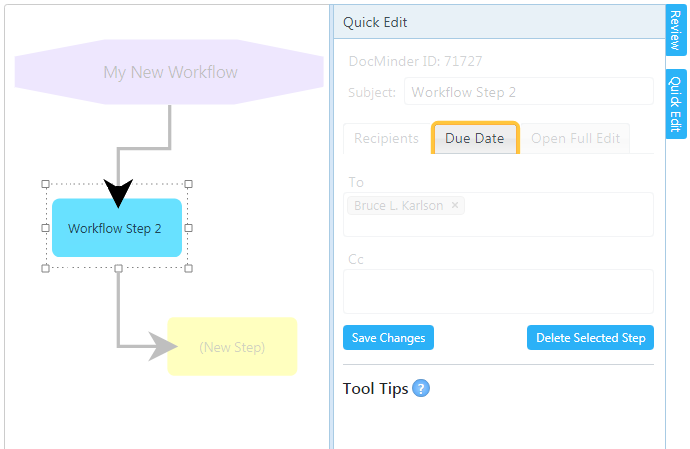
- Click the calendar
 icon to select a Due Date;
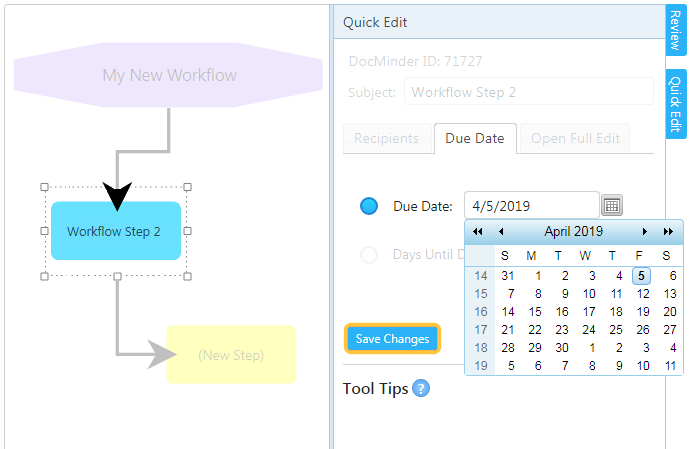 Click Save Changes when finished.
The Days Until Due option allows you to create the number of days to complete a Workflow Step. The exact due date is calculated whenever the step is active in the workflow process.
To set Days Until Due for a Workflow Step; follow the procedure listed below:
- Select a step from the Diagram area and click on the Quick Edit tab;

- From the Quick Edit Panel click on the Due Date tab;

- Select the radio-button option for Days Until Due; then enter a number of days;
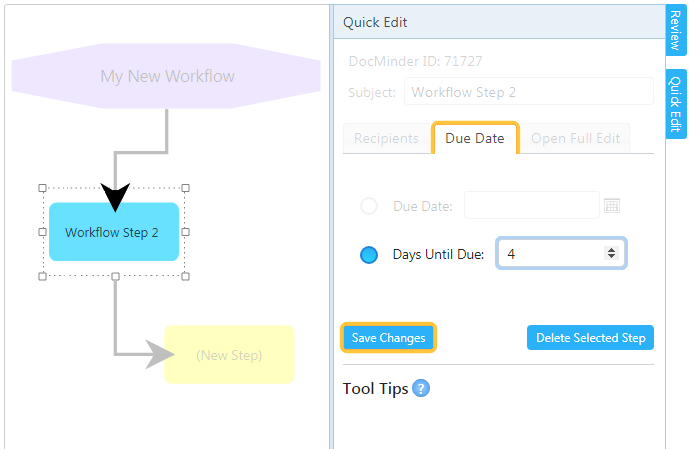 Click Save Changes when finished.
With Open Full Edit you can incorporate task-based functionality (e.g., attach documents, add relationships, checklists, etc) to Workflow Steps.
To access Full Edit; follow the procedure listed below:
- Select a Workflow Step from the Diagram area and click Quick Edit tab;
- From the Quick Edit panel, click on the Open Full Edit tab;
- Full Edit page allows you to configure Workflow Steps within the full application;
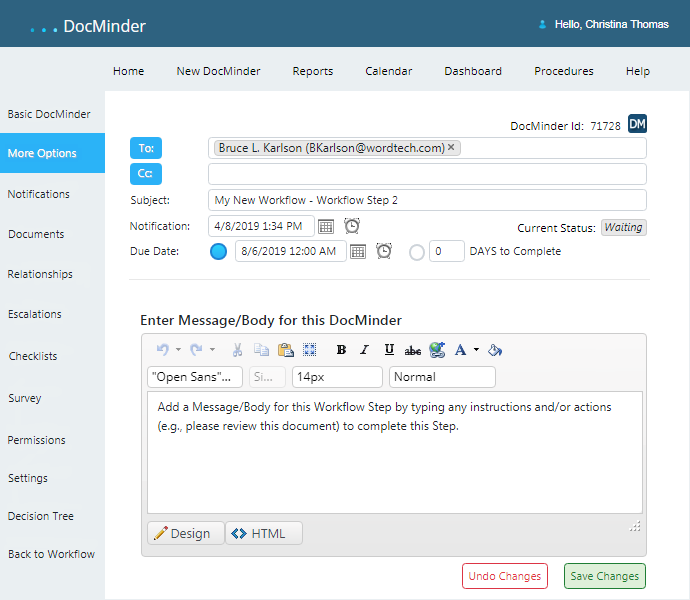
In Full Edit, Workflow Steps are easily-configurable to add task-based functionality such as notifications, documents, relationships, escalations, checklists or surveys.
The Message / Body field is where you provide instructions for Recipient(s) to complete their assigned Workflow Step.
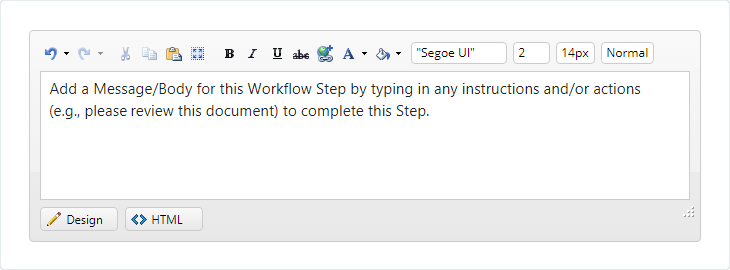
To add a Message / Body; follow the procedure listed below:
- From the Diagram area; select a workflow step;
- Click the Quick Edit tab;
- From the Quick Edit panel select Open Full Edit;
- When Full Edit is displayed; enter a Message/Body into the textbox provided;
- Click Save Changes.
For more information; check out the Message/Body section.
Documents are critical for effective team collaboration. DocMinder® allows you to attach documents and optionally flow those documents into all Steps in a Workflow.
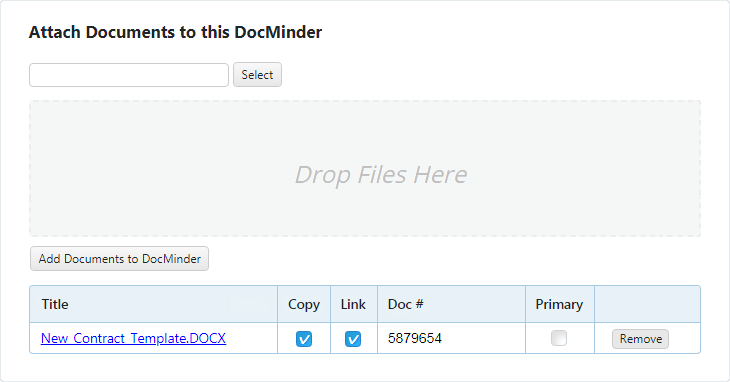
To add Documents; follow the procedure listed below:
- From the Diagram area; select a workflow step;
- Click the Quick Edit tab;
- From the Quick Edit panel select Open Full Edit;
- From the Left-Navigation Pane; click More Options and then select Documents;
- Click Select to browse/select a document from a Shared source;
- Click on the Add Documents button;
- Click Save Changes.
For more information; check out the Documents section.
Notifications are sent from DocMinder® to keep you updated on all the changes made by Recipients to Steps within your Workflow Process.
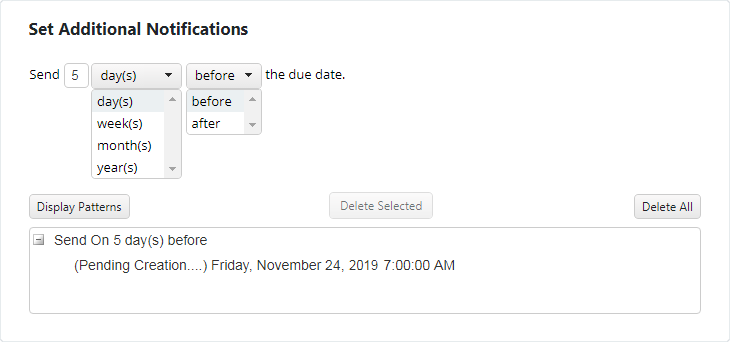
*Notifications on a Step with DAYS to Complete is problematic because it automatically sends after completion of the previous Step.
To add Basic Notifications; follow the procedure listed below:
- From the Diagram area; select a workflow step;
- Click the Quick Edit tab;
- From the Quick Edit panel select Open Full Edit;
- Click More Options from the Left-Navigation Pane then select Notifications;
- Enter a number of days into the Send textbox provided;
- From the 2nd dropdown; select day(s), week(s), month(s) or year(s);
- From the 3rd dropdown; select either Before or After the due-date;
- Click Save Changes.
For more information; check out the Notifications section. Or, to add custom notifications; check out the Custom Notifications section.
When you’re managing a Workflow with a lot of Steps, Relationships can help you categorize data so you can easily report on the progress of each Workflow Step.
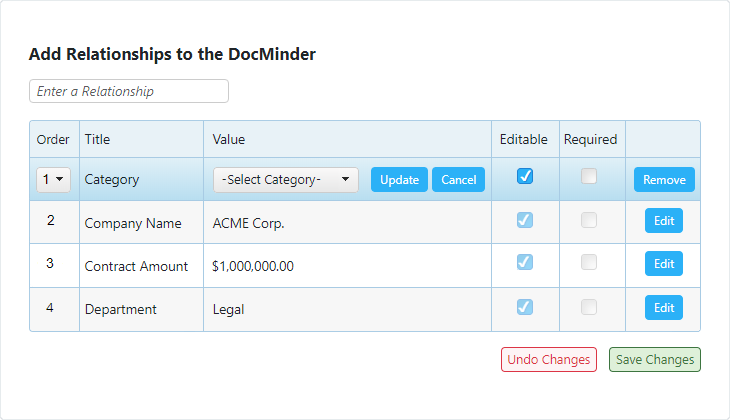
To add Relationships; follow the procedure listed below:
- From the Diagram area; select a workflow step;
- Click the Quick Edit tab;
- From the Quick Edit panel select Open Full Edit;
- From the Left-Navigation Pane; click More Options and then select Relationships;
- Select a Title from the dropdown; or enter a Title into the textbox provided;
- The Relationship Table will display; click the Edit button;
- Then select a Value from the dropdown;
- Optional: Arrange column(s) by Order # for multiple Relationships;
- Check the box under the Editable column to allow edits;
- Optional: Check the box under the Required column to enforce editing;
- Finally, click the Update button in the Value column to save changes;
- Click Save Changes.
For more detailed information; check out the Relationships section. Or, check out the section for Editable Relationships to create Editable Relationship Values.
Escalations alert an individual when a task has not been completed by the assigned due-date. Create escalation events with various dates for multiple individuals.
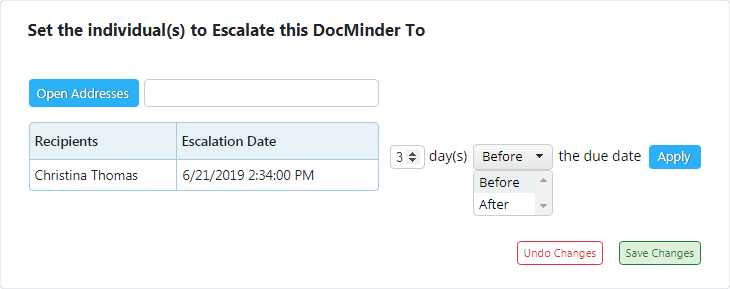
To add Escalations; follow the procedure listed below:
- From the Diagram area; select a workflow step;
- Click the Quick Edit tab;
- From the Quick Edit panel select Open Full Edit;
- From the Left-Navigation Pane; click More Options and then select Escalations;
- Click Open Addresses, OR; type an email address into the textbox provided;
- Select an individual from the list; and click Add to Escalations;
- Click Save Changes.
For more detailed information; check out the Escalations section.
Checklists capture all of the smaller action items (e.g., Sub tasks) by eliminating the need to create a bunch of tiny tasks.
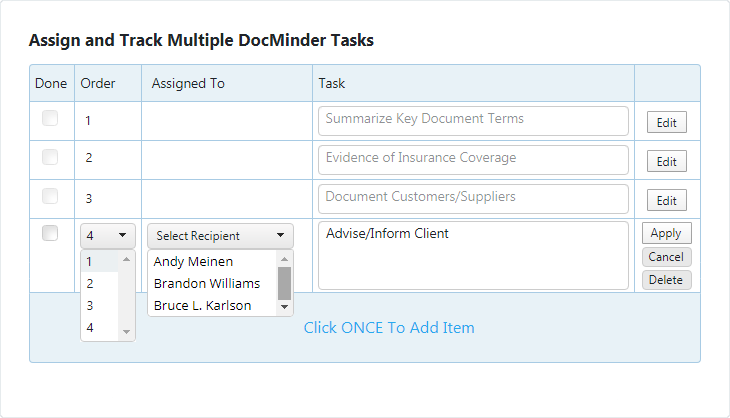
To add Checklists; follow the procedure listed below:
- From the Diagram area; select a workflow step;
- Click the Quick Edit tab;
- From the Quick Edit panel select Open Full Edit;
- From the Left-Navigation Pane; click More Options and then select Checklists;
- Click on Click ONCE To Add Item at the bottom of the Checklist Table;
- Optional: Arrange column(s) by Order # for multiple Checklist Items;
- Optional: Click the Assigned To dropdown to assign a Recipient;
- Enter a description of the Checklist Item into the Task column textbox;
- Click the Apply button in the same row as the Checklist Item;
- Click Save Changes.
For more detailed information; check out the Checklist section.
Surveys and Checklists cannot be added to the same Workflow Step. Each Step can include either a Checklist or Survey, but not both.
Surveys helps you to ask a question and assists in collecting response data.
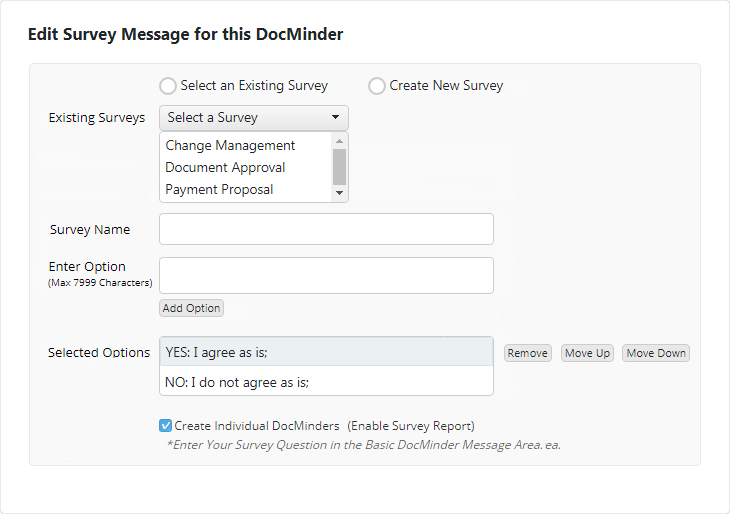
To add a Survey(s); follow the procedure listed below:
- From the Diagram area; select a workflow step;
- Click the Quick Edit tab;
- From the Quick Edit panel select Open Full Edit;
- From the Left-Navigation Pane; click More Options and then select Survey;
- Select the Existing Survey radio-button;
- Select a survey from the Existing Surveys dropdown;
- Click Save Changes.
For more information; check out the Survey section.
Surveys and Checklists cannot be added to the same Workflow Step. Each Step can include either a Checklist or Survey but not both.
Permissions are settings at the task level that allow you to control who can make changes to the tasks created and owned by you.
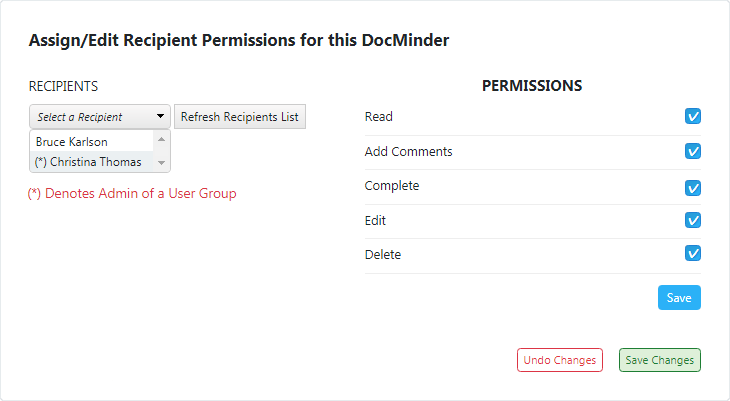
To modify Permissions; follow the procedure listed below:
- From the Diagram area; select a workflow step;
- Click the Quick Edit tab;
- From the Quick Edit panel select Open Full Edit;
- From the Left-Navigation Pane; click More Options and then select Permissions;
- From the dropdown; Select a Recipient;
- Check or Un-Check a checkbox to modify a permission;
- From the Permissions table click the Save button to finish;
- Click Save Changes.
For more information; check out the Permissions section.
Settings allows you to change your application preferences, at the user level, for past-due items, escalation, document uploads and more.
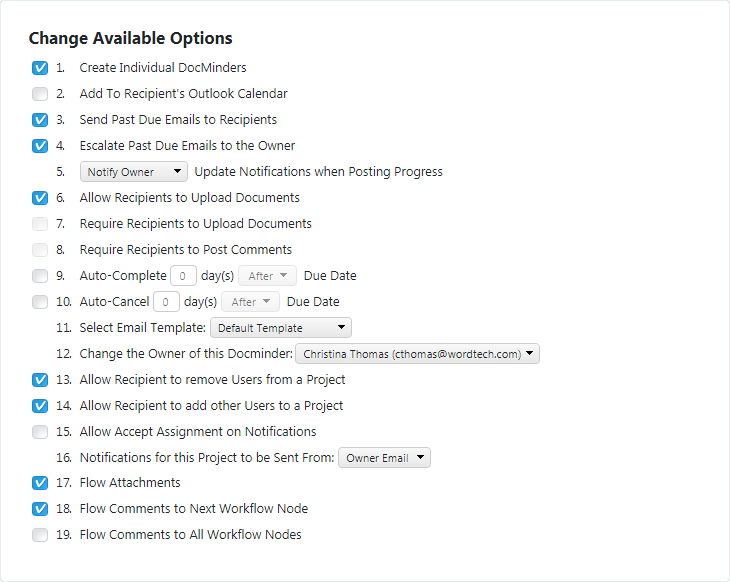
To change Settings; follow the procedure listed below:
- From the Diagram area; select a workflow step;
- Click the Quick Edit tab;
- From the Quick Edit panel select Open Full Edit;
- From the Left-Navigation Pane; click More Options and then select Settings;
- Check or Un-Check a checkbox to change a setting;
- Click Save Changes.
For more information; check out the Settings section.
The Flow Attachments feature allows you to pass attached documents from one Workflow Step to the next in a process.
Flow Attachments can be utilized in a Workflow Step alone; but functions more efficiently when added to the Master Workflow Step.
To Flow Attachments; follow the procedure listed below:
- From the Diagram area; select a workflow step;
- Click the Quick Edit tab;
- From the Quick Edit panel select Open Full Edit;
- From the Left-Navigation Pane; click More Options and then select Settings;
- Place a Check in the box for Flow Attachments;
- Click Save Changes.
The Flow Comments Next feature allows you pass comments from one Workflow Step to the next Step in the process.
To Flow Comments Next; follow the procedure listed below:
- From the Diagram area; select a workflow step;
- Click the Quick Edit tab;
- From the Quick Edit panel select Open Full Edit;
- From the Left-Navigation Pane; click More Options and then select Settings;
- Place a Check in the box for Flow Attachments;
- Click Save Changes.
The Flow Comments All feature allows you to flow comments from one Workflow Step to All Steps in the process.
To Flow Comments All; follow the procedure listed below:
- From the Diagram area; select a workflow step;
- Click the Quick Edit tab;
- From the Quick Edit panel select Open Full Edit;
- From the Left-Navigation Pane; click More Options and then select Settings;
- Place a Check in the box for Flow Attachments;
- Click Save Changes.
During a Workflow process there are instances where a decision needs to be made before a set of tasks are triggered; this functionality is known as Decision Tree.
A Decision Tree is a tree-like model of decisions and their possible outcomes. They provide an alternative way of viewing and managing business rules, especially when these rules are not symmetric.
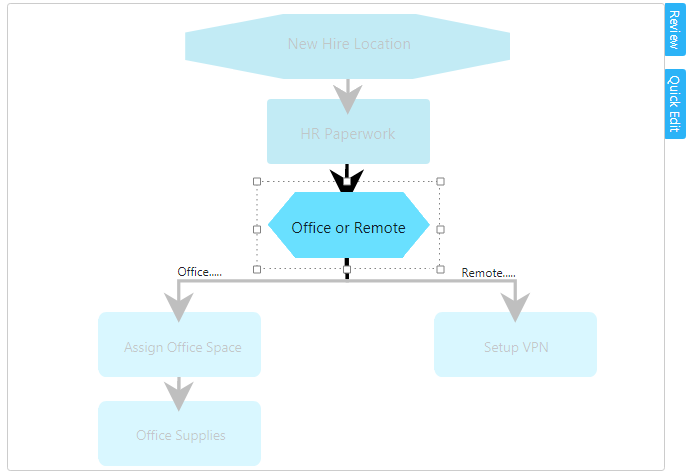
In the example below, the decision is for an employee to work in office or remotely. Different tasks will be executed depending on the answer.
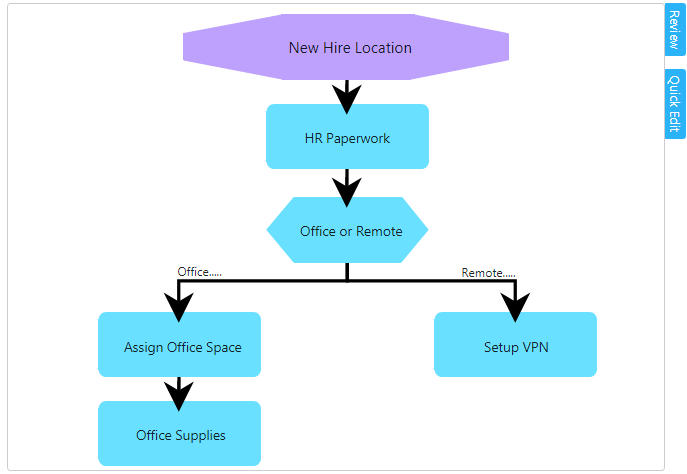
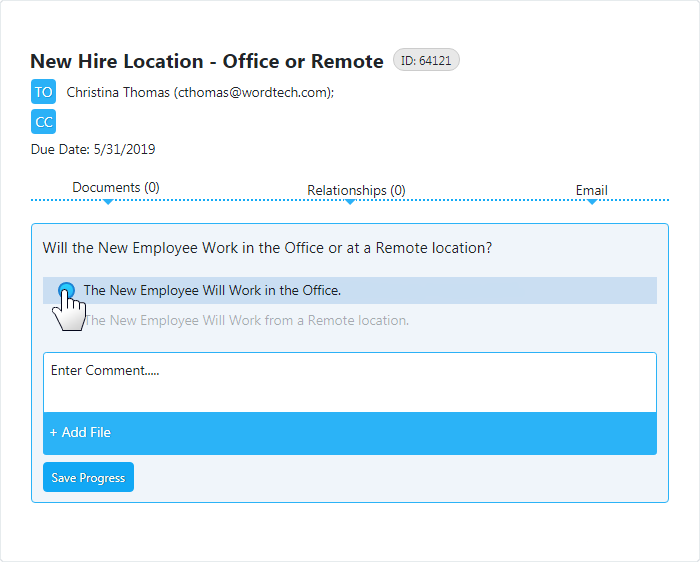
Decisions Steps are presented as a question followed by response options. From the Progress Page the assigned Recipient selects a response to complete the Step.
The selected response determines which Step is executed next in the process.
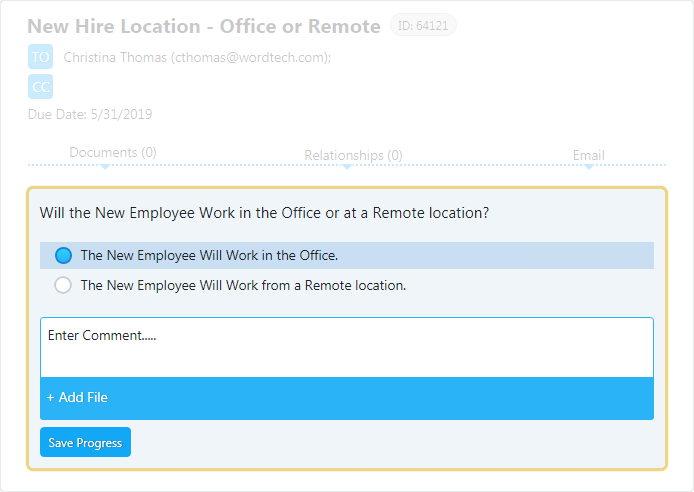
To create a Decision Step; follow the procedure listed below:
- Create a New Blank Workflow;

- Drag-and-drop any Steps that take place before the Decision;
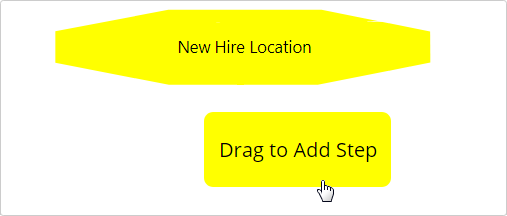
- Now, drag-and-drop the Decision Step onto the Diagram area;
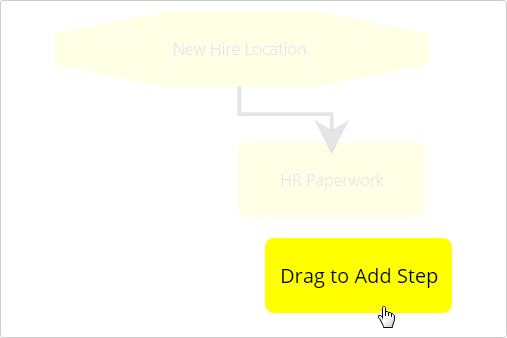
- Select the Decision from the Diagram area and click Open Full Edit;
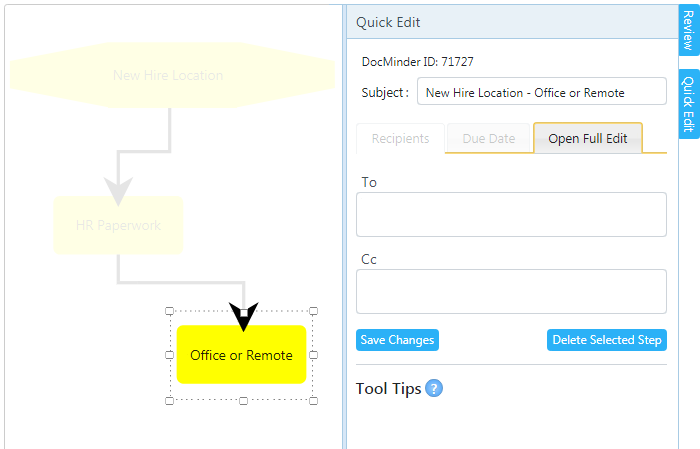
- Include the question for the Decision into the Message / Body;
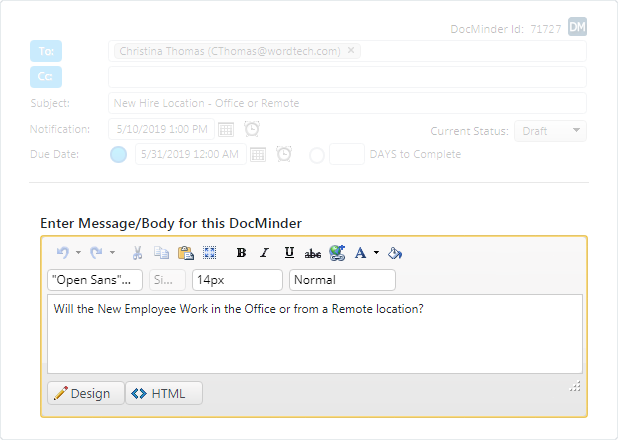
- From the Left-Navigation Pane, click Decision Tree;

- The Decision Tree section displays;
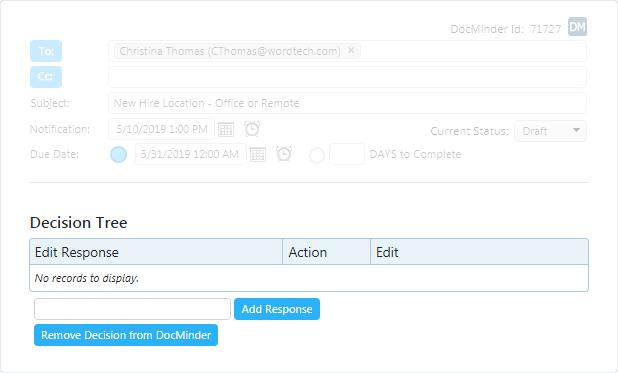
Unlike surveys; Decision Trees are user-specific. There is not an option to select an existing tree (e.g., Decision Template) to use unless you create it.
- Type 'Office' into the Response Option textbox;

- Then, click the Add Response button to add your response;

- The Response will display in the Decision table when added successfully;

- Now, type 'Remote' into the textbox and click Add Response;

- Both Response Options are added to the table;

The purpose of Response Actions is to either Advance to the Next; or Return to the Previous Step in a workflow.
a.) Advance proceeds to the next Step in a Workflow.
b.) Return goes back to the previous Step in a Workflow (e.g., Loopback Routing).
- Click Save Changes;
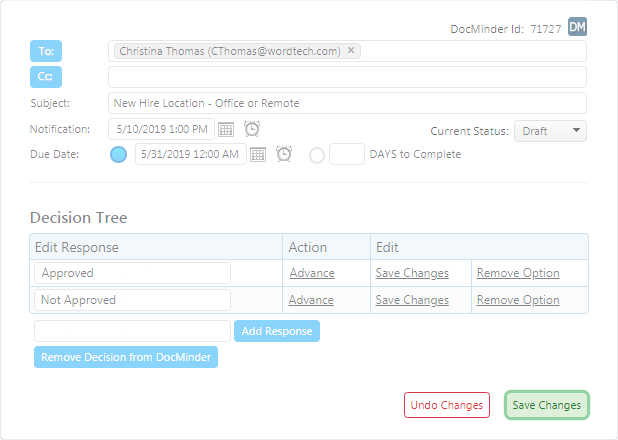
- After saving; the Return to Workflow dialog box displays;

Click Save Changes and Go to Workflow to return to the Diagram Area.
- The Decision Step now displays as an enlarged-hexagon type shape;
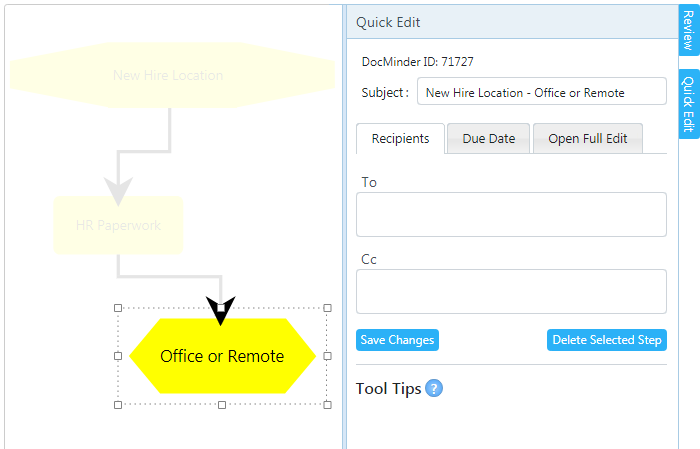
- Now, drag-and-drop a New Step onto the Diagram Area;
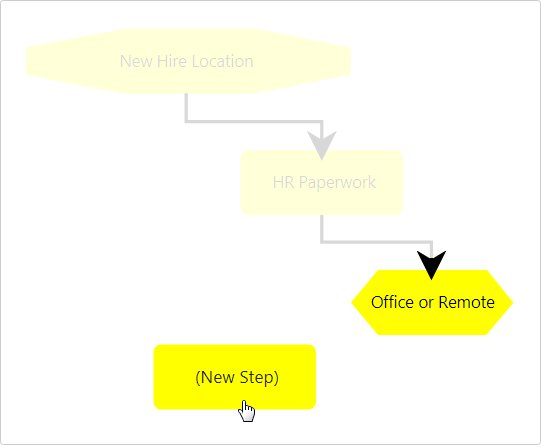
- Then, connect the Decision to the New Step;
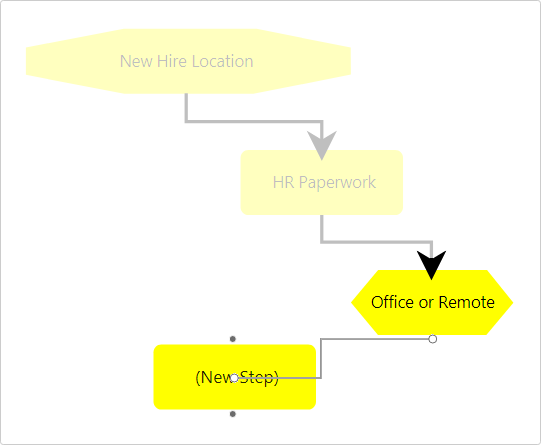
- Select the 'Office' Branch option from the dialog box;
.png)
- The 'Office' Branch option will display on the connector-line to the Step;
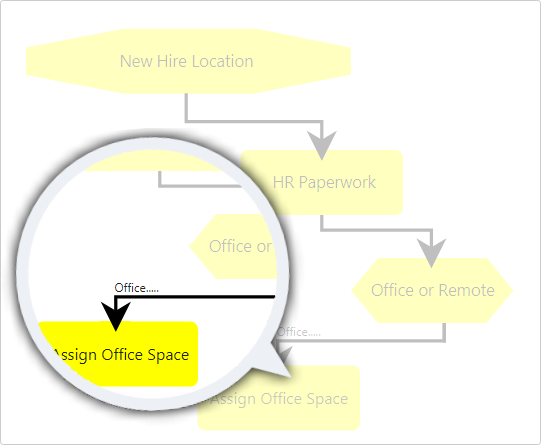
- Now, drag-and-drop another New Step onto the Diagram Area;
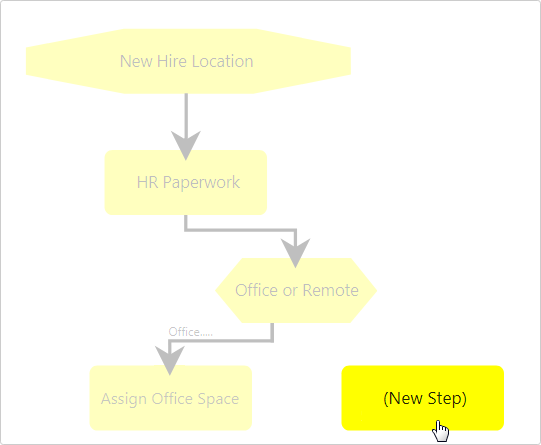
- Then, connect the Decision to the New Step;
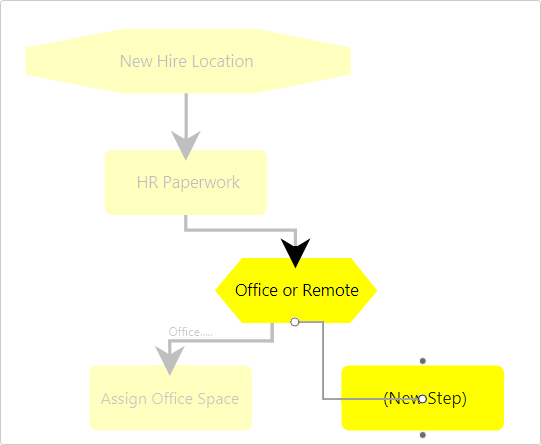
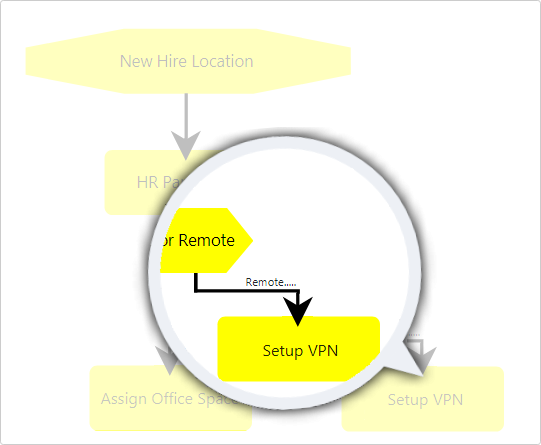
- Select the 'Remote' Branch option from the dialog box;
.png)
- The 'Remote' Branch option will display on the connector-line to the Step;
- The Workflow should continue after the Decision is complete; add a New Step;
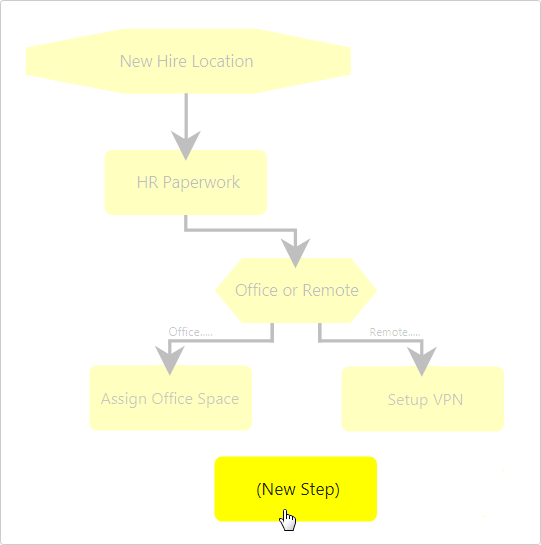
- Then, connect both Branch Steps to the New Step;
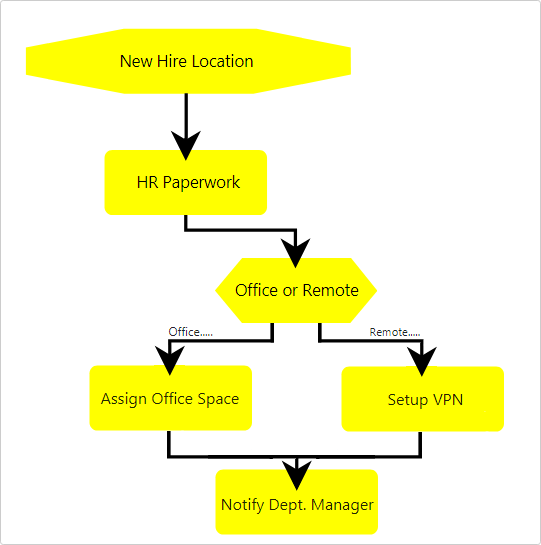
Connecting a Decision to a Step causes the Select a Branch dialog to open.
From the dialog, select a Branch option for the New Step by clicking on the appropriate button.
When a Decision Tree Workflow Step is in process:
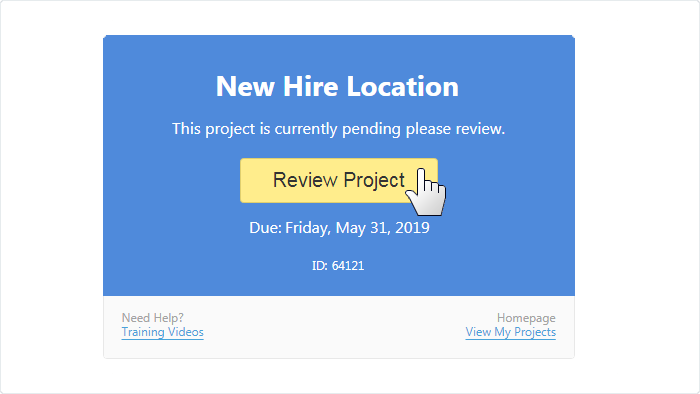
The Recipient receives an email notification and clicks the Review Project button to open up the Progress Page.
To complete the Workflow Step: From the Progress Page, the Recipient chooses the appropriate response option by selecting the corresponding radio button.
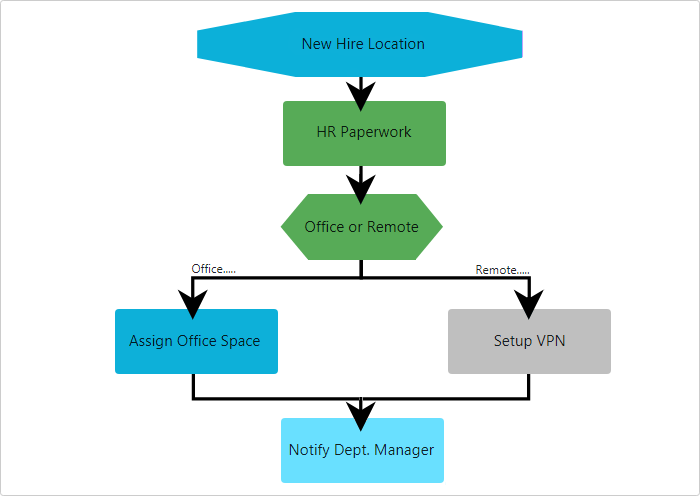
A Decision is Complete when a response option has been selected:
When a decision has been completed the selected Branch will display as Pending, and the Branch that was not selected will display as Cancelled in the Diagram area.
To Remove a Decision Tree from a Workflow; follow the procedure outlined below.
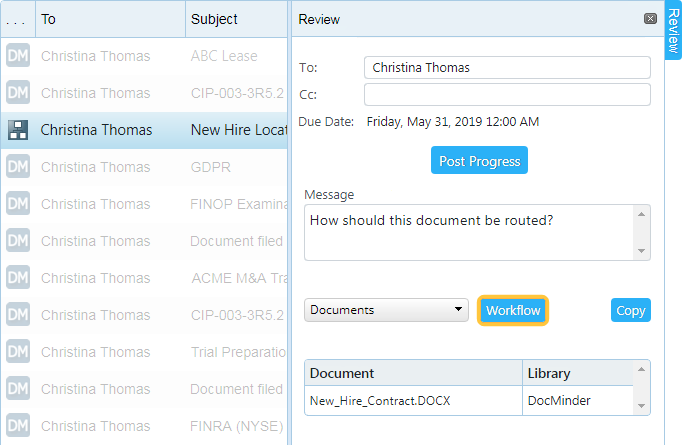
- From your Homepage, locate the Workflow and Open the Review Panel
;

- From the Review Panel click on the Workflow button;
- Select the Decision from the Diagram area and click Open Full Edit
;
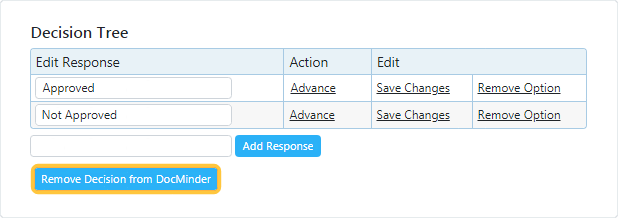
- When the Decision table is displayed, click the Remove Decision button;
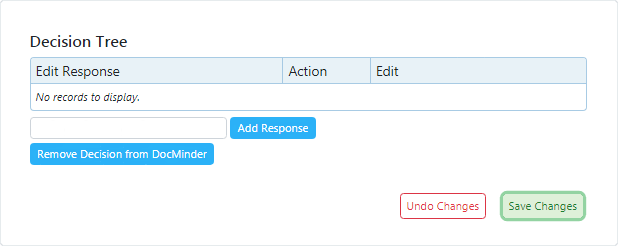
- The table will show "No records to display". Now, click Save Changes;
- Then, click Save Changes and Go to Workflow to return to the Diagram Area.

- The shape of the Decision Step now displays as a Basic Workflow Step.
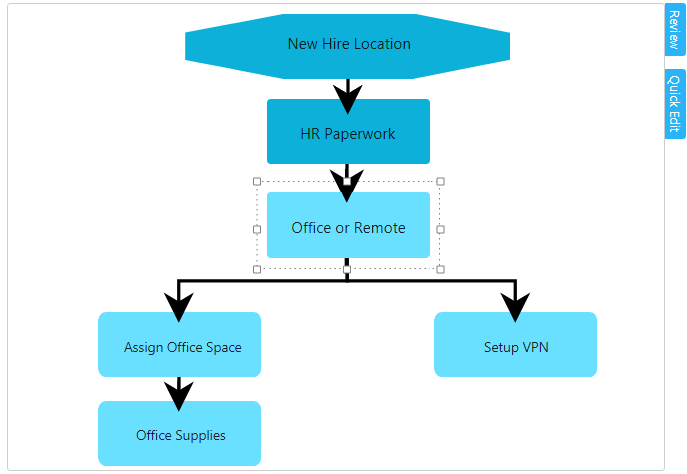
Within DocMinder®, a Workflow Template is a head-start.
Workflow Templates are used to define the Steps that are required to complete a business process (e.g., approval; requests, etc.) and help to reduce human-error by following the same repeatable Steps for similar processes.
Workflow Templates require the following User Access Rights:
- Manager
- Create/Edit Templates
- Access Workflow
To create Workflow Templates, follow the procedure outlined below:
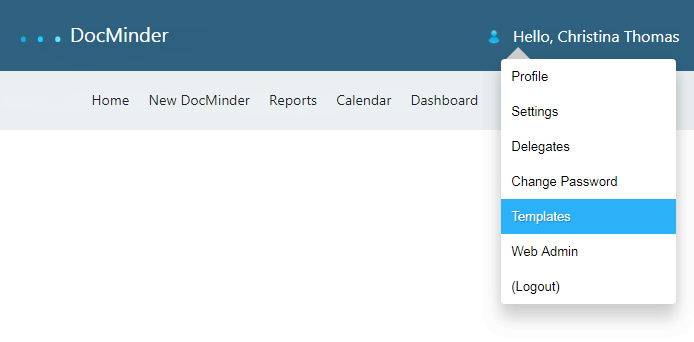
- From your Homepage, click on your User Name and select Templates from the menu;
- Select New Workflow Template from the
Left;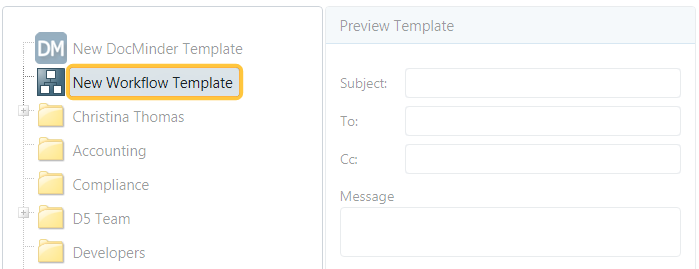
- On the
Right, enter the Template Name into the textbox and click Create Template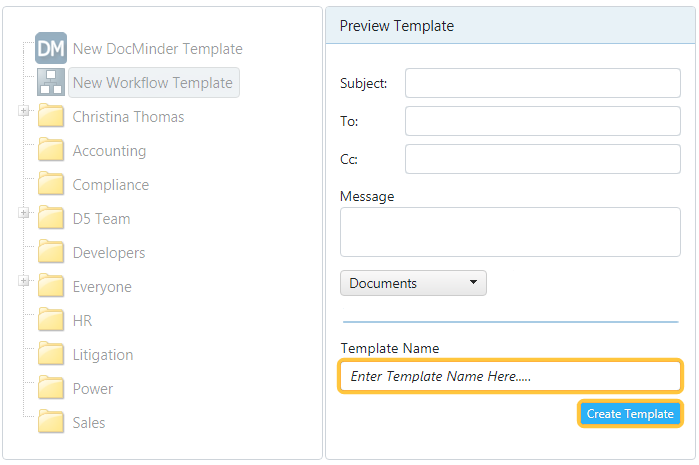
- From the top-section; Enter Template Title and click the Save Title button;

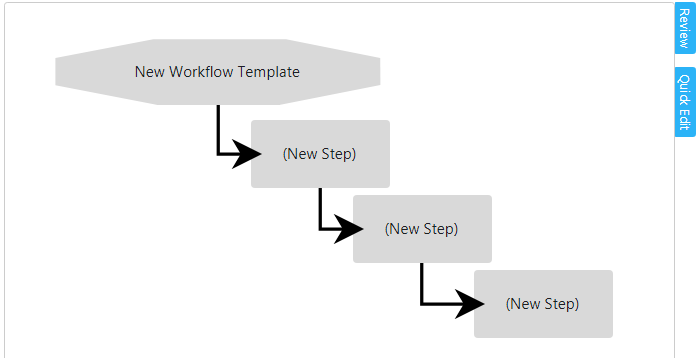
- Drag-and-drop Steps onto the Diagram area;
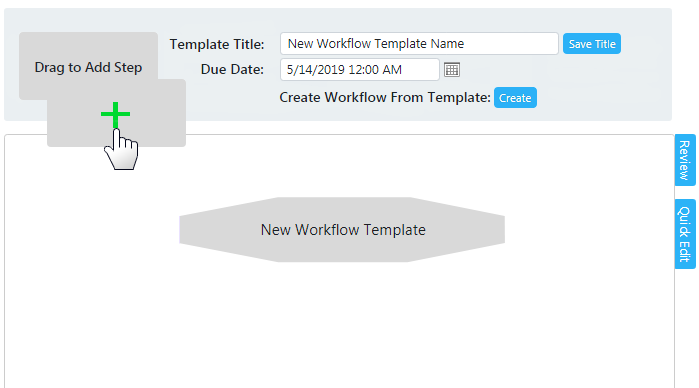
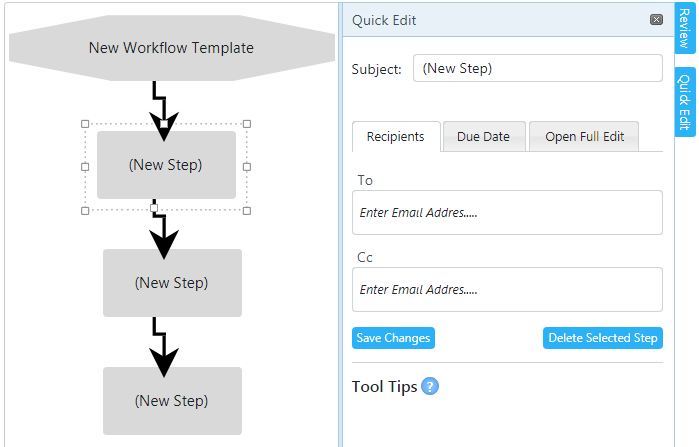
- Connect from the Master Node down to each of the added Steps;
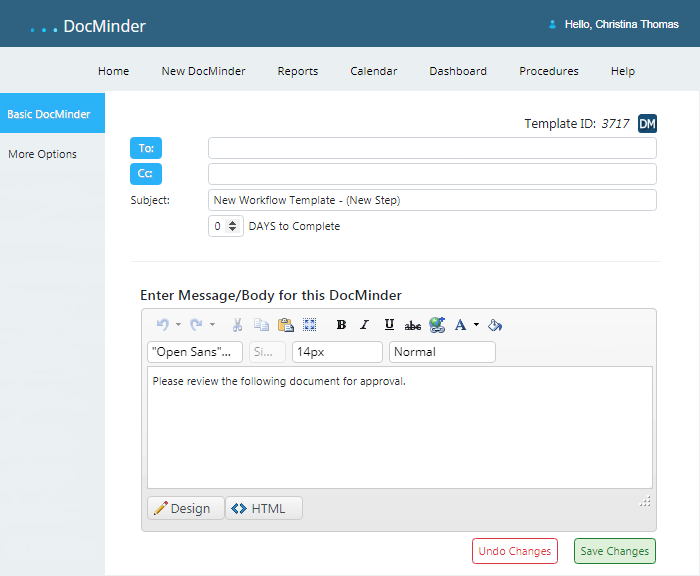
- Select a Step from the Diagram Area and click Open Full Edit;
- Enter the task details for each Step in the Diagram Area;
- The Workflow Template is now available in your User Template Folder.
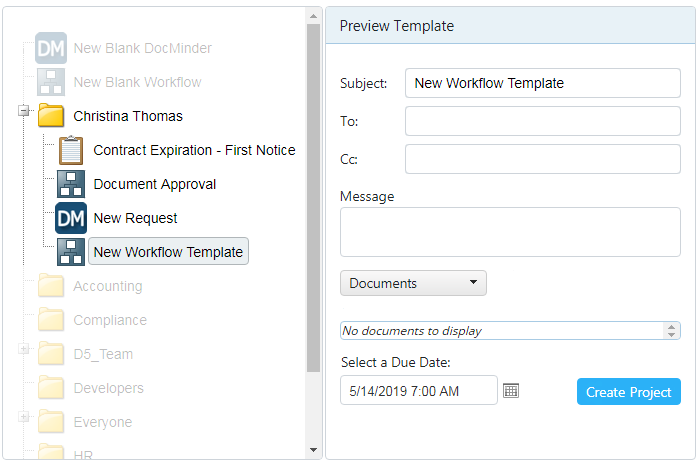
Options are the same as for any Workflow Step except for the Due Date.
When creating a Template, there is no date selector. The Due Date is selected when you create a New Workflow from the Template.
Workflow Templates are accessible from within your User Template Folder when creating a new Task or Workflow item.
To use a Workflow Template; following the procedure outlined below.
- From the Homepage, click on New DocMinder from the top-Navigation bar;

- From the
Left, click the plus-sign next to your User Template Folder;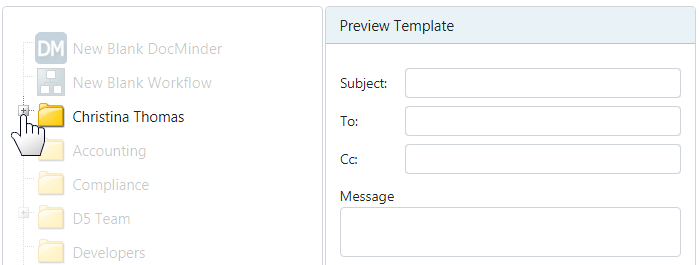
- Select a Workflow Template from the expanded list;
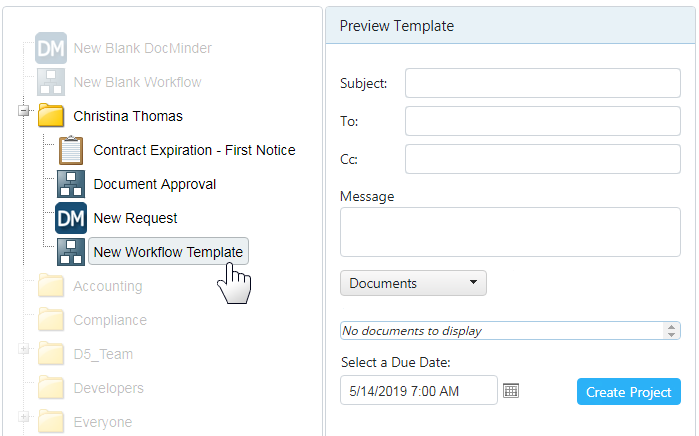
- From the
Right, select a Due Date and then click Create Project;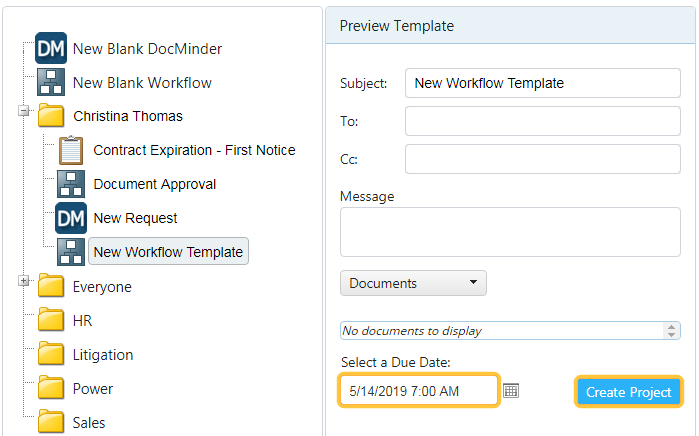
The Due Date for the Master Node is critical to a Workflow Process. Select a date in which the entire Workflow process is to be completed by.
Identify Workflows from your DocMinder® Homepage, Calendar and Reports.
DocMinder® provides an easy-to-spot Workflow icon to identify Workflows from Basic task items such as Checklists and Surveys.
Identify Workflows from your Homepage.
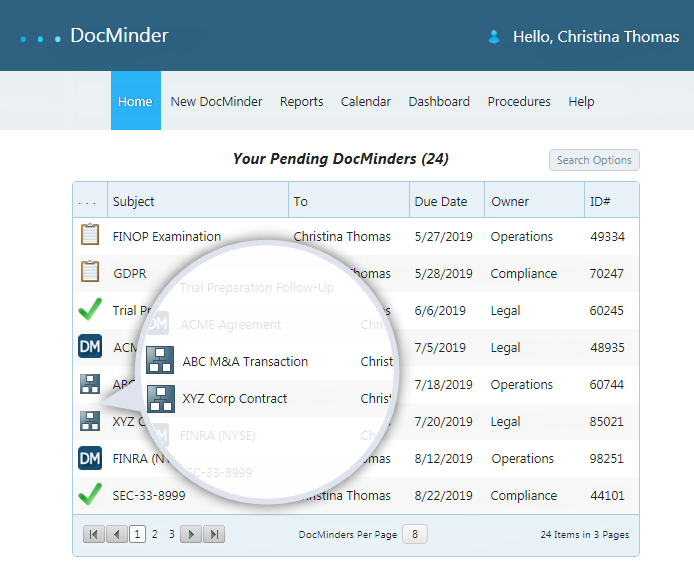
To identify Workflows from your Calendar; follow the procedure outlined below.
- Click Calendar from the Top-Navigation bar;

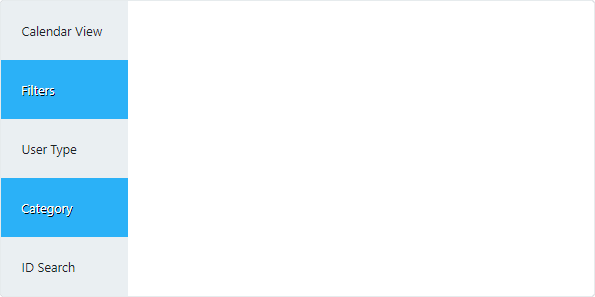
- From the Left-Navigation Pane, click on Filters, then select Category;
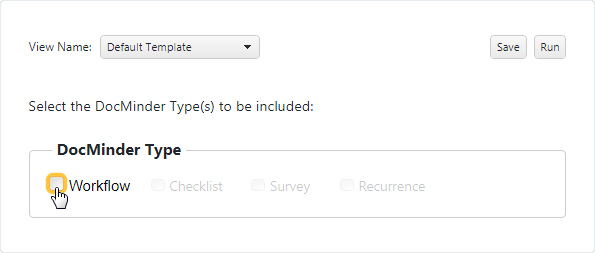
- Under DocMinder Type check the box for Workflow;
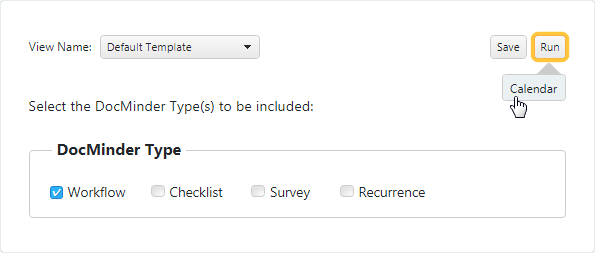
- Then, click on Run and select Calendar;
- The Calendar will now display Workflows for your Calendar View.
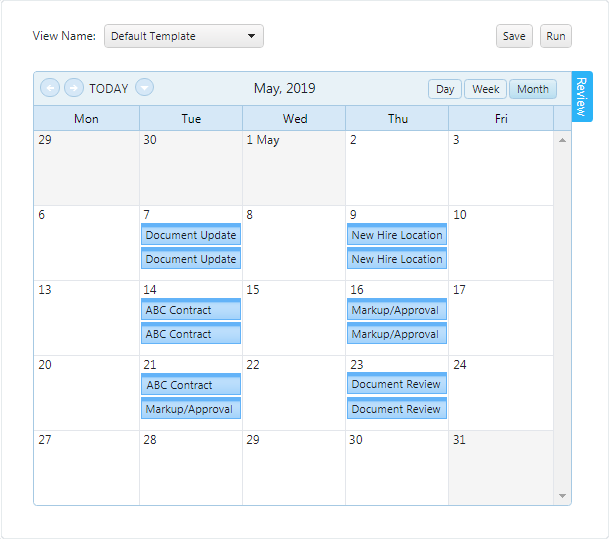
To identify Workflows from Reports; follow the procedure outlined below.
- Click Reports from the Top-Navigation bar;

- From the Left-Navigation Pane, click on Filters, then select Category;
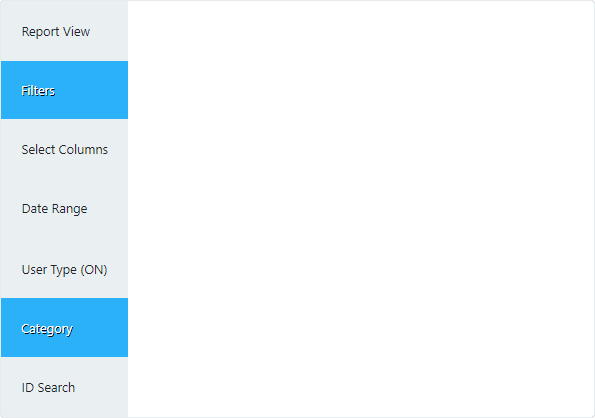
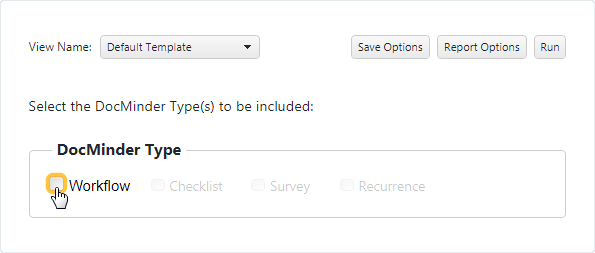
- Under DocMinder Type check the box for Workflow;
- Then, click on Run and select Report;
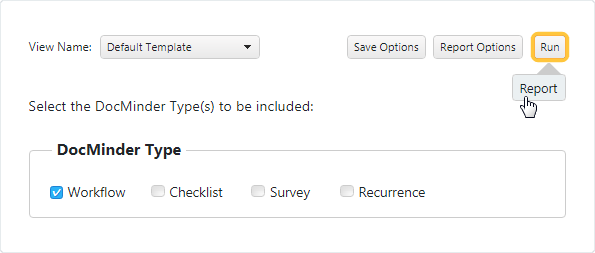
- The Report will now display Workflows for your Report View.
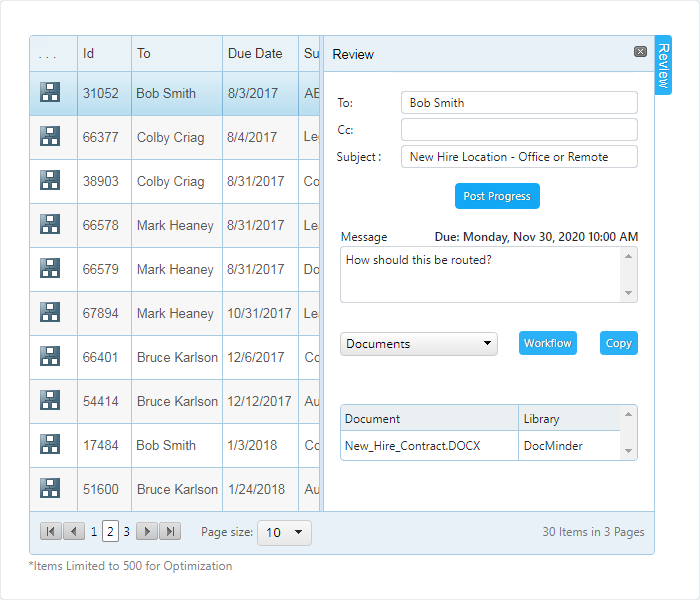
Access the Workflow Diagram Area (e.g., graphical interface) from the DocMinder® Calendar, Reports and Homepage.
From the Workflow Diagram Area you can create new workflows; edit or copy existing workflows; build workflow templates and monitor Workflows currently in process.
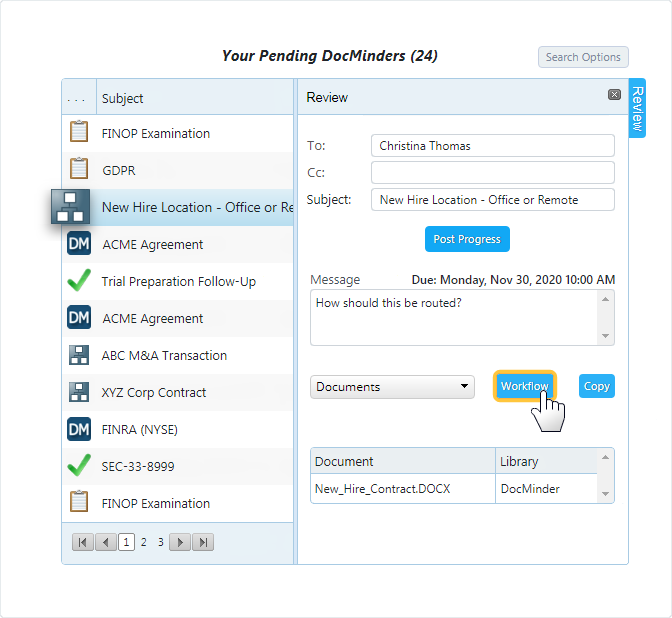
To access the Diagram Area from your Homepage; follow the procedure below.
- Select a Workflow item from your Homepage; and then click on the Review tab.
- Click on the Workflow button to navigate to the Workflow Diagram area.
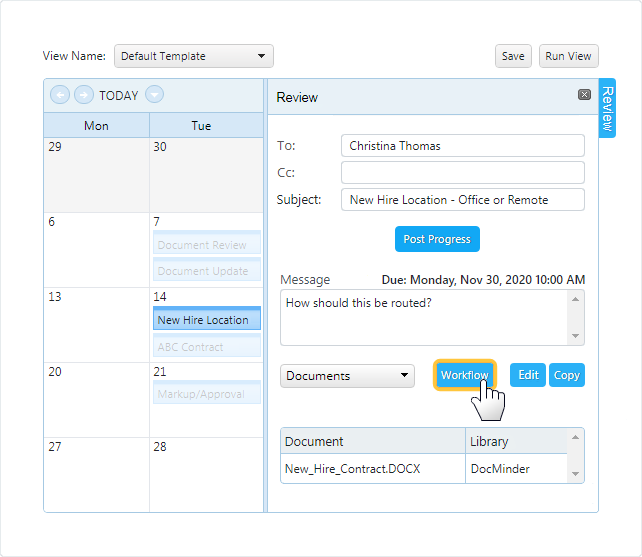
To access the Diagram Area from your Calendar; follow the procedure below.
- Select a Workflow item from your Calendar; and then click on the Review tab.
- Click on the Workflow button to navigate to the Workflow Diagram area.
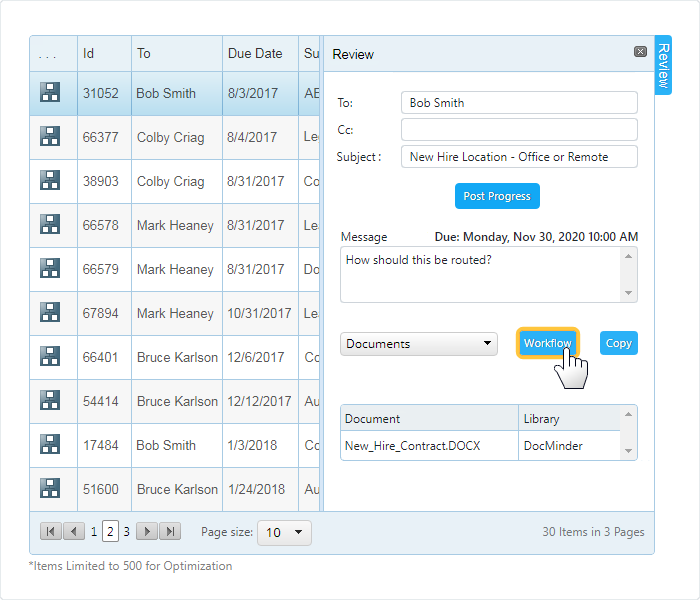
To access the Diagram Area from your Reports; follow the procedure below.
- Select a Workflow item from your Report; and then click on the Review tab.
- Click on the Workflow button to navigate to the Workflow Diagram area.
With all Steps configured, it's time to select an Activation Date for the Workflow. The Activation Date is a calendar date (e.g., May 29th) when the Workflow will begin.
If a Workflow does not have an Activation Date set, the Workflow will remain inactive until a date has been selected.
You can select an Activation Date from the Top Data-Area of the Workflow page.
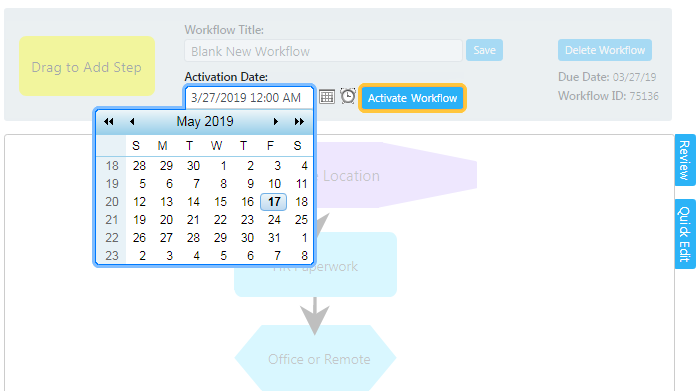
Click the calendar icon to select an Activation Date from the Calendar.
If you want to activate the Workflow at a specific time of the day (e.g., 8:30 AM); click the clock icon to set a Time.
Monitor Workflow Processes from the Diagram Area to view current status by color; Recipient progress comments; uploaded documents and more.
The Diagram Area provides graphical indicators to show the status of a Workflow Process and its related Steps.
Workflow Steps are highlighted by a background-color to indicate it's curent status. The following list shows what each color indicates in the Color Guide.
-
Draft| No Recipient Assigned.
-
Waiting| Delayed until the previous Step is complete.
-
Pending| Currently in process (e.g., Pending).
-
Complete| Has been processed (e.g., Completed by Recipient).
-
Cancelled| Has been voided (e.g., Cancelled by Owner).
-
Rejected| Has been refused (e.g., Rejected by Recipient).
-
Inactive| Process has not been activated (e.g., Inactive).
To review Comments; select a Step from the Diagram and click the Review Tab.
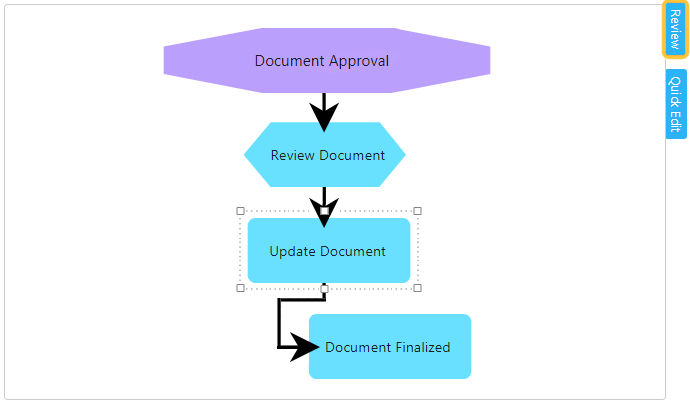
Comments display in the Review Panel for each Step of the Workflow;
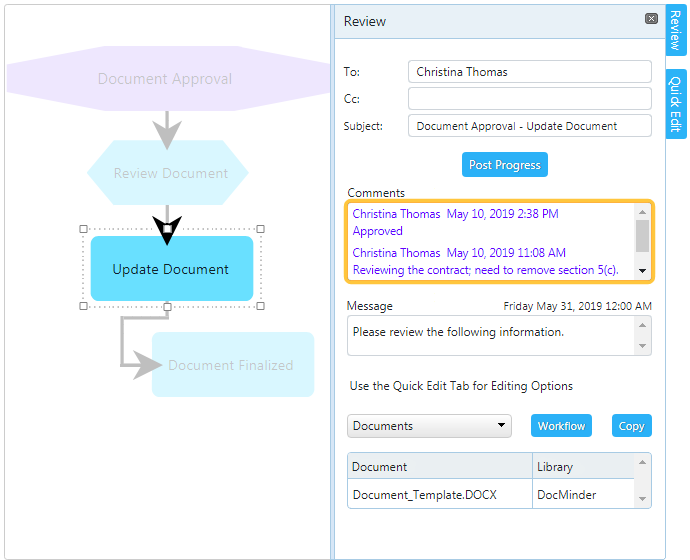
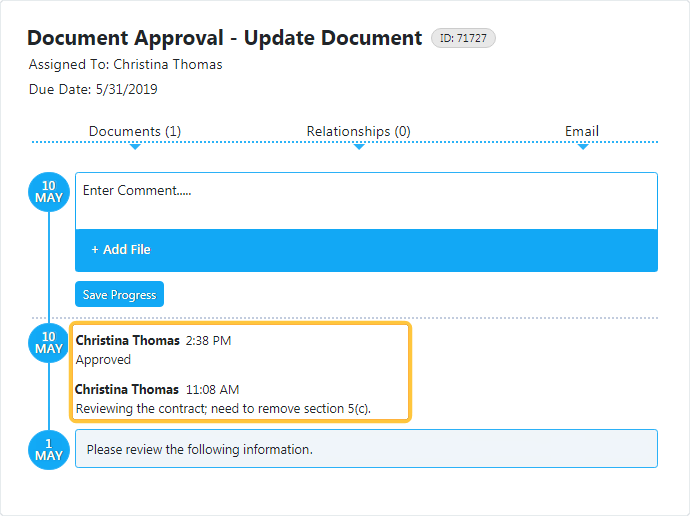
From the Review Panel, click on Progress Page button.

Then view Comments from the Progress Page.
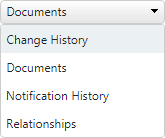
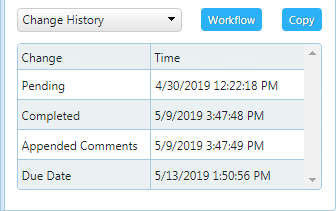
From the Review Panel; select Change History from the dropdown.
Then view changes in the Change History table.
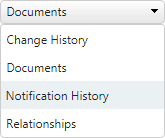
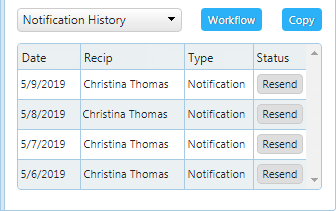
From the Review Panel; select Notification History from the dropdown.
Then view previously sent Notifications in the table.
When a Workflow is currently in process (e.g., Active); there are instances where it may be necessary to add a new Step.
Locate your Workflow process (e.g., from your Homepage; Calendar; or Reports); open the Review Panel and click the Workflow button.
A Workflow Step must meet the following status conditions in order to Add (e.g., connect) or Remove (e.g., disconnect) a Workflow Step.
- A Step must be in Waiting status to disconnect (e.g., Remove) from a Workflow;
AND to connect (e.g., Add) a New Step to the Workflow. - You cannot disconnect (e.g., Remove) a Workflow Step that has a status of Pending
- You cannot delete a Workflow process that has Steps with the status of Completed
Decide where in your Workflow process a New Step is required.
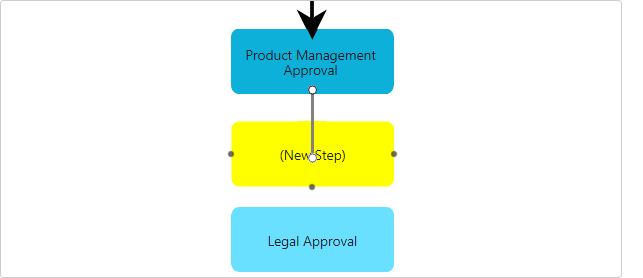
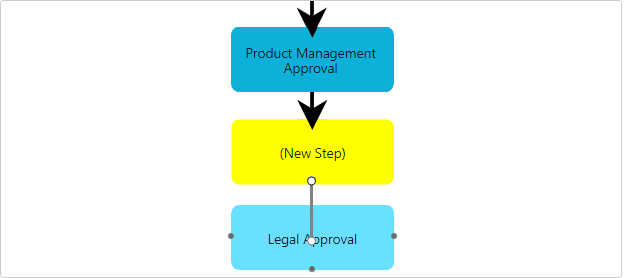
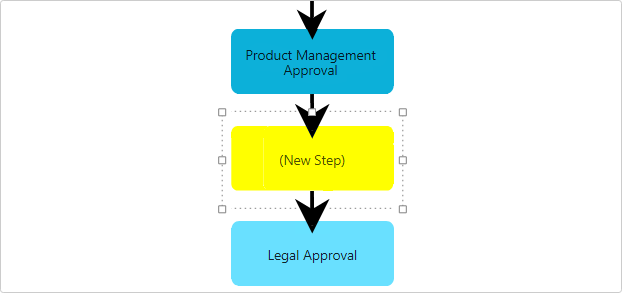
The example Workflow below requires an additional Step between the Product Management Approval and Legal Approval Steps.
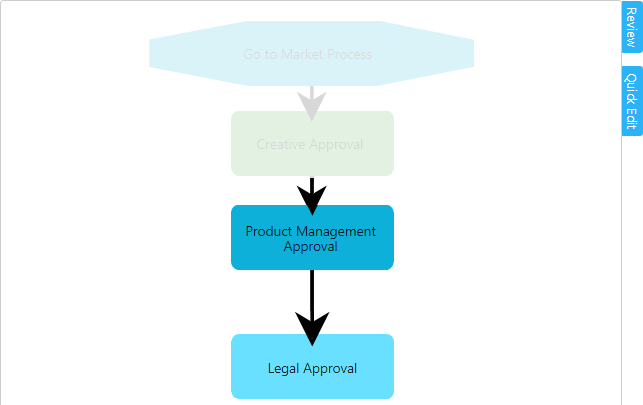
- Select the connector between Product Mgmt. Approval and Legal Approval.
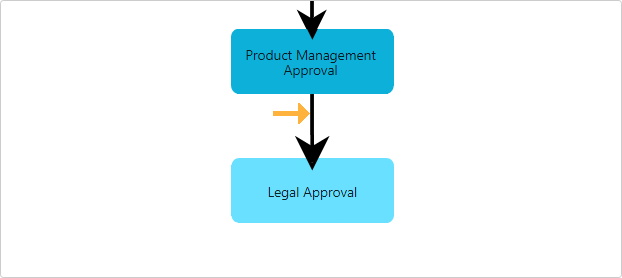
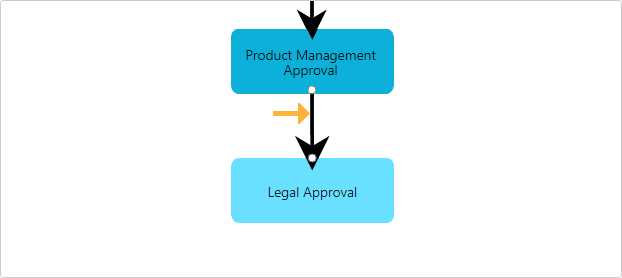
- The connector-arrow will show its selected; now press the Delete key.
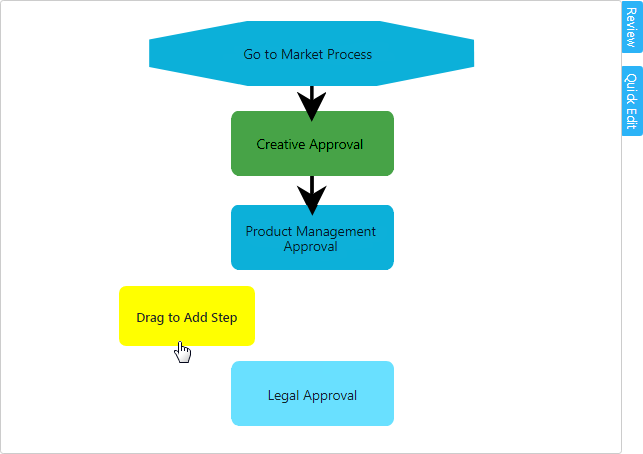
- Drag-and-drop the Add Step block onto the Diagram Area.
- Connect the Product Mgmt. Approval Step down to the New Step.
- Finally, connect New Step down to the Legal Approval Step.
- Select a Workflow Step from the Diagram Area and press the Delete key.
- Now, reconnect the Product Mgmt. Approval and the Legal Approval Step.
 Tab to add/modify an assigned Recipient.
 Tab to add/modify the date.
 Tab to edit a Workflow Step in the full DocMinder application.